In addition to letting you choose the font of text you type, Scrivener lets you adjust fonts in many parts of the app’s interface.
It’s important when working with an app for a long time, as you do with Scrivener, that you can customise the interface to make it as comfortable and easy to use as possible. Most apps that work with text allow you to customise the font and the size of the text you type. But Scrivener goes much further, allowing you to customise many parts of the app’s interface. This is especially useful for people whose vision isn’t 20/20, and who need to increase the size of certain interface elements for ease of use.
In this article, I’m going to explain how you can customise fonts in many areas of Scrivener’s interface.
Customise what you type
As mentioned above, most word processors and text editors allow you to customise the text that you type. Scrivener gives you a great deal of flexibility in this area, letting you tweak the font, the size, the line spacing, borders, and much more. See Customize the Scrivener Editor 2 – Adjusting Fonts in the Editor to learn all the options in the Editor.
Customise fonts in the Binder
Scrivener also lets you customise the fonts in the Binder; that’s the sidebar at the left of the Scrivener window, which shows you the files and folders that make up your project. You may want to increase the size of this font if the default is hard to see, or decrease it if you have a large number of items in the Binder, and want to see them all.
To change the setting, go to Scrivener > Settings > Appearance (Mac) or File > Options (Windows). Click the Appearance tab. Most of the settings in the rest of this article are accessed from here.

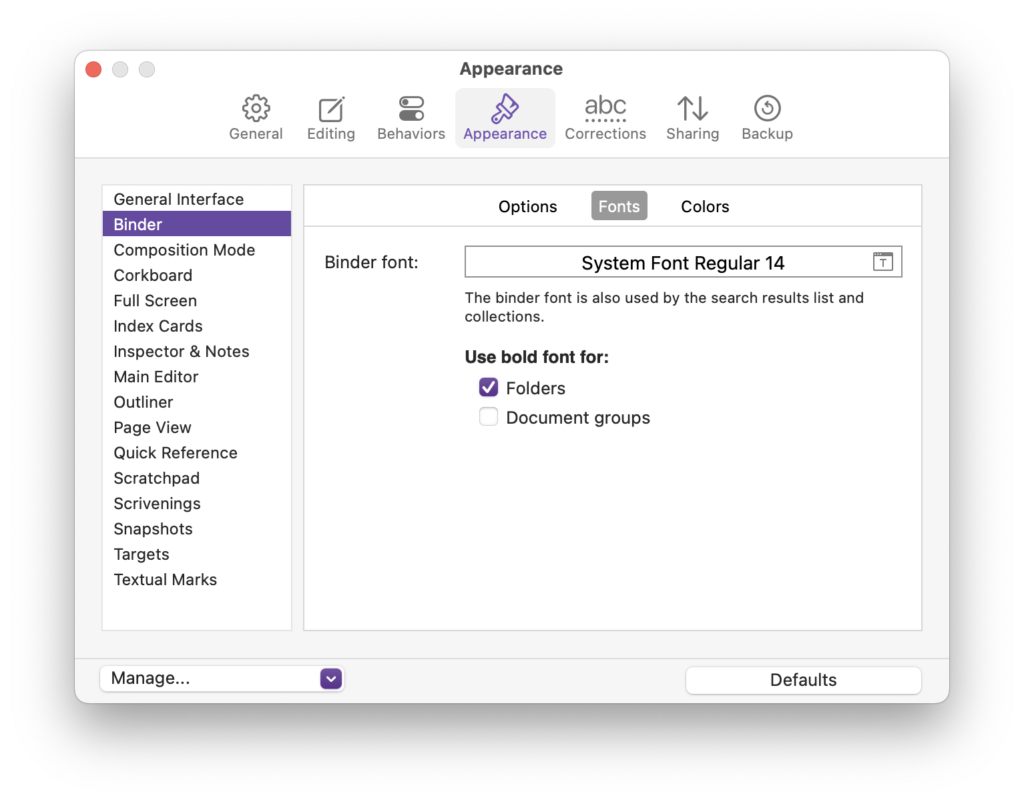
Click Binder in the sidebar of the Settings / Options window, then click Fonts. Choose the font and size you want to use, and choose if you want folders or document groups to be bolded.
Customise Corkboard fonts

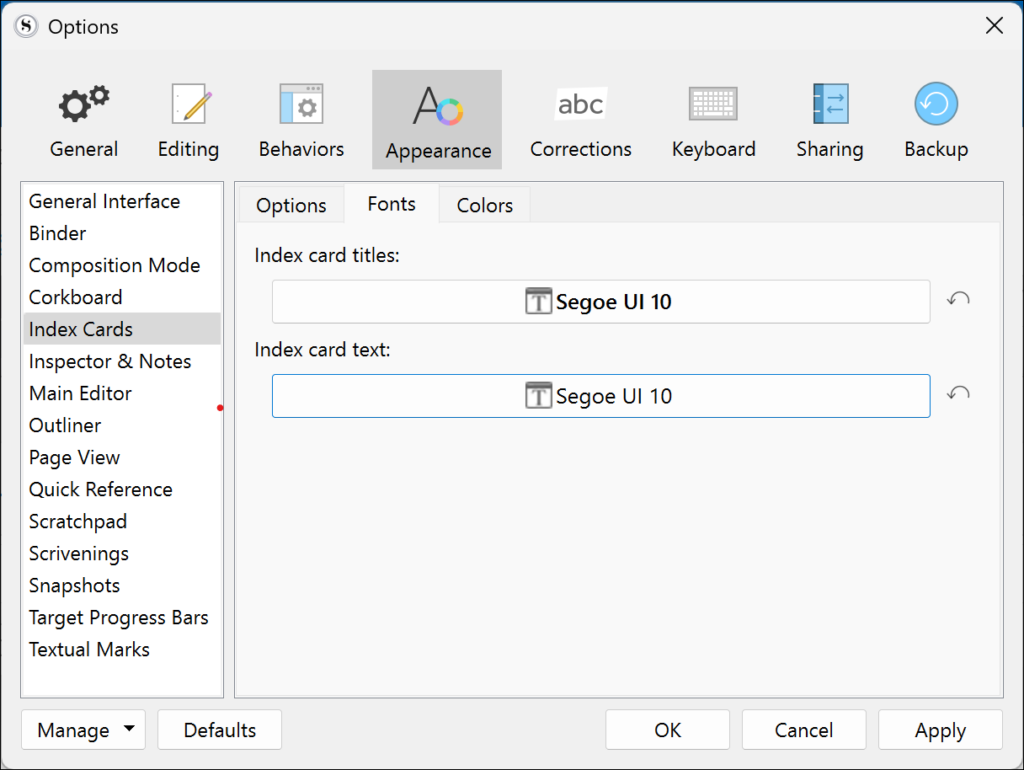
There are two places where you can customise fonts for the Corkboard. Again in the Appearance tab of Settings / Options, click Corkboard to change the font for photographs and status stamps. Click Index Cards to change the fonts for the cards that display on the Corkboard; you can change the font and size of index card titles and texts.
Customise the Editor Header bar font
While you saw how to customize fonts in the editor, at the beginning of this article, there is another element of the editor that you can tweak: the Header Bar. This is the strip above the text you type, and below the toolbar, which has menus to select fonts, styles, line spacing, and more. By default, the font size of the Header Bar is quite small to keep it unobtrusive. But if you use the Header Bar often, you might want to increase the size or change the font.
Go to the Appearance tab of Settings / Options, then click Main Editor, then Fonts.
If you’re not familiar with all the Header Bar can do, see How to Use the Format Bar, Header Bar, and Ruler in Scrivener’s Editor.
Customise fonts in the Outliner

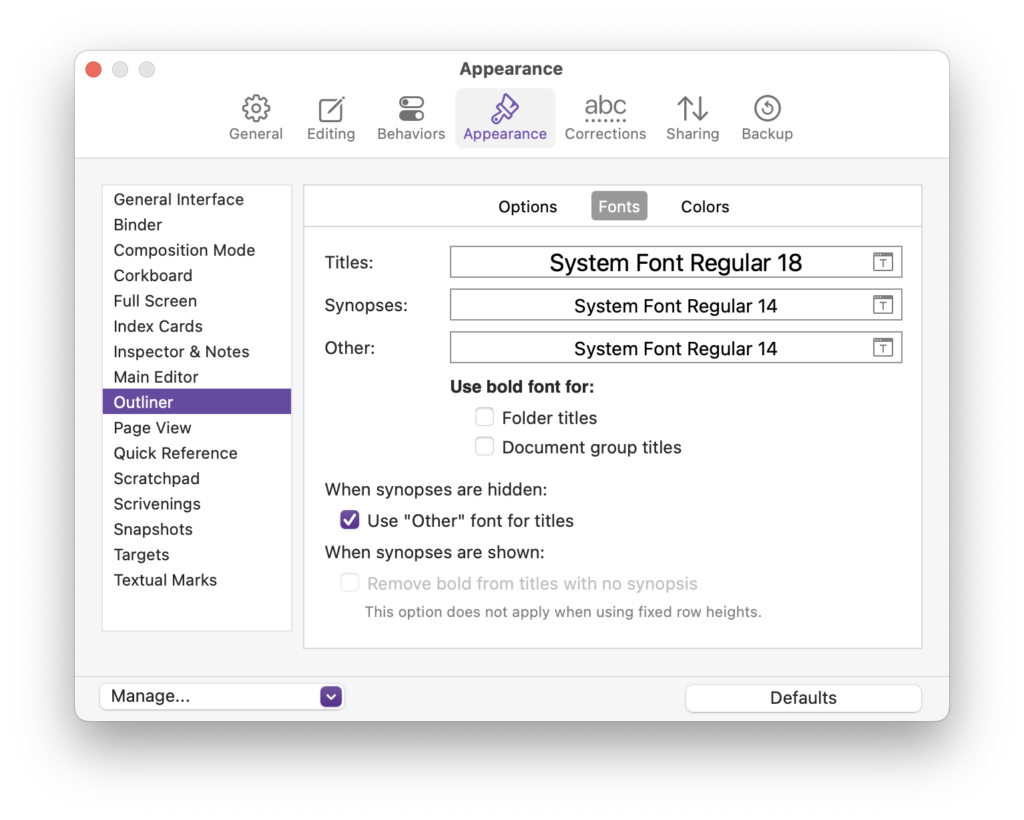
The Outliner offers a lot of options for fonts: you can customise titles, synopses, other texts, and you can choose whether you want folder and document group titles to display in bold text. Go to the Appearance tab, then click Outliner, then Fonts.
Scrivenings font settings
Scrivenings view is how Scrivener displays texts without breaks when you select multiple items in the Binder. You can learn how to use this in View and Edit Multiple Documents with Scrivenings.
Scrivenings view using the Editor’s font settings, but you can also tweak the font for Scrivenings titles, and more, in Appearance > Scrivenings.
Customise font colors in Composition Mode
If you use Composition Mode – which is Scrivener’s full-screen mode that hides many of the app’s interface elements – fonts display as you have set them up in the Editor. However, you can change the colors of these fonts. You may want to do this because the editor displays surrounded by a background, rather than above your computer’s wallpaper or desktop.
If you choose Appearance > Composition Mode > Colors, you have options to change the color of texts in the Editor (use the Text setting in the sidebar; the Editor color setting changes the background color) and Scrivenings titles.
You’ll also note that many of the options in the Appearance settings allow you to change the colors of various elements of the Scrivener interface.
See Distraction-Free Writing with Scrivener to learn how to use Composition Mode.
Saving your custom settings
You may want to use certain settings sometimes, and other settings at other times, depending on what you’re working on and how complex your projects are. At the bottom of the Settings / Options window is a Manage menu. This allows you to save settings as a preset, so you can change among different settings with a couple of clicks. To learn how to do this, see Saving and Sharing Scrivener Preferences and Options.
Kirk McElhearn is a writer, podcaster, and photographer. He is the author of Take Control of Scrivener, and host of the podcast Write Now with Scrivener.

