Use Scrivenings mode to view multiple documents in your Scrivener project sequentially.
One reason many people like Scrivener is that, unlike most word processors, you don’t have to constantly scroll back and forth to see different parts of your work. When you’re writing chapter 17, and need to see what a character did in chapter 5, you don’t have to scroll, scroll, scroll, but just click the folder or document for that chapter in the Binder. (Read this article to learn how to leverage the full power of the Binder.)
Yet there are times when you do want to read more than just a single Binder document. This could be the case if you split your chapters into folders, and, in each folder, have different documents for each scene; or if you want to do one final proofreading pass on your entire project, from start to finish.
Scrivener has the catchily-titled Scrivenings feature, which allows you to view multiple documents as though they were one. Here’s how.
What’s Scrivenings?
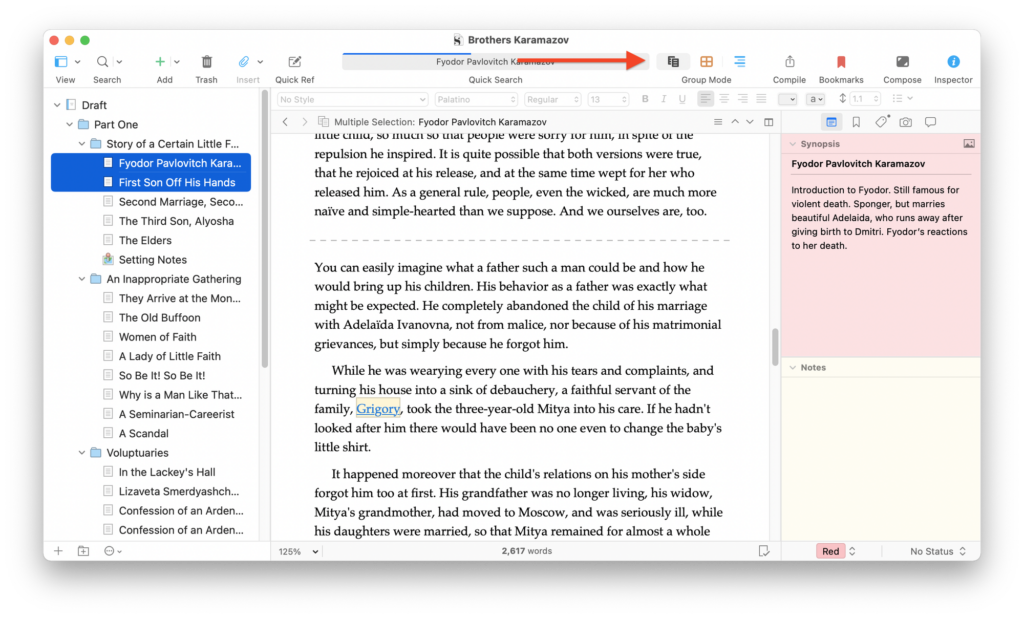
Scrivenings mode is a powerful feature that lets you view different sections of your project sequentially. The simplest use of Scrivenings mode is to click the Draft or Manuscript folder, then click the Scrivenings button in the toolbar (to the right of the red arrow below) or press Command-1 (Mac) or Ctrl+1 (Windows). As you scroll, you’ll see dashed lines between each document in the Binder.

You can now scroll through your text as though it is a single document, reading and editing it as you would in a standard word processor, with the exception that the name of each document, as it displays in the Binder, is added in the Editor.
You can always tell which document you’re viewing. You’ll notice, just above the main Editor window, the name of the file shows Draft: Fyodor Pavlovich Karamazov. In Scrivenings mode, this title reflects first what you’ve clicked on – here, it’s the main Drafts folder, but it could be any folder, or even file (see below), and after the colon is the section you are currently editing. The cursor is located in the Fyodor Pavlovich Karamazov document, so that’s what displays after the colon.
If I had clicked the Story of a Certain Little Family folder in the Binder, then was editing the same document, I’d see this:

In addition, the document you are currently editing is also highlighted in the Binder.
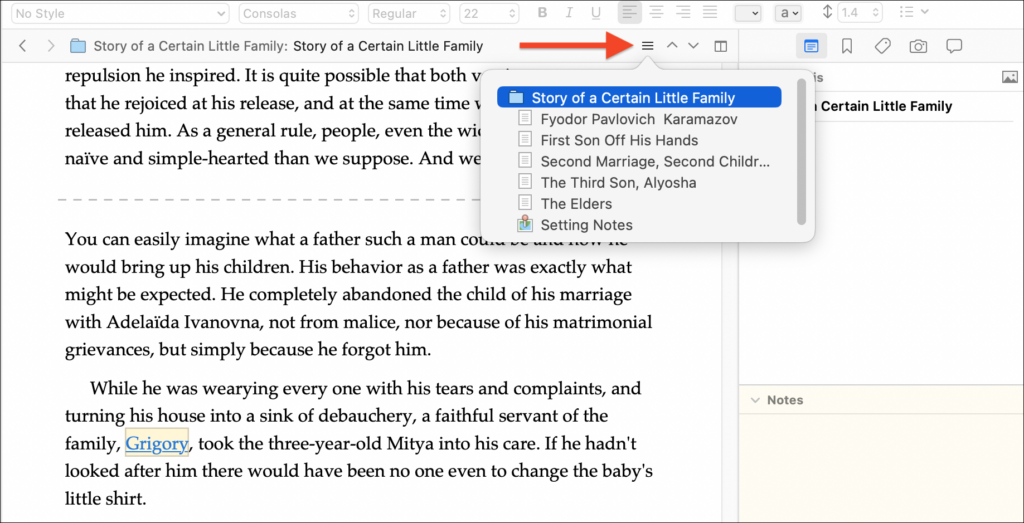
You can navigate your project while in Scrivenings mode either from the Binder, or by clicking the Outline Navigation button in the Header Bar just above the Editor. This displays a small pop-up table of contents, that corresponds to your Binder.
Advanced Scrivenings
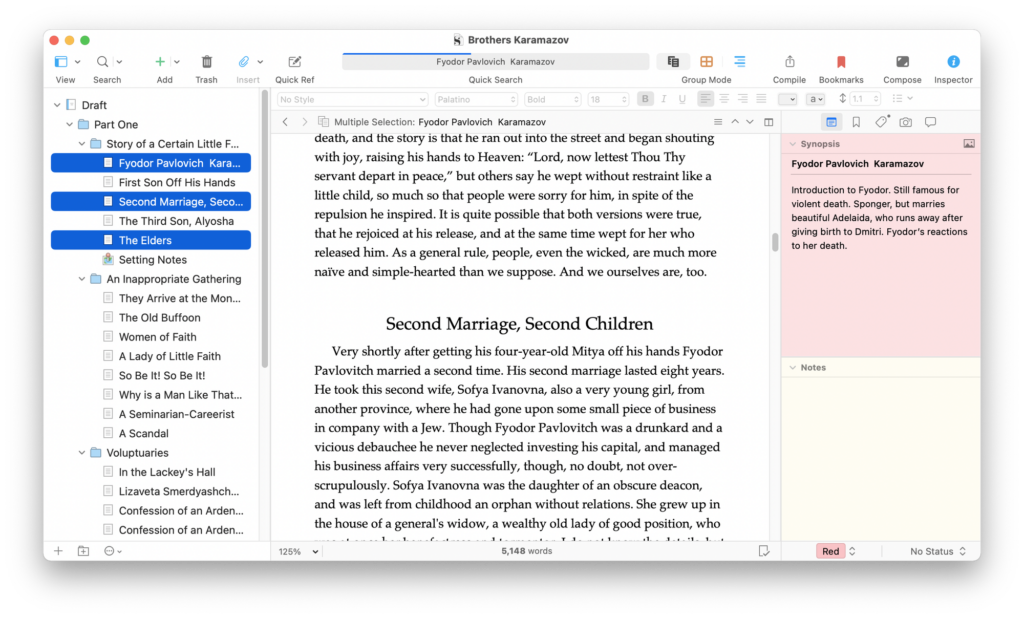
You can use Scrivenings for a lot more than just viewing your entire project or project folders. You can choose any combination of documents from the Binder and view them in Scrivenings mode. For example, let’s say you have a novel where the point-of-view character shifts back and forth between two characters. You may want to read through all of the chapters that focus on one character, without having to scroll or skip around. Just select all these documents in the Binder, then click the Scrivenings button in the toolbar.
To select multiple documents in the Binder, on the Mac, click one document, then press the Command key and click others; each click will add a document to your selection. On Windows, click one document, then click Ctrl, then click others.
Here’s how Scrivenings view looks with non-contiguous documents:

As you scroll up and down, Scrivener will only display the text of the documents you’ve selected in the Binder.
Scrivenings settings
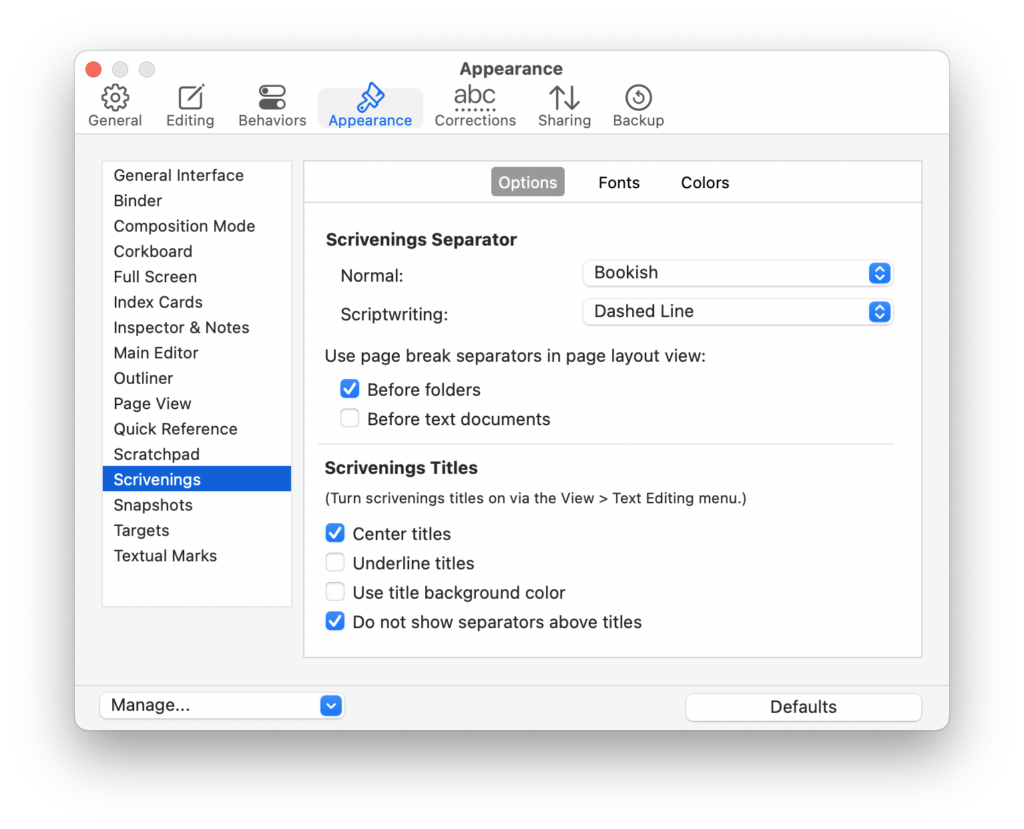
Scrivener offers several display settings for viewing documents in Scrivenings mode. Choose Scrivener > Preferences (Mac) or File > Options (Windows), then click the Appearance tab, then click Scrivenings in the sidebar.

You can choose which type of separator you want to use between documents, for both normal documents and scriptwriting projects: the default dashed line, corners, a divider, or a “bookish” bold dot, centered in the Editor.
The Mac version of Scrivener offers an option to use page break separators in page layout view, and there are options for Scrivenings titles on both Mac and Windows. Scrivener can display document titles if you choose View > Text Editing > Show Titles in Scrivenings; you can see how this looks in the screenshot in the section above. You’ll note that when Scrivener displays titles like this, it doesn’t display a separator between documents in Scrivenings mode by default, but you can change this in the settings: uncheck Do not show separators above titles to display both titles and separators.
If you click the Fonts tab, you can set the font and size of the titles that display at the beginning of each document in Scrivenings mode. And click Colors to set the color for Scrivenings title text and backgrounds.
Scrivenings mode is a powerful way to temporarily combine either sequential or disparate parts of your project so you can read it as it will appear when you compile. Learn to use this mode when you want to view more than just one document.
Kirk McElhearn is a writer, podcaster, and photographer. He is the author of Take Control of Scrivener, and host of the podcast Write Now with Scrivener.


