Take a look at how to get the most out of folders and text documents when organising your projects.
When you’re working on a project in Scrivener, the Binder is your organizational tool. You create folders and texts, and use them to structure your work. You could just have a single text, and write like Jack Kerouac on a scroll, but then you wouldn’t get the benefit of being able to rearrange chapters, sections, and scenes in the Binder. Understanding how to use the Binder is the key to working with a Scrivener project.
In this article, I’ll talk about the Binder elements you use most: folders and texts, and show you how you can get the most out of this part of the Binder.
Work with Texts and Folders
At the simplest level, you can write in Scrivener with just one folder and one text. When you open a Scrivener template, you’ll see something like the screenshot below. At the top, there’s a folder labeled Draft or Manuscript, which is meant to house your project. You might want to change this name to the title of your work. (To do this, click the folder’s name to highlight it, and enter the name you want to use.)
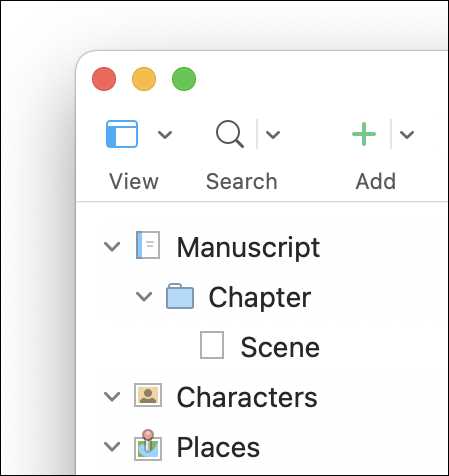
Below this folder, you see another folder, with a standard folder icon. Depending on the type of template you use, you may see Chapter and Scene for the first folder and text; or Chapter and Section; or you may see other types of names.
Folders can be chapters, but they don’t have to be: if you want to write a novel by scene, then you can use folders as scenes. Or you can only use texts. The Binder gives you a lot of flexibility.
You can add new folders and texts by clicking the Add button: click the down-pointing arrow and choose New Folder or New Text. When you do this, Scrivener adds the new item just below the currently selected item. So to add a folder below that first Draft or Manuscript folder, choose Add > New Folder.
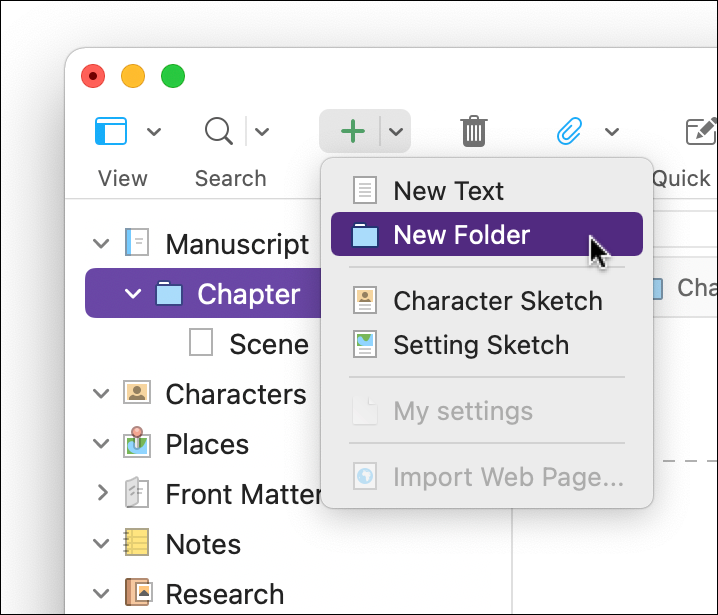
If nothing is selected in the Binder, or if you select the top-level Draft or Manuscript folder or its equivalent, adding a new item puts it at the bottom of that section of the Binder. And if you want to add items from the keyboard, just press Command-N (Mac) or Ctrl+N (Win) for a new text; Command-Option-N (Mac) or Alt+Shift+N (Win) creates a new folder.
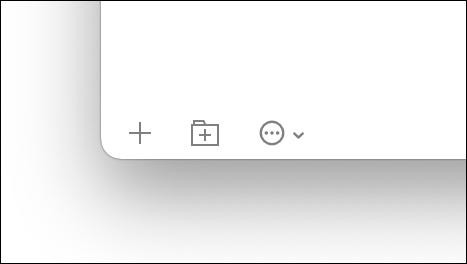
You can also add items by clicking one of the two buttons in the Binder footer. Click the button on the left to add a text, and the one on the right to add a folder.
Note that there is one special folder in the Binder: the Research folder. See Use Scrivener’s Research Folder to Store Information About Your Project to learn how to use this folder.
Reorganize the Binder
The real strength of the Scrivener Binder is the ease at which you can reorganize your writing project. With a standard word processor, if you want to move a scene, you have to find it, cut it, find the new location, then paste it. With Scrivener, you simple drag texts or folders in the Binder. Do you want to re-order chapters? Just drag the folder for chapter 7 above the one for chapter 6. Do you want to move a scene to another location? Just drag the text containing that scene to a different spot in its folder, on to a different folder.
You can also use the Binder to outline your project; see Outlining with the Scrivener Binder. Changes you make in the Binder are reflected in Scrivener’s Outliner: see Plan Your Project with Scrivener’s Outliner.
A Text Is a Folder Is a Text
When you’re writing in Scrivener, you probably think about folders and texts as being different. Texts contain, well, text; what you write. Folders are receptacles that you use to gather texts in groupings that may be chapters, sections, or scenes. While they are visually different, the two types of items can be functionally the same.
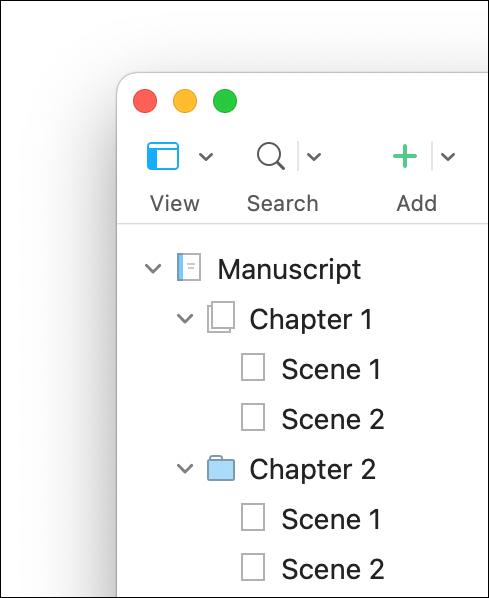
A folder can contain text in the Editor, and a File can contain sub-files. To change a file to a folder, or a folder to a file, right click an item in the Binder, then choose Convert to Folder or Convert to File. If you convert a folder to a file, and it already contains files, its icon will be different from a standard file:
Use Folders and Texts as Separators
The Binder is a visual representation of the structure of your project, and when you look at it, you can tell at a glance where you are working. The selected item shows which folder your looking at, or which text you’re working on. If you have a complex project, you can use folders and texts as dividers, to provide more visual clues as to how your project is structured. These can be empty folders or texts, which you place in specific locations to break things up, or items that are part of your project.
To use an item as a separator, right click it and choose Show as Separator. The item gets highlighted in a slightly darker gray, with subtle lines around it.

Change Text and Folder Icons
A useful way to use items in the binder as visual reminders of their contents is to use custom icons for texts and folders. Instead of the default blue folder icon, and white text icon, right click on any item, choose Change Icon, and choose one of the many available icons. When you want to spot a specific item, or type of item, it’ll be a lot easier if they have different icons.
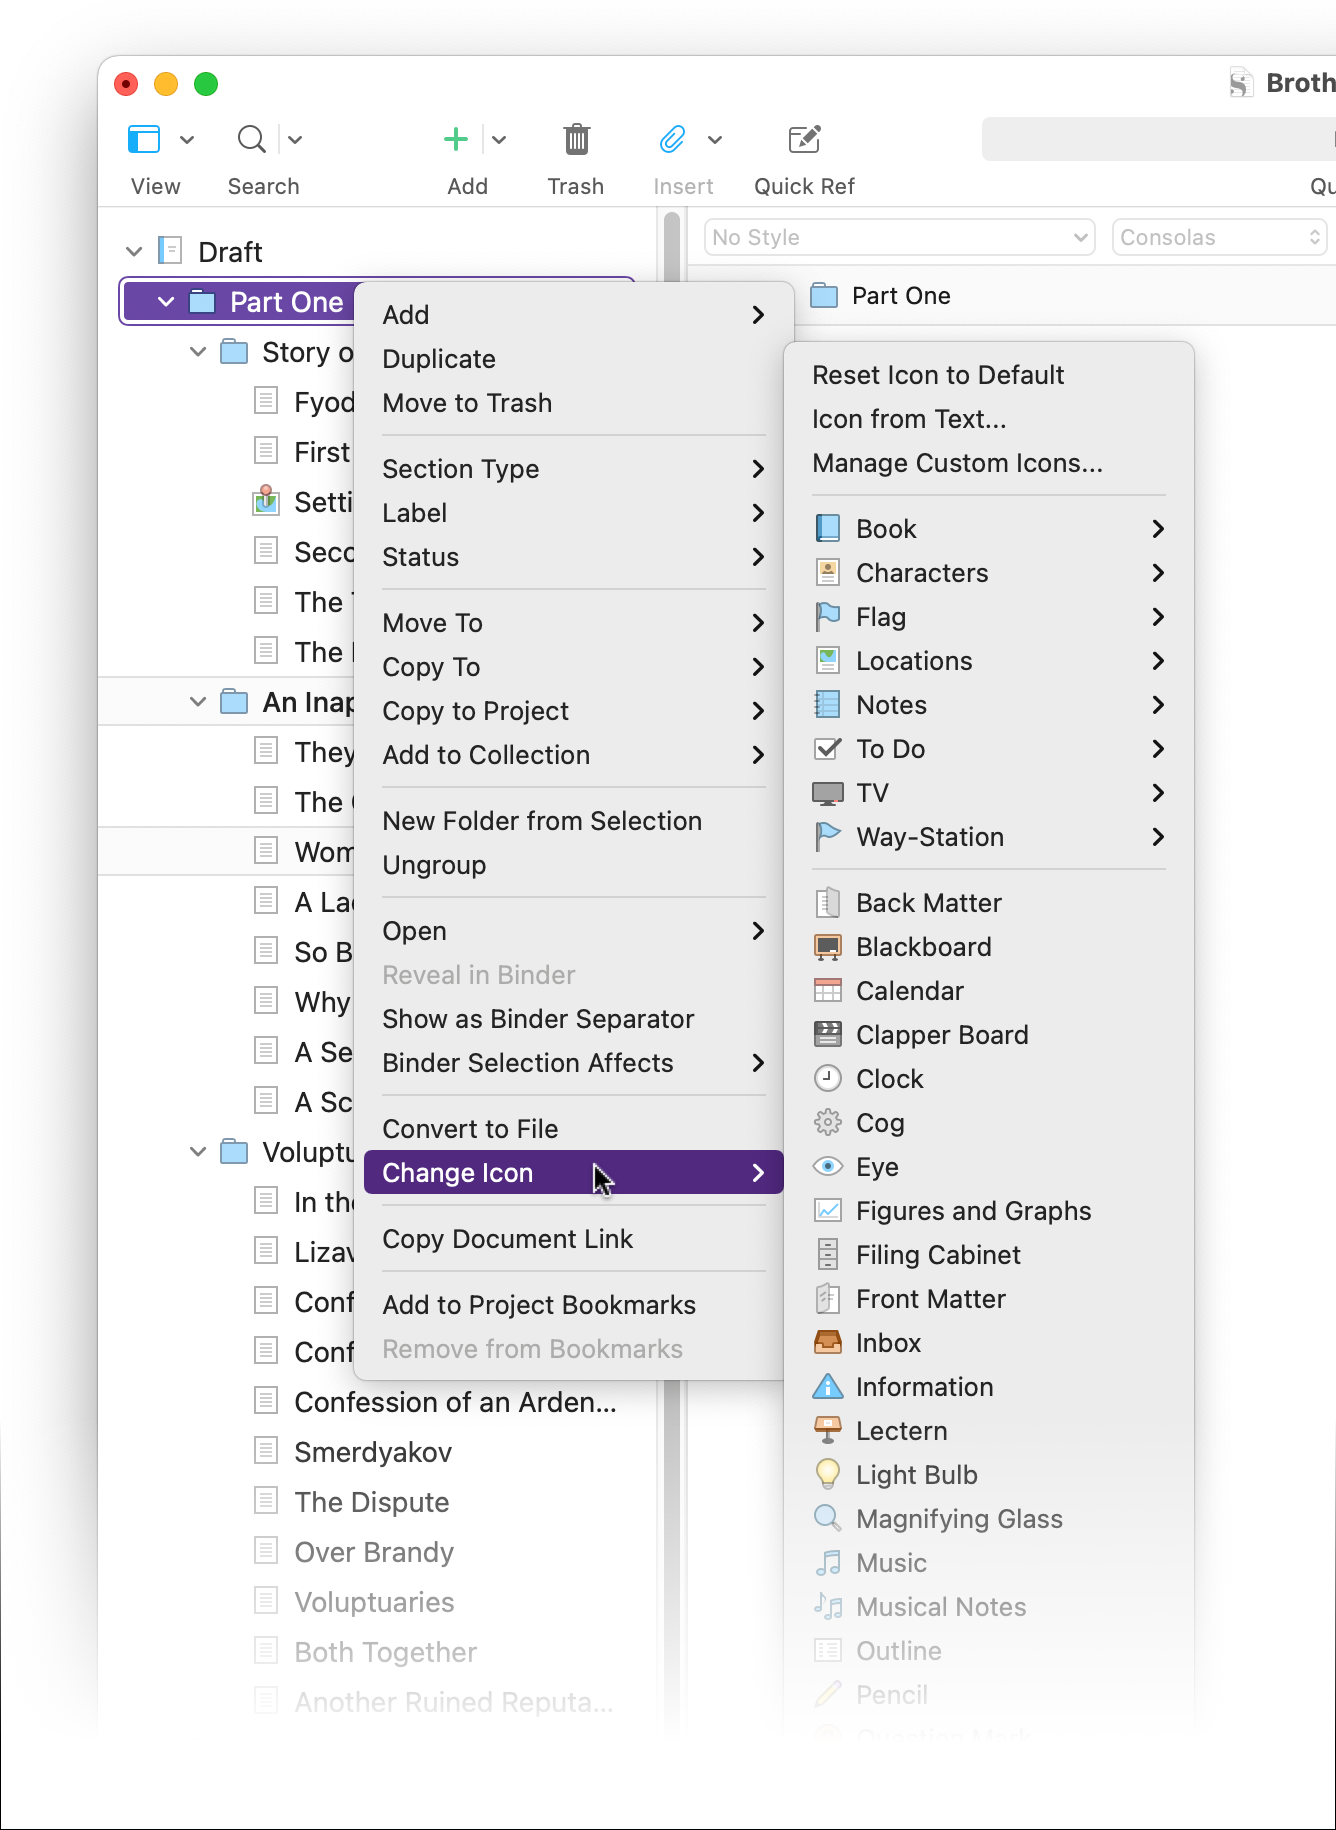
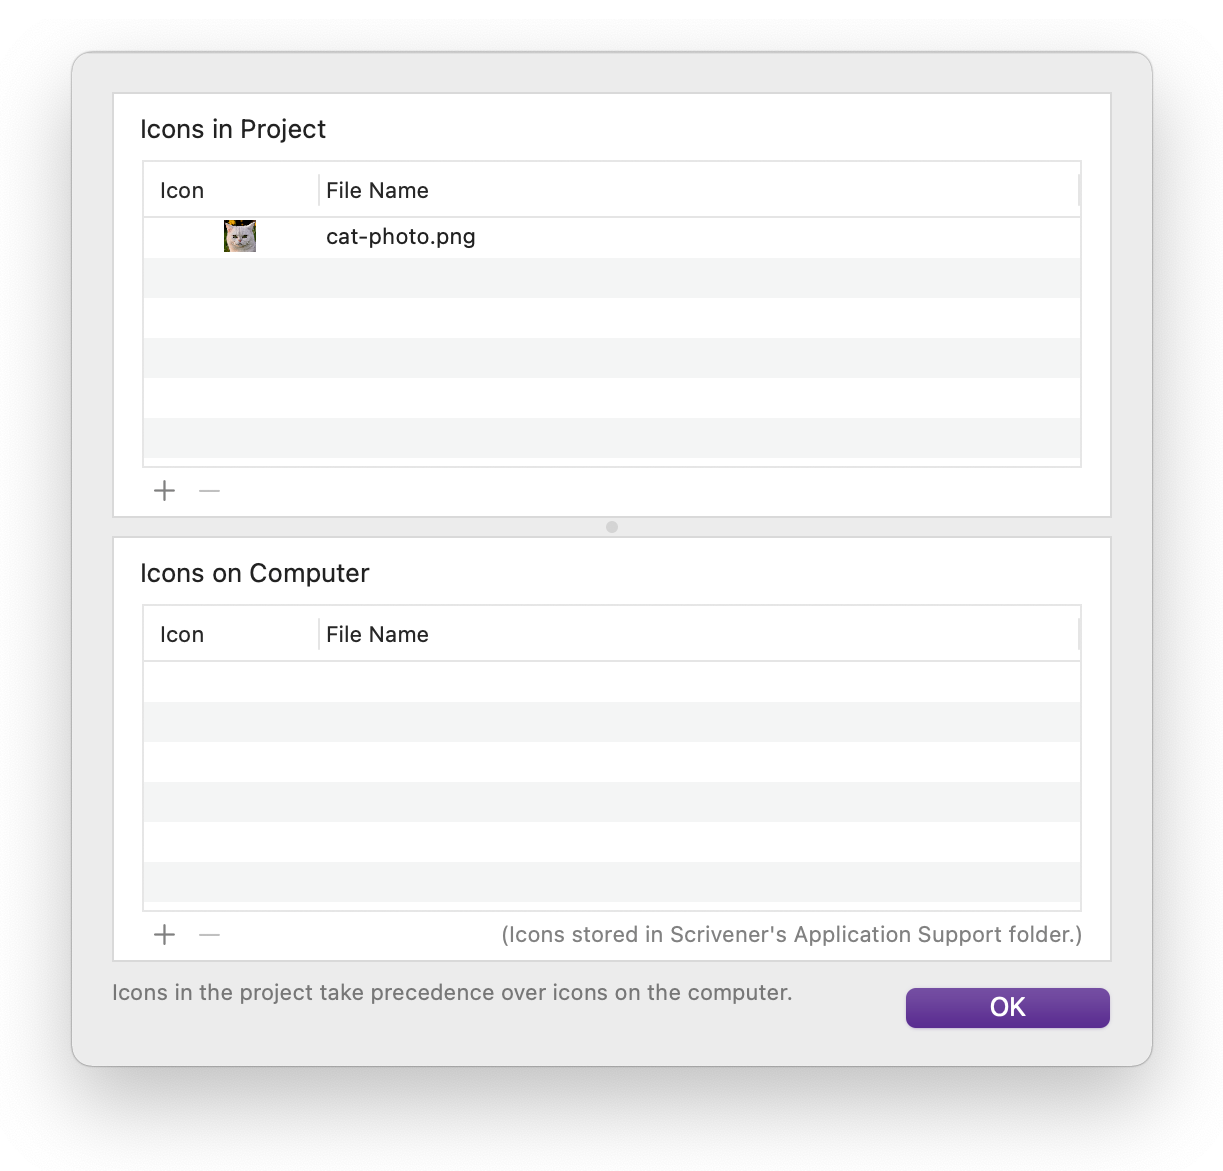
You can use specific book cover icons with different colors, icons for character or location information, light bulbs, clocks, thought bubbles, and much more. Want to use your own icons? Click Manage Custom Icons in the contextual menu, and drag files to the dialog.
For more on using custom icons in the Binder, see Personalize the Scrivener Binder with Custom Icons.
There’s a lot more you can do with the Binder. For example, see Merge and Split Files in the Scrivener Binder to learn how to split and combine files. The Scrivener manual, which you can access by choosing Help > Scrivener Manual, goes into more detail about using the Binder in Chapter 6.3, Using the Binder.
Kirk McElhearn is a writer, podcaster, and photographer. He is the author of Take Control of Scrivener, and host of the forthcoming podcast Write Now with Scrivener.

