Scrivener lets you save the app’s preferences or options in a file, which can be useful as a backup, or to use the settings on another computer.

Like any sophisticated app, Scrivener has plenty of preferences and options, allowing you to customize the way the app works, how it displays, and much more. You can adjust the way the Editor displays text, how the Corkboard looks, and set fonts and colors for the Outliner. There are also settings for auto-correction, backups, how the Scratchpad works, and much more. You may want to use Scrivener in its default setup, or you may want to tweak these settings to make them right for you.
What if you want to use Scrivener on two computers, such as a desktop computer and a laptop? Scrivener allows you to save these preferences or options and load them on another computer. You may even want to do this to keep a backup of your settings, or to help a friend get started using Scrivener. In this article, I’ll explain how you can save and load preferences and options.
Preferences, options, and settings
Almost every app, on every platform, has settings. You can adjust the way the app displays, how certain features work, and more. Scrivener has lots of settings: the section of the Scrivener manual that covers these settings (Appendix B) is 60 pages long. You don’t need to read all this, and you probably won’t need to change most of these settings, but you can customize Scrivener in great detail.
Note: macOS uses the term “preferences,” and Windows uses “options” for the type of settings I’m discussing. In order to be platform-agnostic, I’ll use the term “settings” in the rest of this article.
Why you should save settings
If you customize Scrivener a lot, then it’s a good idea to save your settings. Imagine if you have a problem with your computer, and lose the settings file that Scrivener stores; even if you have backed up your Scrivener projects (you have, right? See How to Back Up Your Scrivener Projects for more on backups), you could spend a long time adjusting Scrivener’s settings the way they were. And you may not even remember all the changes you made, so you could feel uncomfortable if the app isn’t working as you expected.
Another reason to save Scrivener settings is to load them on another computer. Say you work both on a desktop computer and a laptop; you probably want to use the same settings on both computers. With an app like Scrivener that has so many settings, it’s practical to adjust them on one computer, then load them on the second one. And if you change settings on the second computer, you can save those settings and load them on the first one, replacing the settings.
You may also want to have different settings for different projects. Perhaps you want Scrivener to look and work a certain way for long-form writing, but when you write articles or short stories, you may want to use different settings. These could be as simple as using different font settings in the Editor.
Saving and loading settings is easy, and you can save multiple settings files to use when you want.
Saving settings
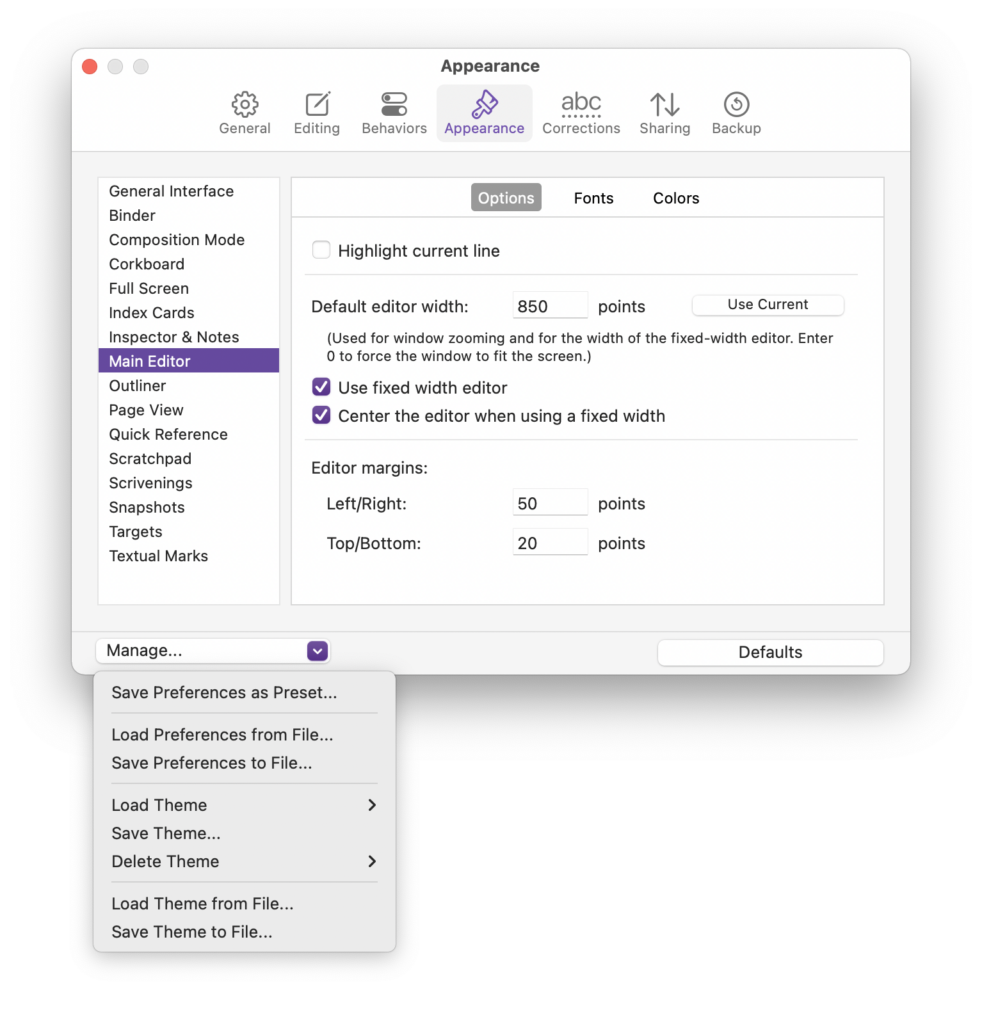
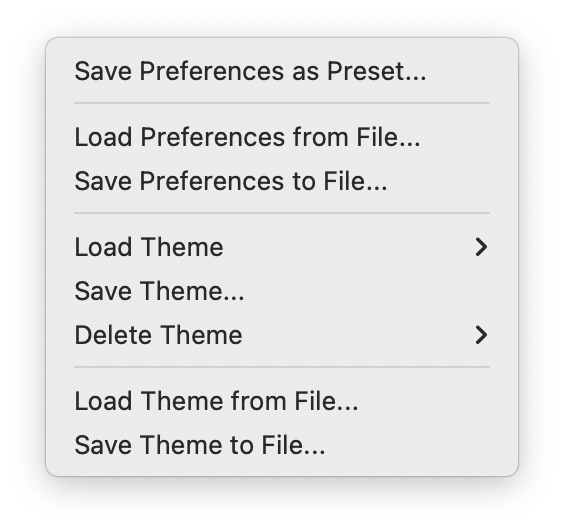
Once you’ve made changes to settings in Scrivener, you can save them. Go to Scrivener > Preferences (Mac) or File > Options (Windows). At the bottom of the Preferences or Options window is a pop-up menu labeled Manage. Click this and choose Save Preferences to File (Mac) or Save Options to File (Windows). In the Save dialog, choose a name and location, then click Save.

If you plan on only saving the settings once – such as to transfer them to another computer – don’t worry about the name, but if you do plan to create different settings files, make sure you name them accordingly. You can save as many settings files as you like.
It’s a good idea to store these files in a location on your computer that is regularly backed up; you may want to store them in the folder where you keep your Scrivener projects.
Loading settings
Now that you’ve seen how to save settings, it’s obvious how to load a settings file. From the Manage pop-up menu, choose Load Preferences from File (Mac) or Load Options from File (Windows). Navigate to the file you want to load, select it, then click Open. You can copy a settings file to another computer – email it to yourself, or put it in Dropbox, OneDrive, or iCloud Drive – and open it on that computer.
Save Preferences as Preset
The Mac version of Scrivener allows you to save preferences as a preset. Choose Save Preferences as Preset, then give the preferences a unique name, such as Non-Fiction, Blog, or Journal. When you do this, your saved preferences will appear in the Manage pop-up menu. When you want to load these preferences, just choose them from the Manage pop-up menu.
Saving settings may seem like a minor feature, but when you consider how customizable Scrivener is, it’s practical to do this either as a backup, or to be able to work on a second computer with the same settings.
Kirk McElhearn is a writer, podcaster, and photographer. He is the author of Take Control of Scrivener, and host of the podcast Write Now with Scrivener.

