

You can use keywords to mark documents in your Scrivener projects, to help you find which ones have specific characters, settings, and more.
In addition to managing multiple documents in the Binder, Scrivener allows you to tag these documents, using keywords, so you can search for documents containing these tags. You may want to use keywords to mark scenes with specific characters, or in specific locations. You may want to use keywords to mark scenes that take place in the present, and others for flashbacks. You may also want to use keywords to indicate the status of your documents: draft, edited, final, etc.
In this article, I’m going to tell you how to apply keywords to Scrivener documents, and how to leverage keywords to help you manage your projects.
What are keywords?
You may be familiar with tags, which you can use in the Finder on macOS, and in the File Explorer on Windows. You can apply tags to files, and they can help you find files of a certain type, or that contain certain content. You can tag files by project, by client, or by any other category.
Scrivener Keywords are like tags, unique words that you can use with many apps, to indicate certain elements about documents. The simplest way you can use keywords in Scrivener is to add them to each of your documents indicating which characters appear. In a non-fiction work, this could be specific years, or even ideas that you are exploring.
How to use keywords in Scrivener
In a Scrivener project, you can assign keywords to any document in the Binder, any card on the Corkboard, or any item in the Outliner. All three are just different views of the same items in your project, so when you assign a keyword in one interface, they are available in the others.
The easiest way to use keywords is to display the Project Keywords panel; choose Project > Show Project Keywords to see the panel, which floats above your project.
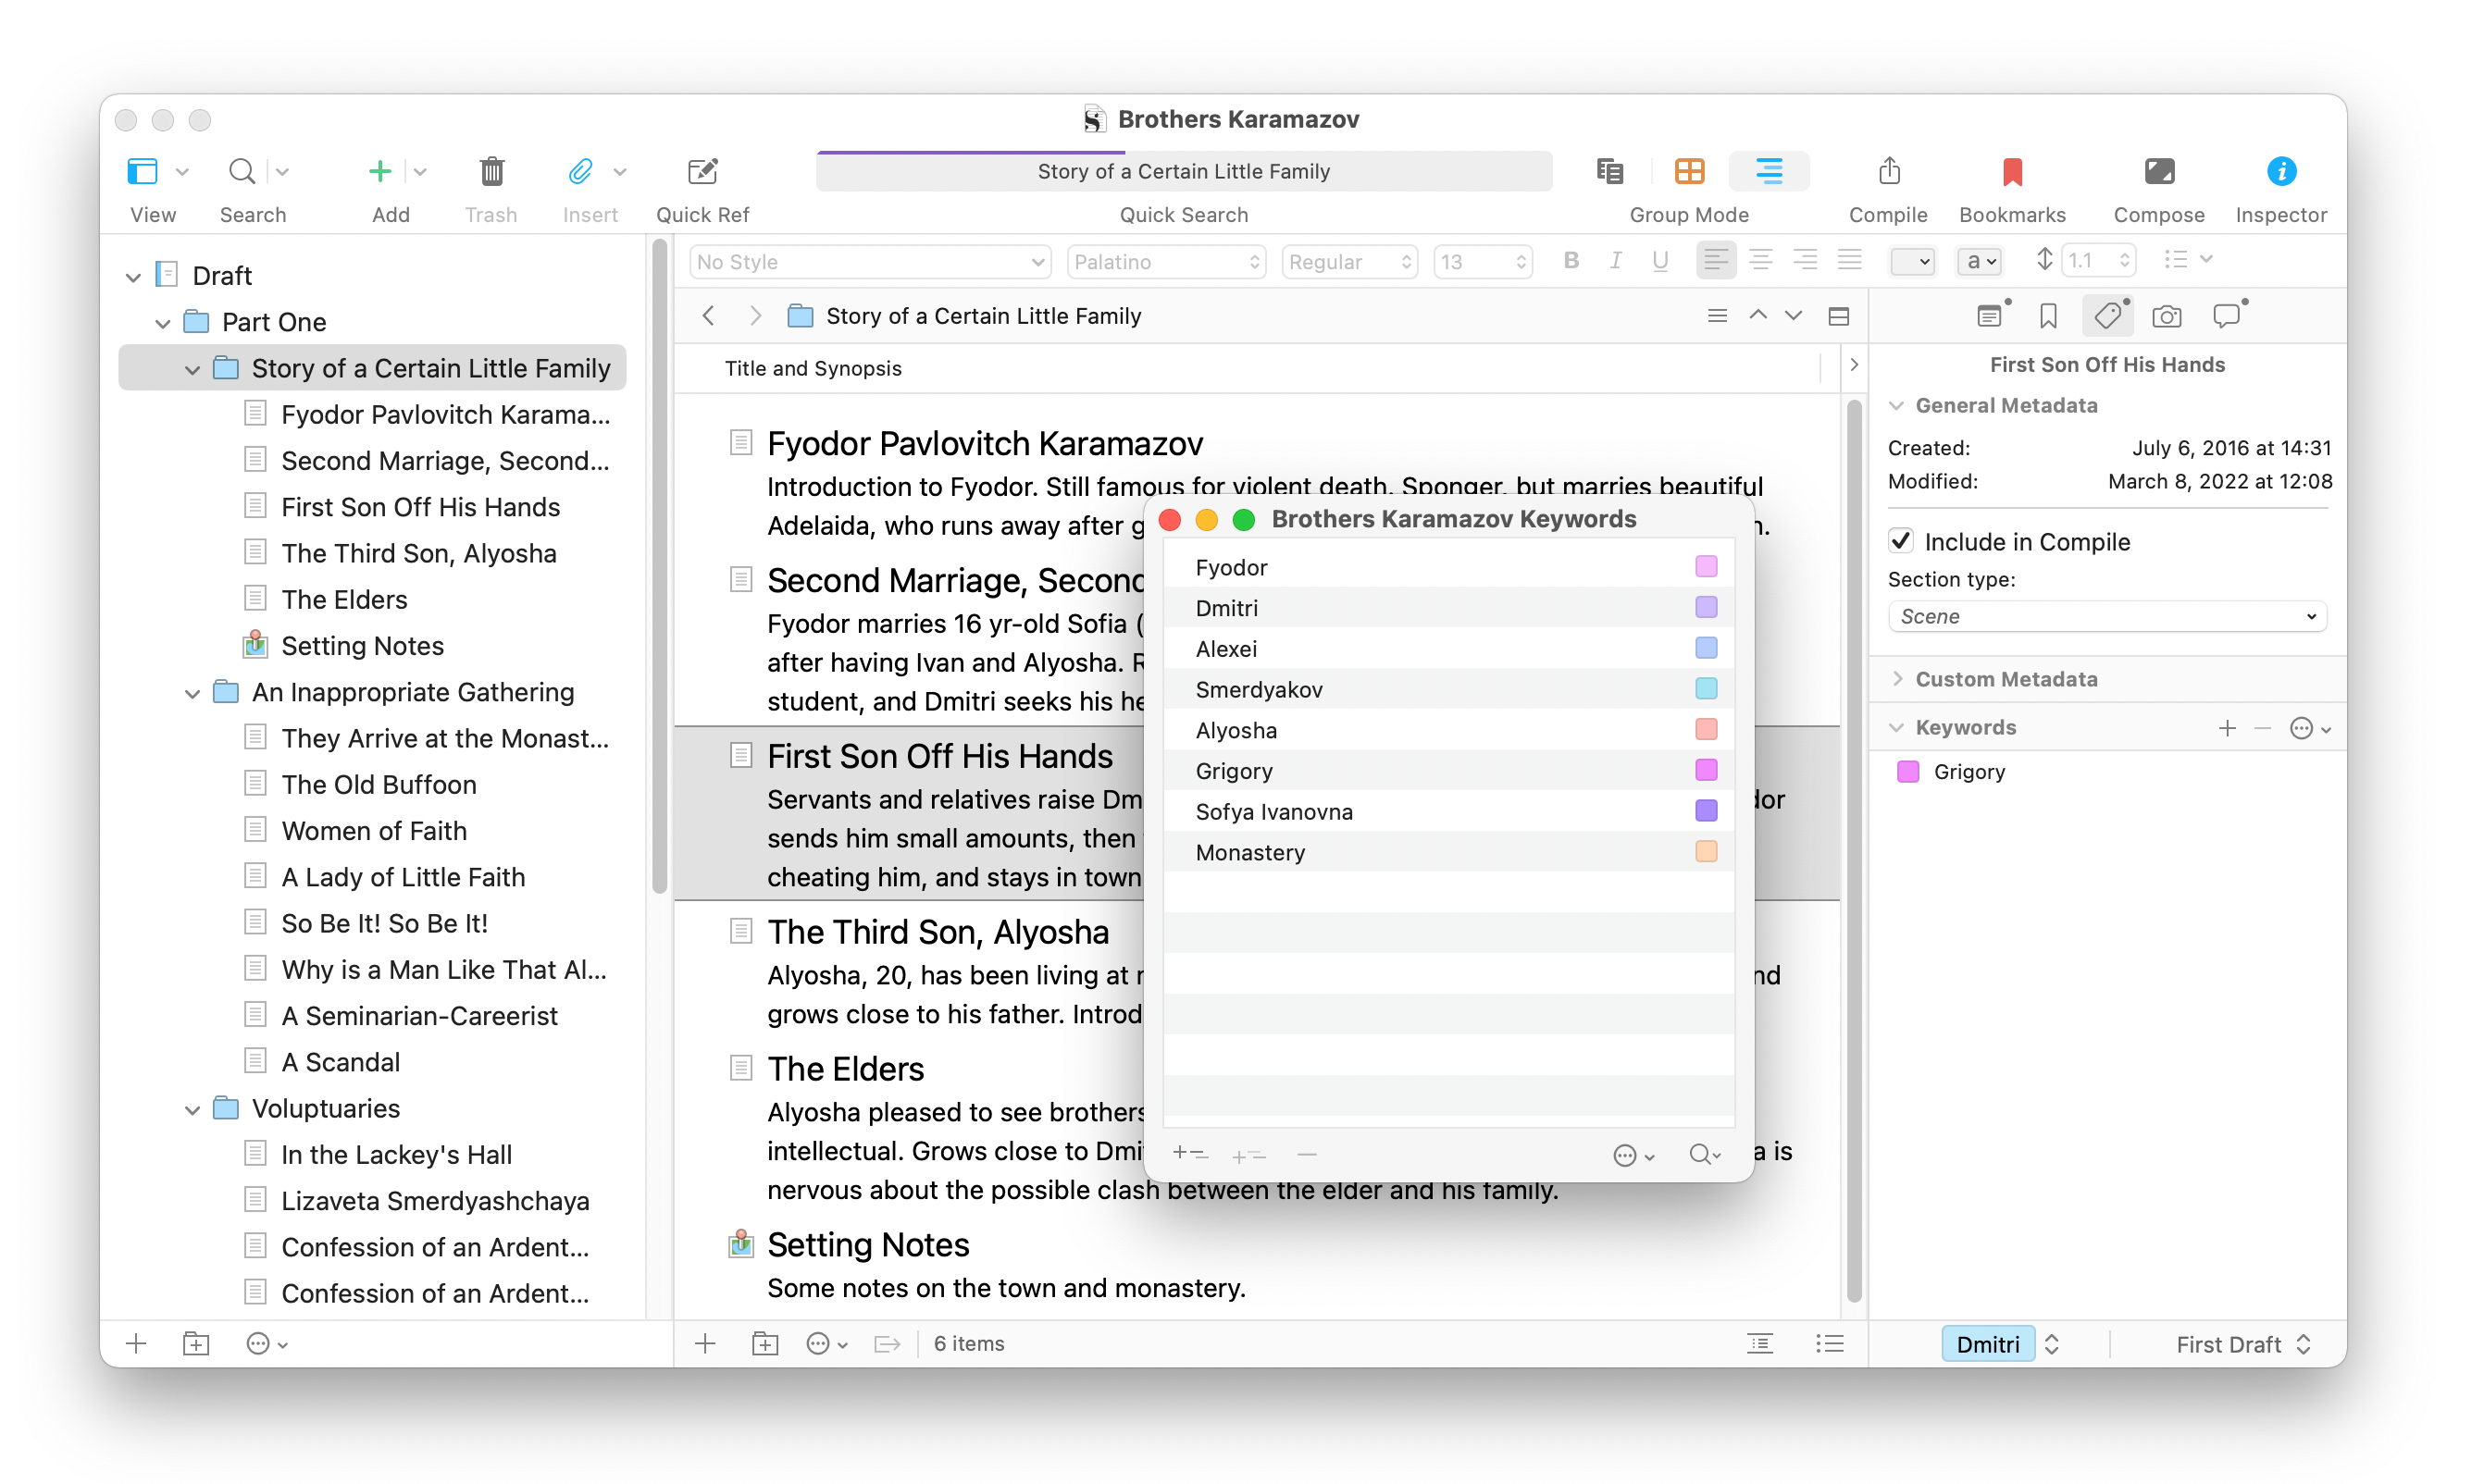
You can see above that I’ve assigned some keywords for this project, mostly for characters. You can also see in the above screenshot that, in the Inspector, I’ve selected the Metadata panel, which shows keywords at the bottom.
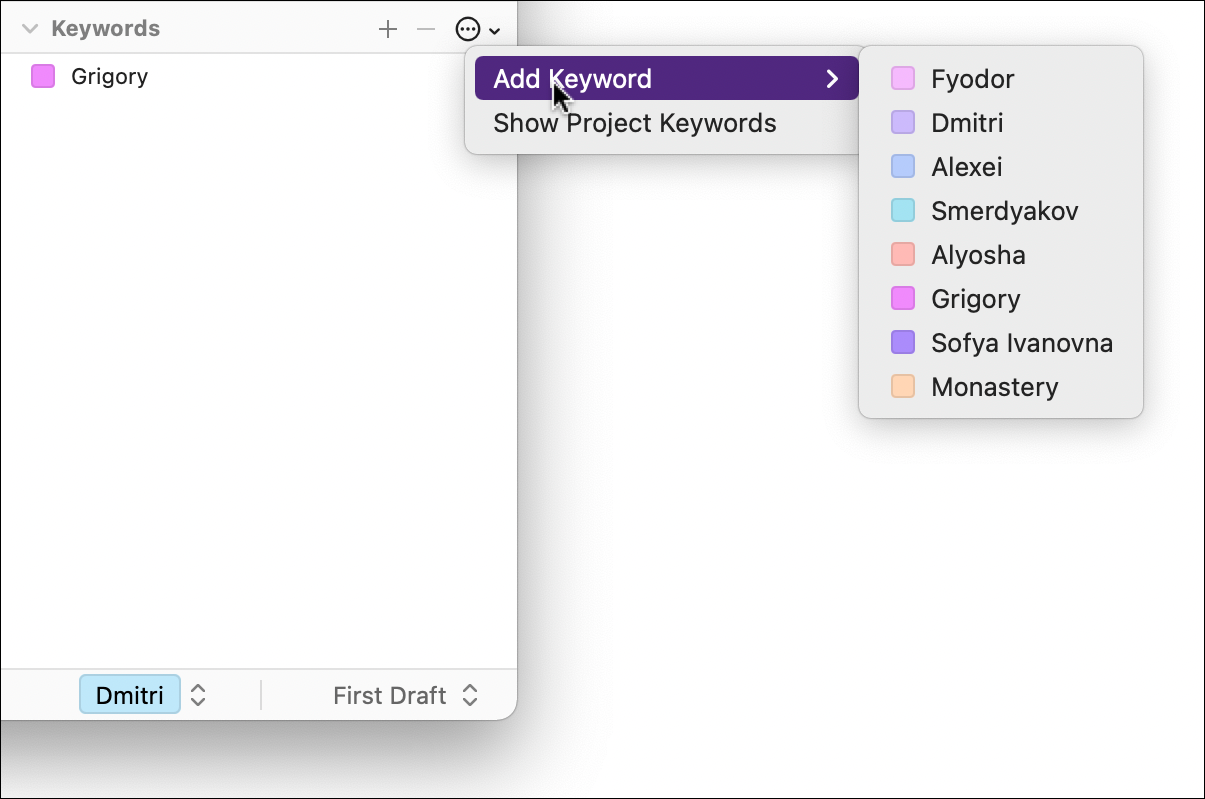
To add a new keyword, click the leftmost + icon at the bottom of the Project Keywords panel, or click the + icon in the Keywords pane of the Inspector. Type a keyword, then press return. You can add as many keywords as you want.
To apply an existing keyword to a document in the Binder, just drag that keyword from the Project Keywords panel onto that document. If you don’t want to have the Project Keywords panel visible, you can also apply a keyword to the currently selected document(s) by clicking the Action menu, then choosing Add Keyword, then selecting the keyword you want to add.
Finding documents with keywords
The main reason to use keywords is so you can later find documents to which you have applied them. You can, of course, scroll through your Binder, checking the Metadata tab of the Inspector, but there are easier ways to find tagged documents. If you click the magnifying glass icon, Scrivener performs a search for all documents with keywords assigned. The Binder displays the search results, and you can click any document to view it.
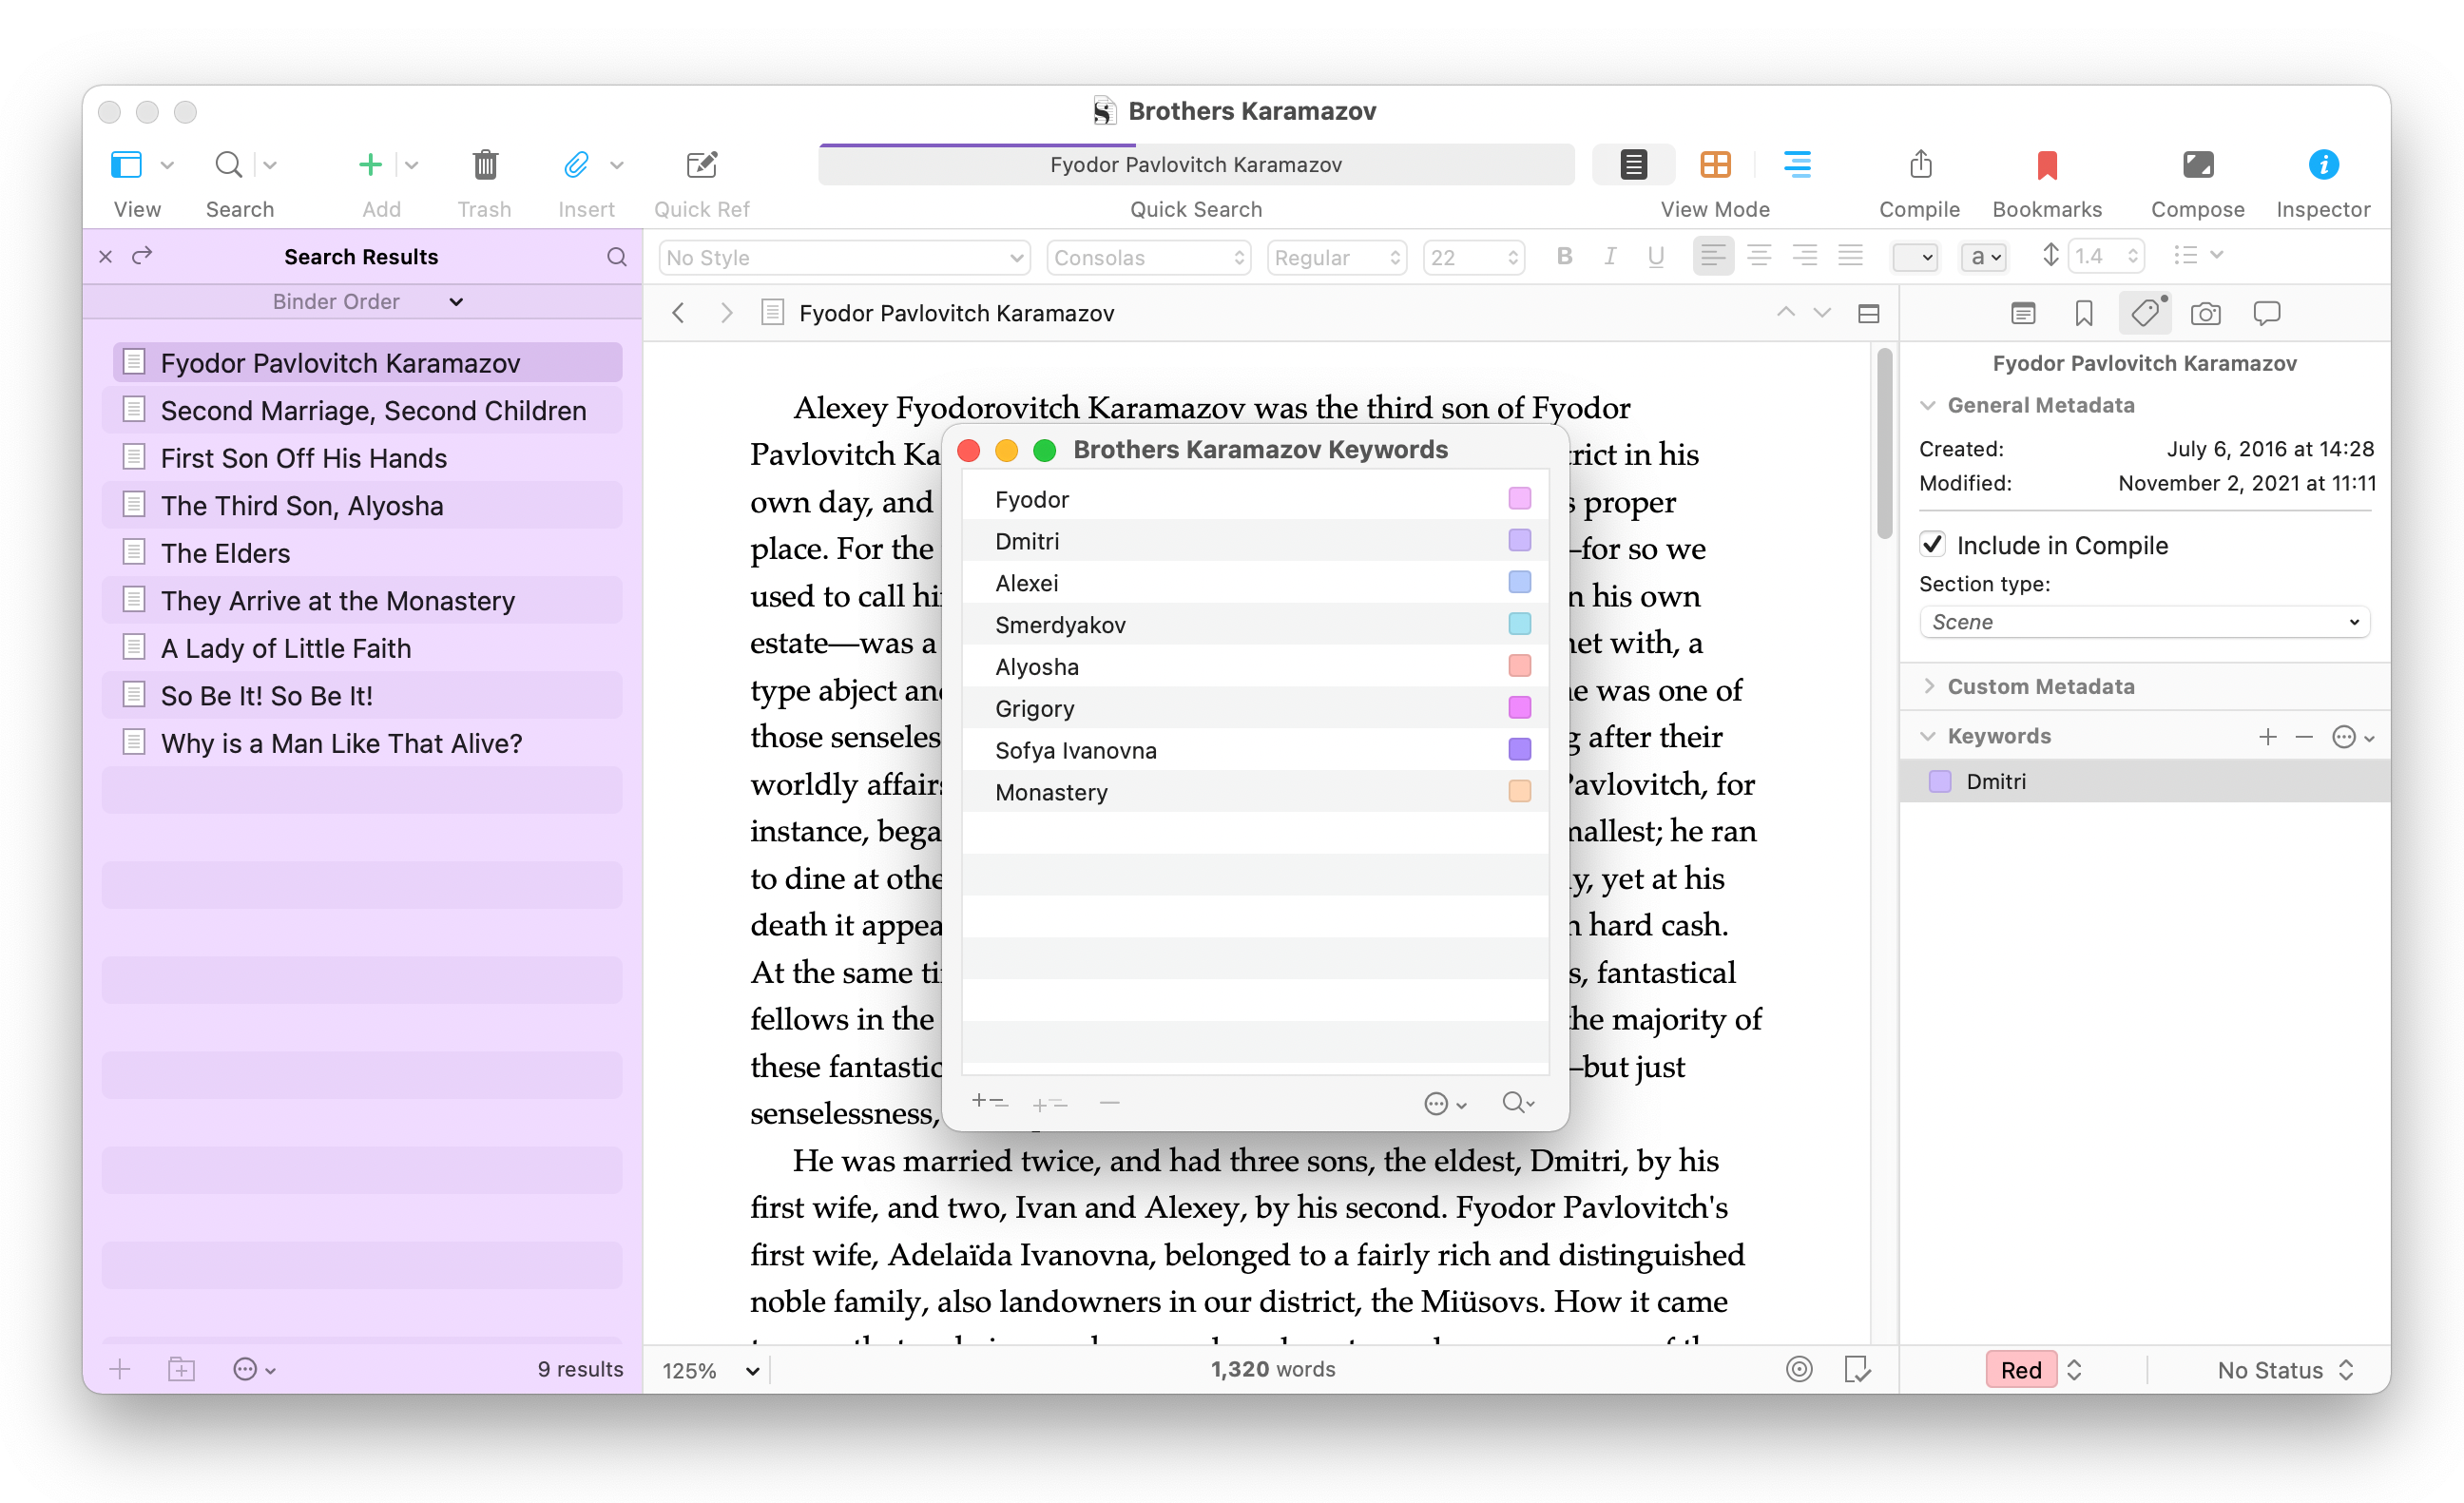
If you select one or more keywords, then click the magnifying glass icon, Scrivener searches for documents that contain only those keywords.
If you click and hold the magnifying glass, a menu gives you other search options. You can Search Keywords Only, as described above. You can Search All Content, which finds the selected keyword(s) in all documents, allowing you to assign keywords to those documents. And you can choose Show Documents with No Keywords, if you want to go through all your documents and add keywords to them.
To clear the search results, click the x in the upper right corner of the Search Results pane.
Managing keywords
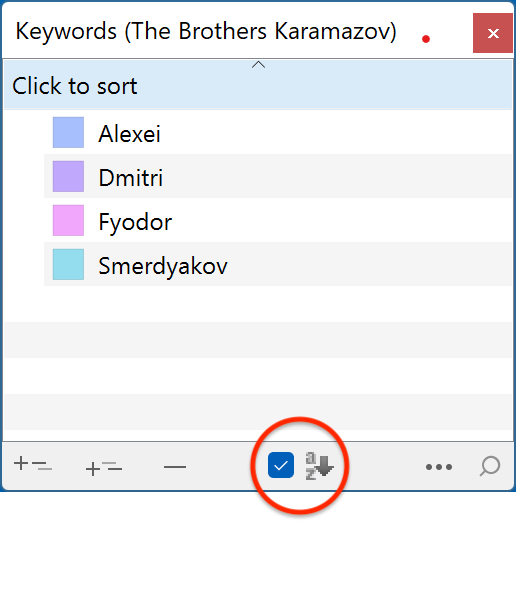
If you have a lot of keywords, you may want to rearrange them in the Project Keywords panel. You can do this by dragging and dropping keywords in the list. Or you may want to sort your keywords alphabetically. To do this on Mac, choose Edit > Sort > Ascending or Edit > Sort > Descending. On Windows, click the a-z button at the bottom of the panel. If you want to change the sort direction, click where it says Click to sort at the top of the list.
You can also drag any keyword on another keyword, creating a nested keyword. For example, if you have keywords for your characters, you may want to create a Characters keyword, and drag all your characters onto that, to nest them. This is a good way of keeping track of keywords, if you use them a lot.
You may want to rename an existing keyword; just double-click it and type a new name. The keyword changes, but still remains attached to all the documents you’ve assigned it to. And if you want to change the color of a keyword, double-click the color square next to the keyword and choose a new color.
To delete a keyword, select it in the Project Keywords panel, then click the – in the panel’s footer.
There’s a lot more you can do with keywords: there are other ways you can search using keywords, and you can export keywords and import them in a different project. Chapter 10.4.5 of the Scrivener manual, Using Keywords, goes into more detail.
Kirk McElhearn is a writer, podcaster, and photographer. He is the author of Take Control of Scrivener, and host of the podcast Write Now with Scrivener.