

These three tools, the Format Bar, Header Bar, and Ruler, give you options for formatting, navigating, and viewing documents in Scrivener’s Editor.
Like any app that handles text, Scrivener gives you options for formatting your writing. You can use styles to ensure consistency in your projects, and you can manually format text when you need to make certain words bold or italic. You can format text using Scrivener’s menus, keyboard shortcuts, and you can also use the Format Bar.
You can set up margins, tabs, and indentation using the Ruler. This is especially useful if you need to set off text in a block quote, or to create tables.
The Header Bar tells you which document you’re editing, lets you navigate forward and backwards, and has some tools to work with the editor.
Here’s how to use the Format Bar and Ruler in Scrivener.
The Three Bars
Above the Editor, the pane where you write text in Scrivener, are three bars.
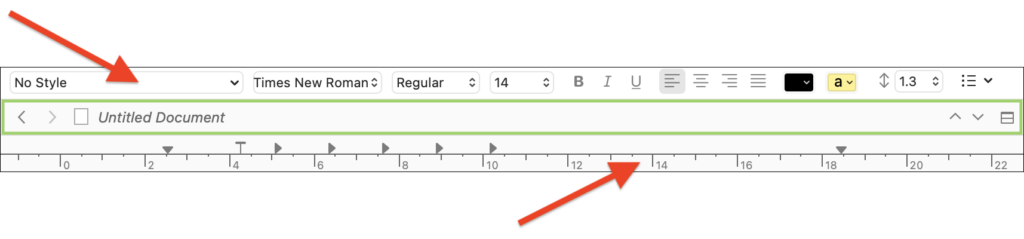
- The Format Bar is at the top.
- The Header Bar, surrounded by a green box, is in the middle.
- The Ruler is at the bottom.
All of these bars display by default, but you can hide each of them if you don’t need them visible. Choose:
- View > Text Editing > Hide Format Bar
- View > Editor Layout > Hide Header View
- View > Text Editing > Hide Ruler
To make them visible again, choose the same menu items, which now display Show instead of Hide.
The Format Bar
The Format Bar gives you quick access to a number of formatting options. You can change the font, size, color, line spacing, and more of the text in your document.
Scrivener supports styles; these are groups of formatting settings, which allow you to quickly format different elements of your documents. Click the leftmost dropdown menu, and you see these default styles:

You can define your own styles, and it’s a good idea to learn how to use styles; they can save a lot of time, and ensure consistency when formatting documents. For more on using styles in Scrivener, see Customize the Scrivener Editor 3 – Use Styles to Format your Scrivener Projects.
The next three menus are easy to understand. The first lets you choose a font, the second the font variant (bold, italic, bold italic), and the third lets you choose the font size. To apply any of these settings, select the text you want to change, then click a menu and select your option. If you make changes when not selecting text, the options you select will apply from the point where your cursor is located. For example, if you’ve finished a paragraph, and want the next paragraph to be bold, press Return, then choose Bold. The text will remain bold until you choose Regular.
Next, you can set paragraph alignment here. Choose from left, center, right and justified.
The next section lets you choose text and highlight color. Each of these works a bit differently. If you want to change the color of text, select it, then right-click on the text color box and choose a color. To revert to black, click the text color box again. To highlight text, select text then click the highlight box. To change the highlight color, right click the highlight box and choose another color.
You can set line spacing with the next dropdown menu, and the final menu lets you choose from a number of list formats.
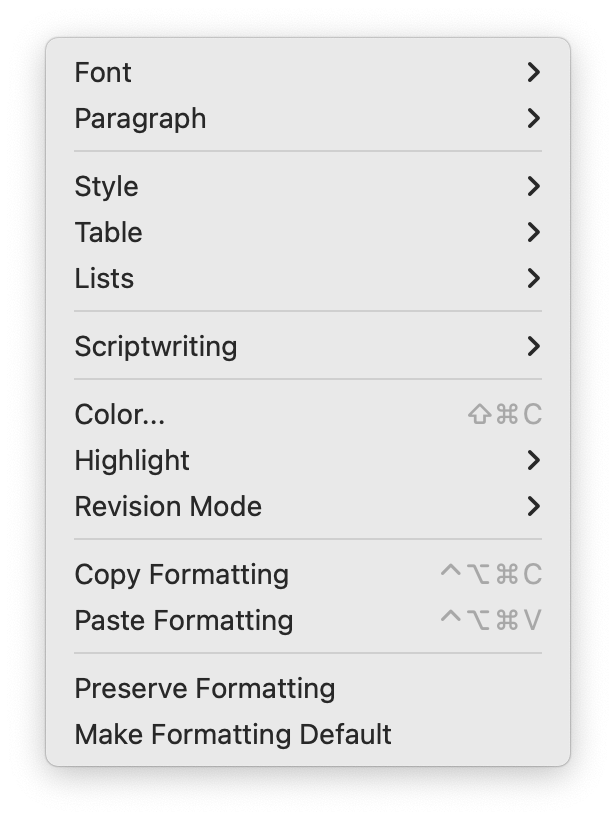
Many of these options are also available from Scrivener’s menus, and many writers will choose to hide the Format Bar (View > Text Editing > Hide Format Bar) when writing. You can see that the Format menu contains most of the options you see on the Format Bar. If you’re making a lot of changes, it can be more practicle to use the Format Bar. Also, note the many keyboard shortcuts available from the Format menu and its sub-menus.
See chapter 15.7.2 of the Scrivener manual for more on using the Format Bar.
The Header Bar
The most obvious element of the Header Bar is the name of the document you are currently viewing or editing. Here, I’ve chosen an untitled document, before adding any text. You can name or rename a document by clicking the name in the Header Bar and typing.
At the left are < back and > forward buttons; these work like in a web browser, taking you back and ahead in documents you have viewed in your manuscript.
At the right, the ∧ and ∨ buttons let you view the documents above and below the current document in the Binder. These buttons are useful if you’re checking or editing documents, and want to move sequentially ahead or back in your manuscript.
The icon at the far right lets you split the Editor, so you can view two or four documents at the same time. Read See More of Your Project: Splitting the Scrivener Editor to learn how to split the Editor, use Copyholders, and more.
As expected, there’s a lot more going on with the Header Bar. Chapter 8.1.1 of the Scrivener manual goes into more detail.
The Ruler
If you’re familiar with word processors and text editors, you have probably used a ruler before. You use this to set margins, insert tabs, and set the indent or outdent for the first line of your paragraphs. As you can see, Scrivener has already set a number of tabs by default; they show as ▶︎ characters in the Ruler. Margins display as ▼ characters at the left and right of the ruler.
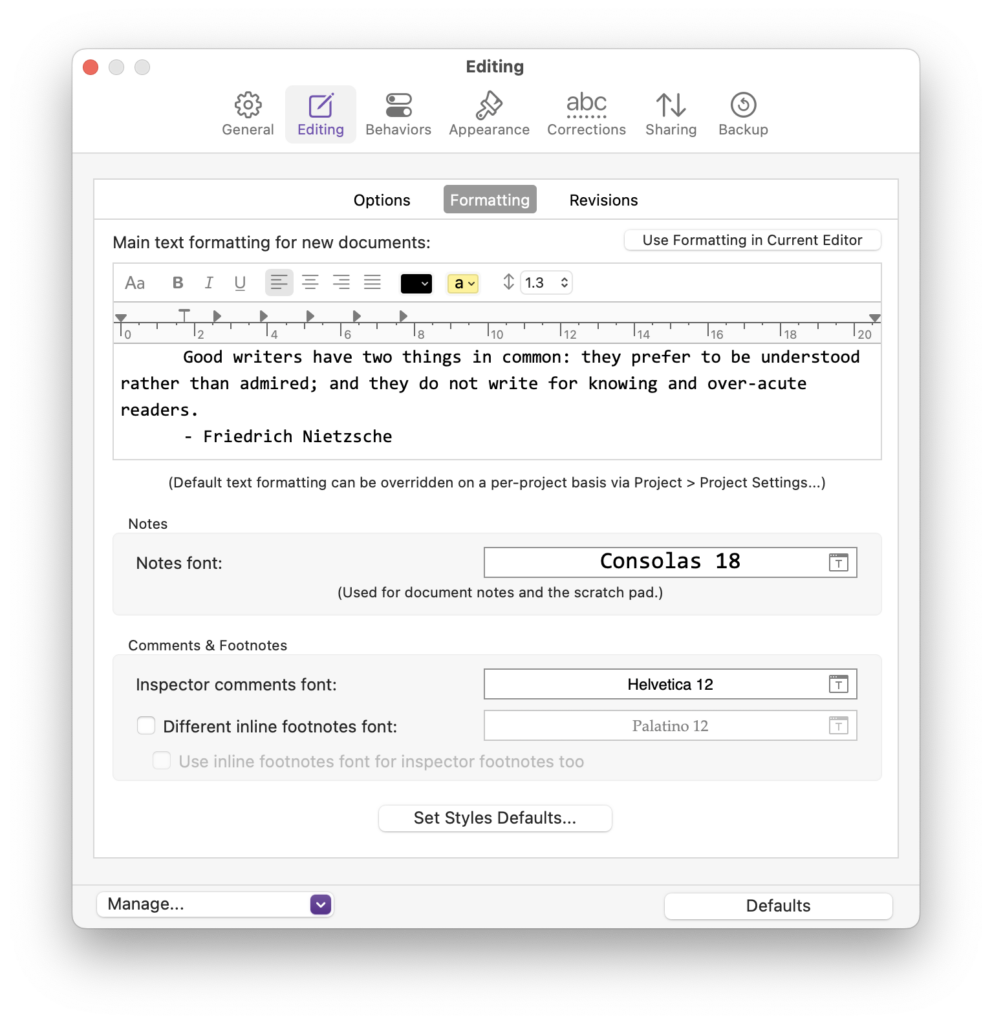
These defaults display in Scrivener’s settings. Choose Scrivener > Settings > Editor (Mac) or Scrivener > Options > Editor (Windows), then click Formatting.
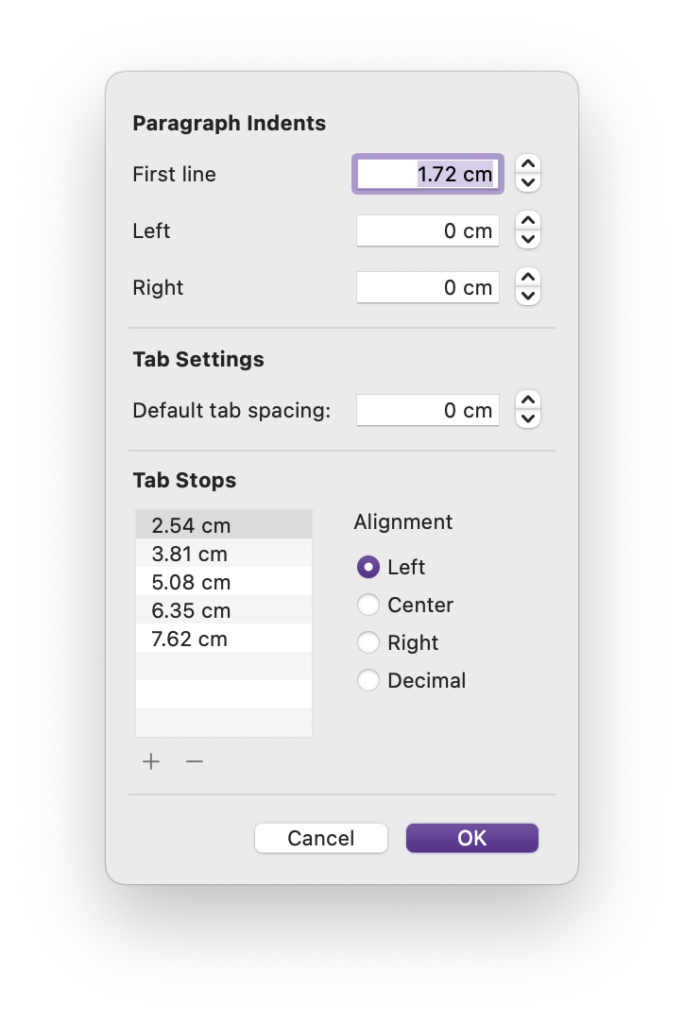
If you want to make changes to the ruler, you can do so by selecting text in your document, then dragging the tabs, or clicking to add new ones. But there’s an easier way to manage tabs: choose Format > Paragraph > Tabs and Indents. The dialog that displays lets you define tab and indents using digits, so you can make them more even.
Kirk McElhearn is a writer, podcaster, and photographer. He is the author of Take Control of Scrivener, and host of the podcast Write Now with Scrivener.