

Scrivener’s window has many elements, which you can display and hide. You can create window layouts to quickly switch between different configurations.
Scrivener’s window contains a lot of elements: the Binder on the left, the Inspector on the right, the Editor in the middle, the Toolbar and Format bar at the top, and the Footer bar at the bottom. You’ll probably always have the Editor visible, but you don’t always need to see all the other elements. You can hide the elements you’re not using to make Scrivener’s window simpler.
If you often change which elements are visible in Scrivener’s window, it’s a good idea to create window layouts. These are saved settings that quickly switch what Scrivener displays, so you don’t have to go to menus or use keyboard shortcuts to change your window’s view. In this article, we’ll show you how you can create and switch Scrivener window layouts.
Understanding window layouts
In Tame the Scrivener Window, we looked at the three main elements in Scrivener’s window: the Binder (left), the Editor (center), and the Inspector (right).
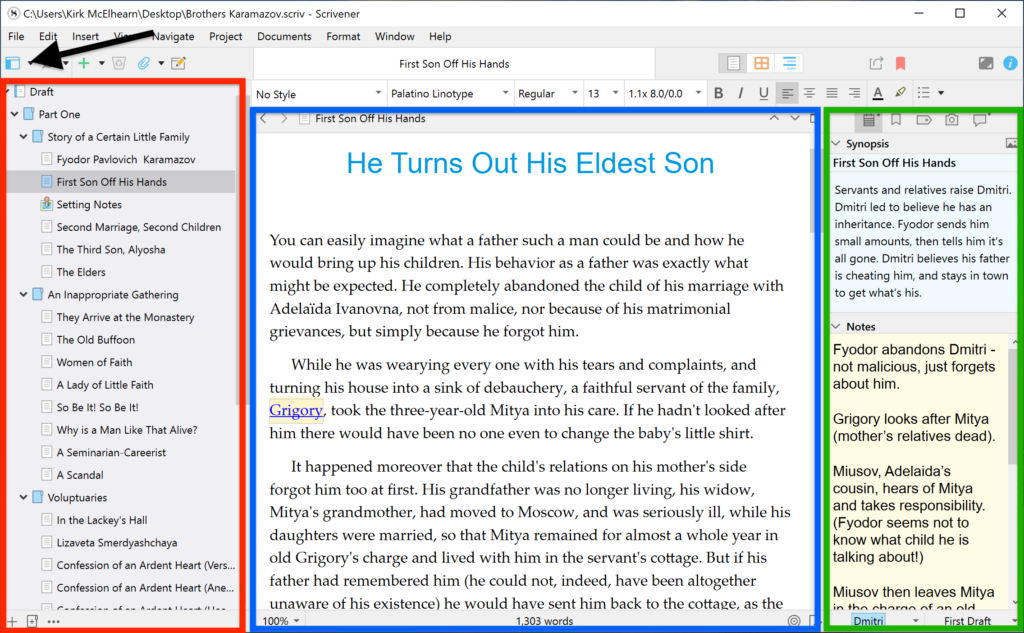
When you’re planning or editing a project, you’ll probably want to keep the Binder visible; that’s the left-hand sidebar that holds the parts of your project. If you want to view or add synopses, add metadata, or attach notes to files, then you’ll use the Inspector, the right-hand sidebar. (It has many other features.) And you’ll always want to view the Editor, the central pane; in fact, you can’t hide it. The Editor is where you write; it also displays your project in Outline and Corkboard views.
Adjusting the window layout for the task you are performing can make it easier to work on your projects. By removing elements you don’t need, you also remove distractions. (For the ultimate in distraction-free writing, get to know Scrivener’s Composition Mode.)
Scrivener’s built-in window layouts
Scrivener comes with seven built-in window layouts. You can see these by choosing Window > Layout; the submenu shows each of these layouts by name, and a small graphic gives you an idea of what each one looks like.
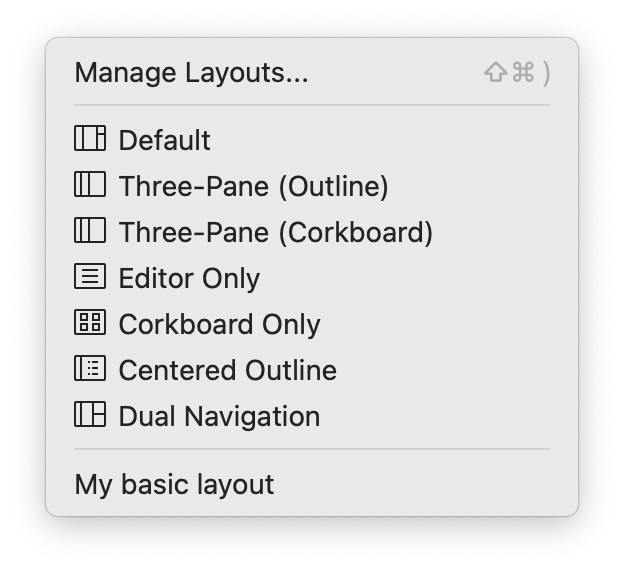
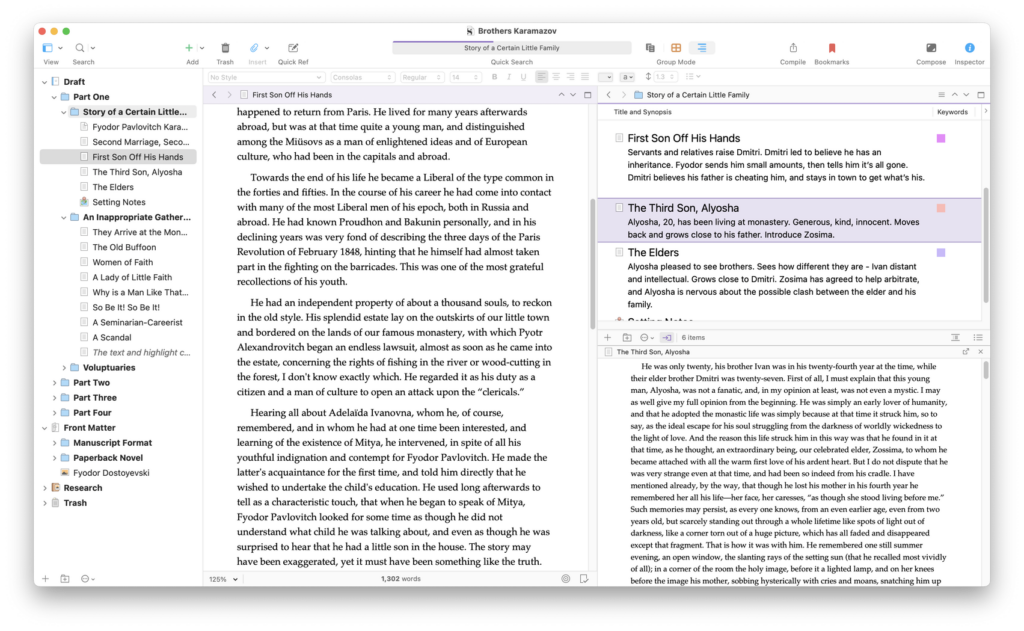
These layouts include the basic, three-pane view, as in the screenshot above; specific views that highlight the Outliner and Corkboard; and a useful dual-navigation view, that can fill your screen, and let you view the Binder, along with three other elements.
You can hide these built-in layouts from this menu if you wish; see the note below.
Creating custom window layouts in Scrivener
The stock window layouts are great to give you an idea of what you can do to change Scrivener’s display, but you can go much further by creating your own window layouts. Creating a layout means that you adjust different elements in the Scrivener window, and then save its settings. You can then switch to that layout at any time without manually changing all the settings.
Before you do this, it’s a good idea to save your current window layout, so you can revert to it at any time. To save this layout, choose Window > Layouts > Manage Layouts. A dialog displays showing a thumbnail of the current layout.
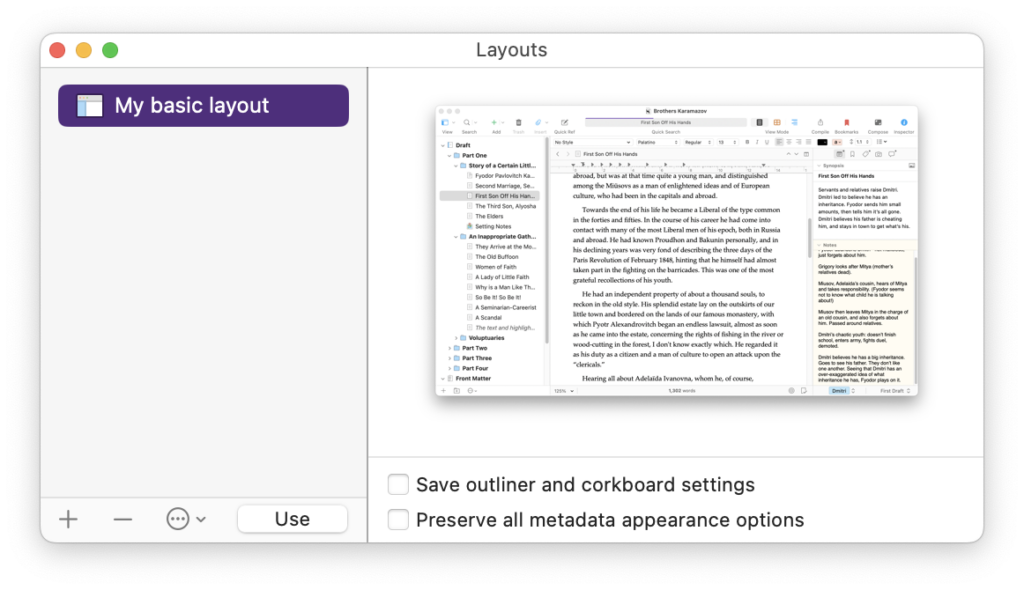
To save this layout, click + and enter a name. Now, no matter how much you change Scrivener’s window, you’ll be able to come back to this layout by choosing it from the bottom of the Window > Layouts menu, or from the Manage Layouts dialog.
Note: you can choose to hide the stock layouts from the Layouts menu if you wish. Click … at the bottom of this dialog, then choose Hide Built-In Layouts in Menus.
Here’s what window layouts save:
- The size and position of the window, and the sizes of elements within them, such as how wide the Binder is or the ratio between the two splits.
- The visibility of the Binder, collection list, and Inspector.
- Whether the Editor is split; horizontally, vertically, or not at all.
- Which element is visible in each split: Editor, Corkboard, or Outliner.
- Whether the Header or Footer are visible in each split.
- Whether the Ruler and Format Bar are visible.
- Whether the window is in full-screen mode.
Some other settings are saved; see section 12.3.2 of the Scrivener manual for details.
When you save layouts, there are two options that you can check:
- Save outliner and corkboard settings: this saves the Corkboard card size, ratio, card wrapping, and other display elements, as well as freeform and label view.
- Preserve all metadata appearance options: this saves label tinting used in the various areas of the interface; and pin, stamp, and keyword chip visibility in the Corkboard.
Switching window layouts in Scrivener
Now that you saved one or more window layouts in Scrivener, it’s easy to switch. There are two ways to do this.
Choose Window > Layouts, then choose the name of the layout you want to use. The built-in layouts are in the top section of the menu, and the ones you’ve saved are in the bottom section.
Or choose Window > Layouts > Manage Layouts, or press Command-Shift-) on Mac, or Ctrl+) on Windows. This brings up the dialog you used to save layouts. You might want to use this option if you have saved several window layouts and forget exactly how they look.
There are three ways to choose a layout from this dialog:
- Double-click a layout to switch to it. On the Mac, double-click the thumbnail; on Windows, double-click the layout’s name.
- Select a layout and press Return.
- Select a layout and click Use.
If you make changes to a window layout and want to save the changes, select the layout, click …, then choose Update Selected Layout.
You can export and import window layouts if you want to share them, or if someone else has created a layout you want to use. From the … menu, choose Export Selected Layout or Import Layout. This will save or import a .scrlayout file.
Window layouts are a practical tool in Scrivener that lets you shift the way you look at a project, whether you’re planning, writing, revising, or editing. Learn how to use window layouts to simplify Scrivener’s display when you want to, and to show more details when you need to.
For more on window layouts, see section 12.3 of the Scrivener manual.
Kirk McElhearn is a writer, podcaster, and photographer. He is the author of Take Control of Scrivener, and host of the podcast Write Now with Scrivener.