

Learn how to use Scrivener’s find and replace feature with individual documents or your entire project.
As you progress in your project, you may need to find specific words or phrases. For example, you may want to find a specific section of your work to recall what a character did or said, and you may remember certain words that you can search for. Or, in a non-fiction book, you may want to find a specific date to check something. And, if you decide to change the name of a character, it’s easiest to do this in one operation, finding the original name and replacing it with the new name.
Like all word processors, Scrivener has a find and replace feature. Scrivener’s find options are powerful, and allow you to search for more than just isolated words and phrases. In this article, I’ll tell you how to leverage find and replace in your Scrivener projects.
Finding text
To find text, select a document in the Binder, then choose Edit > Find > Find, or press Command-F (Mac) or Ctrl+F (Windows). Enter a word or phrase, click Next, and Scrivener will highlight the next occurrence of the search text.
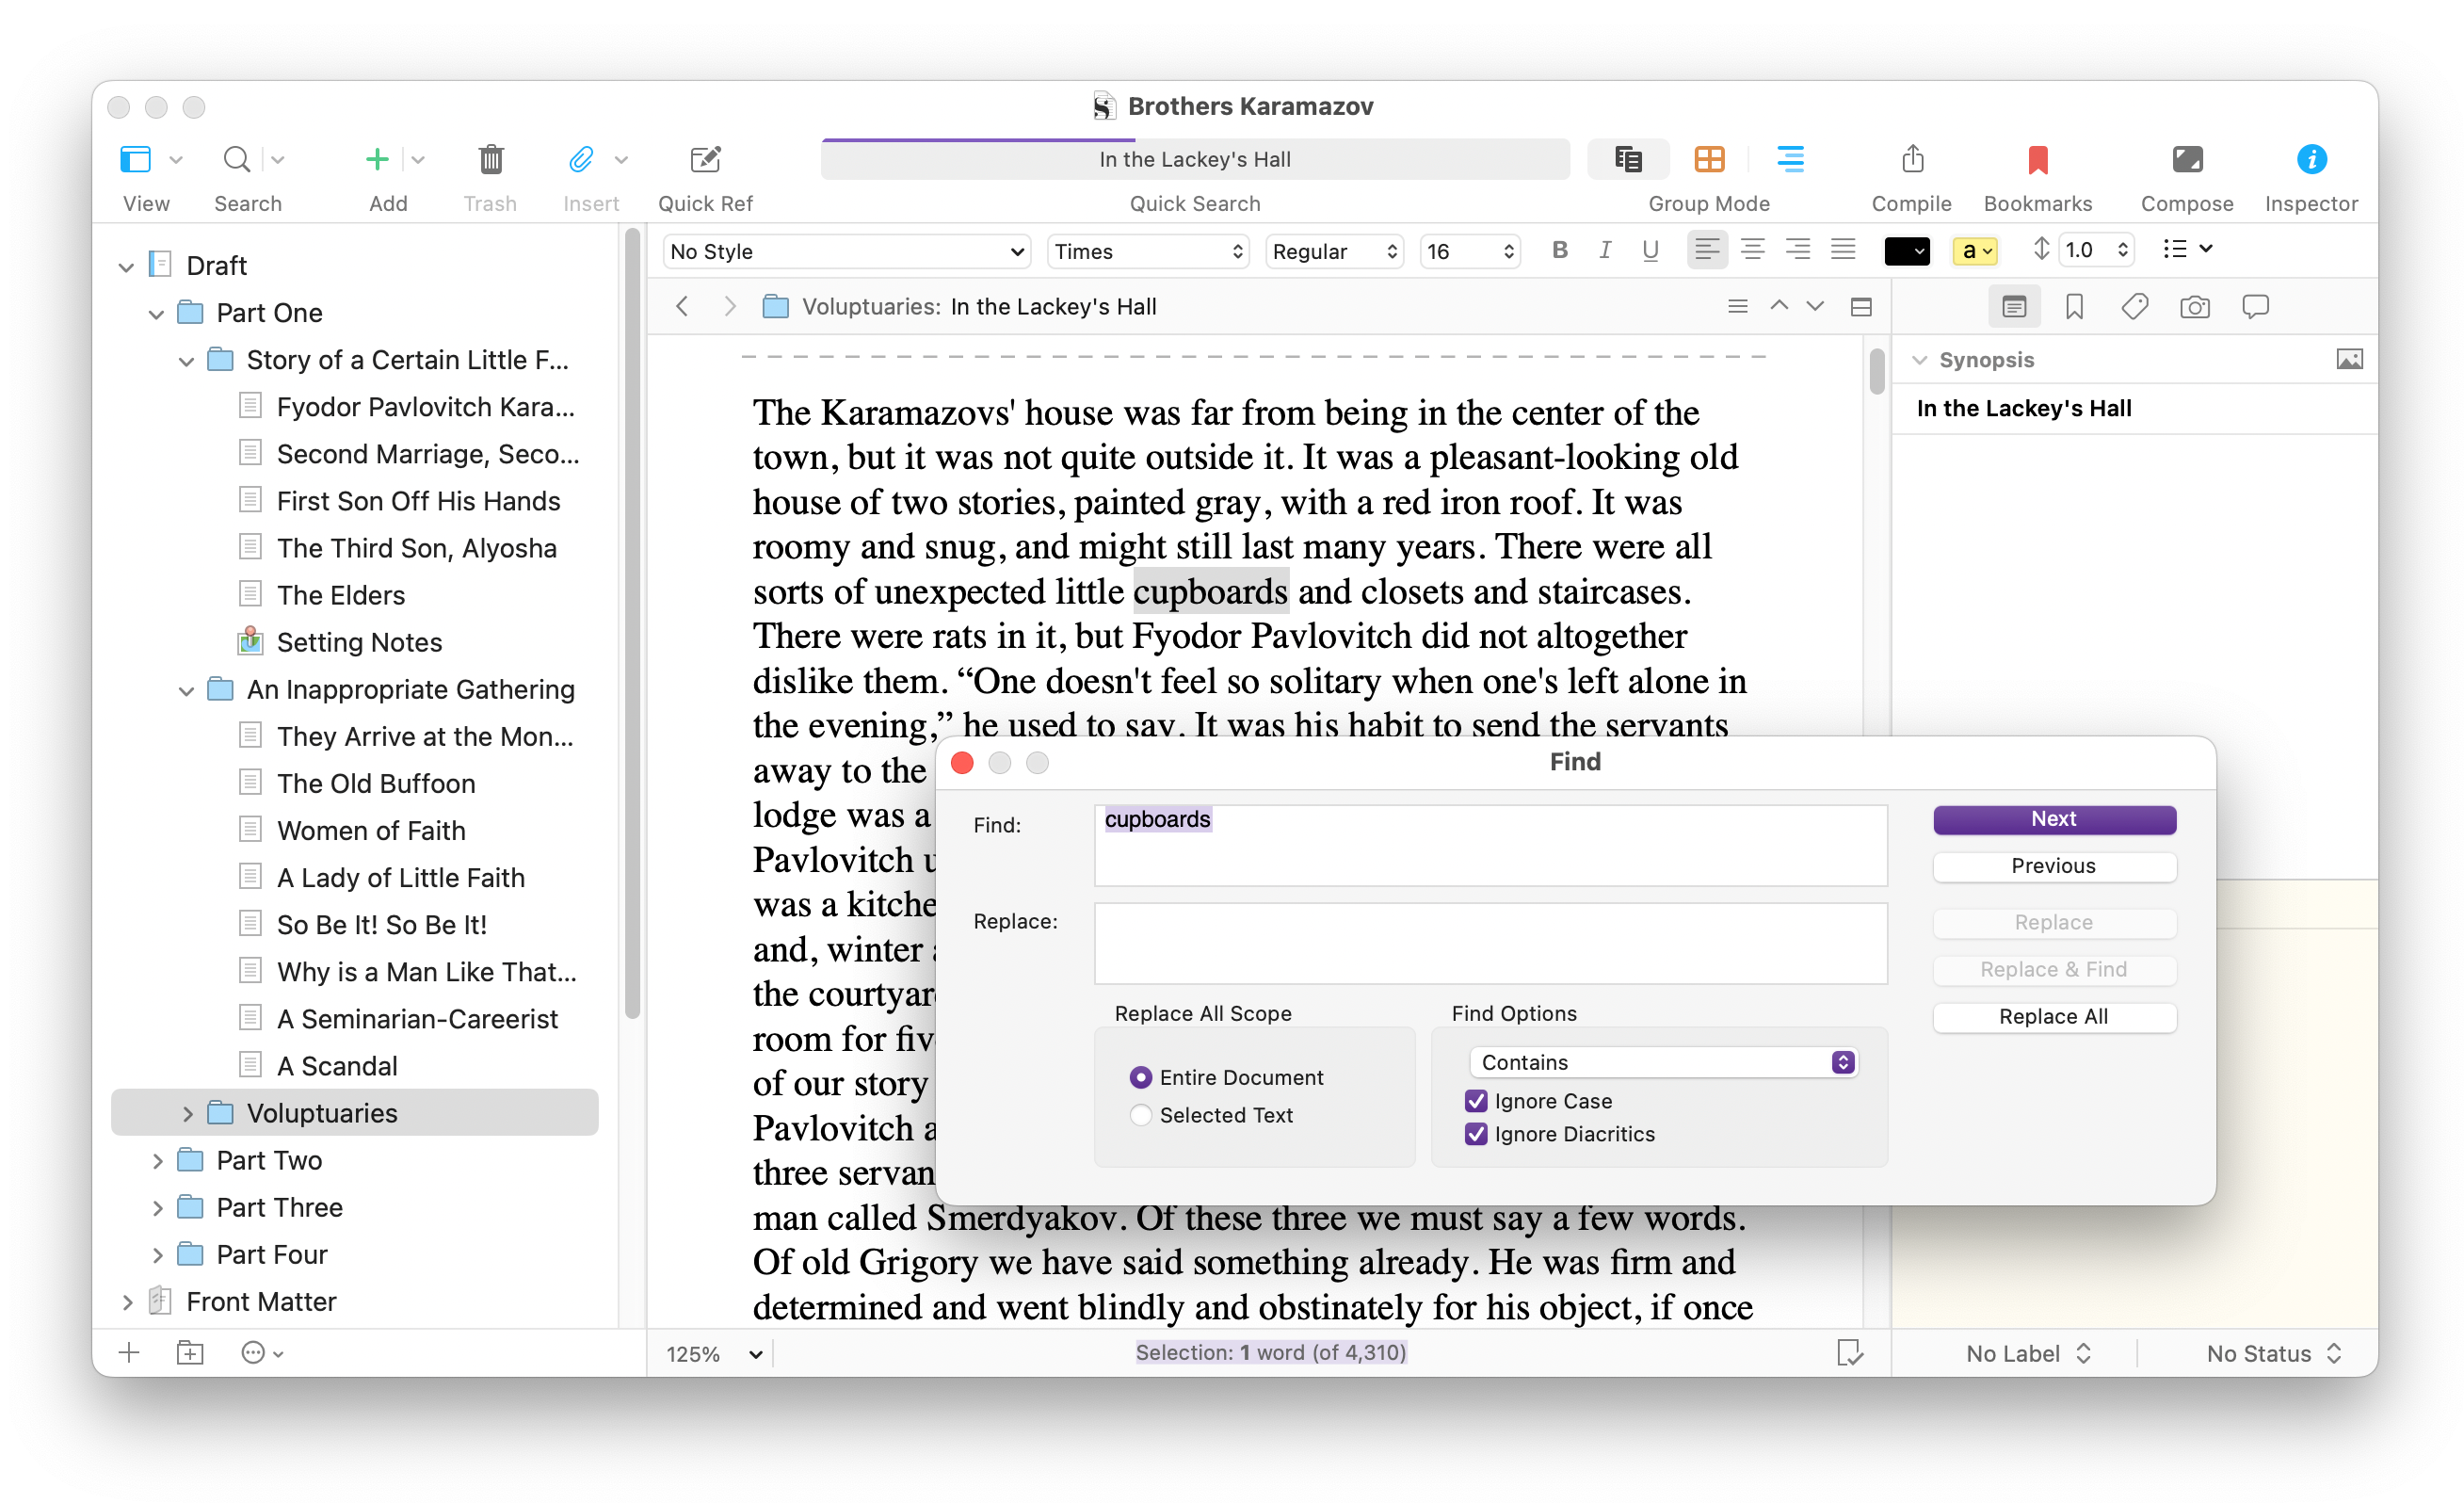
If your cursor is at the beginning of the document, Scrivener finds the first occurrence of the term in that document; if not, it finds the first occurrence from the position of the cursor. Click Next again to find the next occurrence, or click Previous to search in the other direction.
You can also use keyboard shortcuts to find the next and previous occurrences: Command-G (Mac) or F3 (Windows) for Next, and Command-Shift-G (Mac) or Shift+F3 (Windows) for Previous.
If you see the text you want to search for in a document, you can select it, then press Command-E (Mac) or Ctrl-E (Windows), and Scrivener fills the Find field of the search box with that text. This means that you can search for text without even using the Find/Replace dialog. Select some text, press Command-E or Ctrl+E, then use the Next and Previous keyboard shortcuts, mentioned above, to go through your document.
Note that you can also find and replace text on more than one just document by selecting multiple documents in the Binder, or by using Scrivenings Mode to search all the documents in a folder, or your entire draft. See View and Edit Multiple Documents with Scrivenings for more on using this mode.
Refining your searches
Scrivener’s find and replace feature allows you to refine your searches.
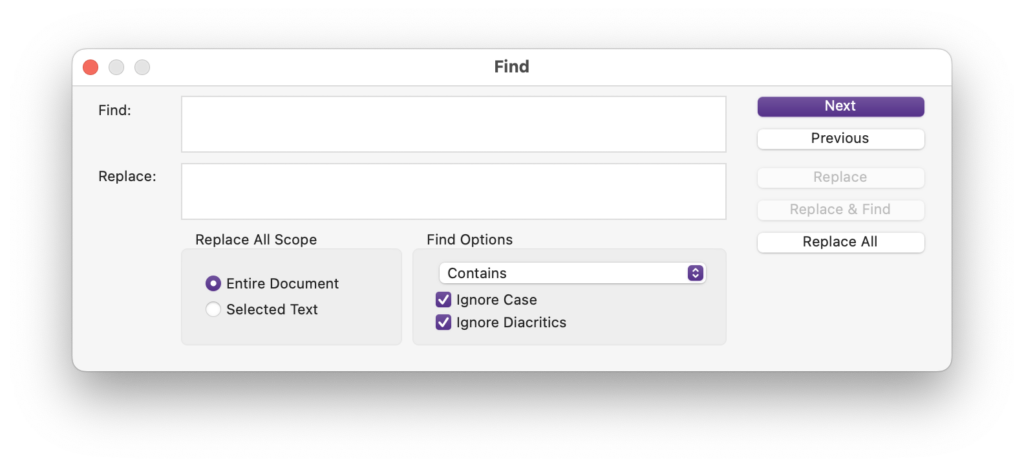
Find options let you ignore case (Scrivener finds texts with upper and lower case characters) and ignore diacritics (Scrivener searches for characters ignoring their accents, so words with e, é, è, and ë will all be found if you search for a word containing e).
The Find Options pop-up menu gives you more options. By default, this is set to Contains, so if you search for “the,” Scrivener will find words like the, these, father, and together. You can choose Starts With (the search string must be at the beginning of the word), Whole Word (Scrivener searches for the exact text string), or Ends With (Scrivener finds words where the text string is at the end).
There is also an option to use Regular Expressions or RegEx. If you know what this means, then you know how amazing this form of search can be. Regular Expressions are a type of search where you use variables to search for text, and are often used for complex searches of code or of databases.
One simple example is a search like this: say|says|said, which finds any of the strings separated by the | pipe character; in this case, the three variance of the word “say.” Or, this search will find the whole words “go” or “went”: \bgo\b|\bwent\b.
This Wikipedia article discusses regular expressions, and many books have been written about using regular expressions.
Replacing text
If you want to search for a word or phrase and replace it with another, you can do that by entering text in both the Find and Replace fields of the search box. When you click Find, you can then click Replace, to replace that instance of the search text; Replace & Find, to replace the text and move to the next occurrence; or Replace All, to replace all occurrences of the search text.
You can adjust the Replace All Scope; you can select the Entire Document, or just the Selected Text. In the latter case, select some text before searching, and Scrivener only makes replacements in that selection.
Finding and replacing texts throughout your project
There are other types of search in Scrivener projects, and we’ll cover them in other articles, but there’s one more useful feature to discuss here. You can find and replace texts throughout your project; not only in all its text files, but also in other elements. This is especially useful if you decide to change the name of a character or place in a novel, or change other specific terminology that appears often in your work. Choose Edit > Find > Project Replace… This dialog displays.
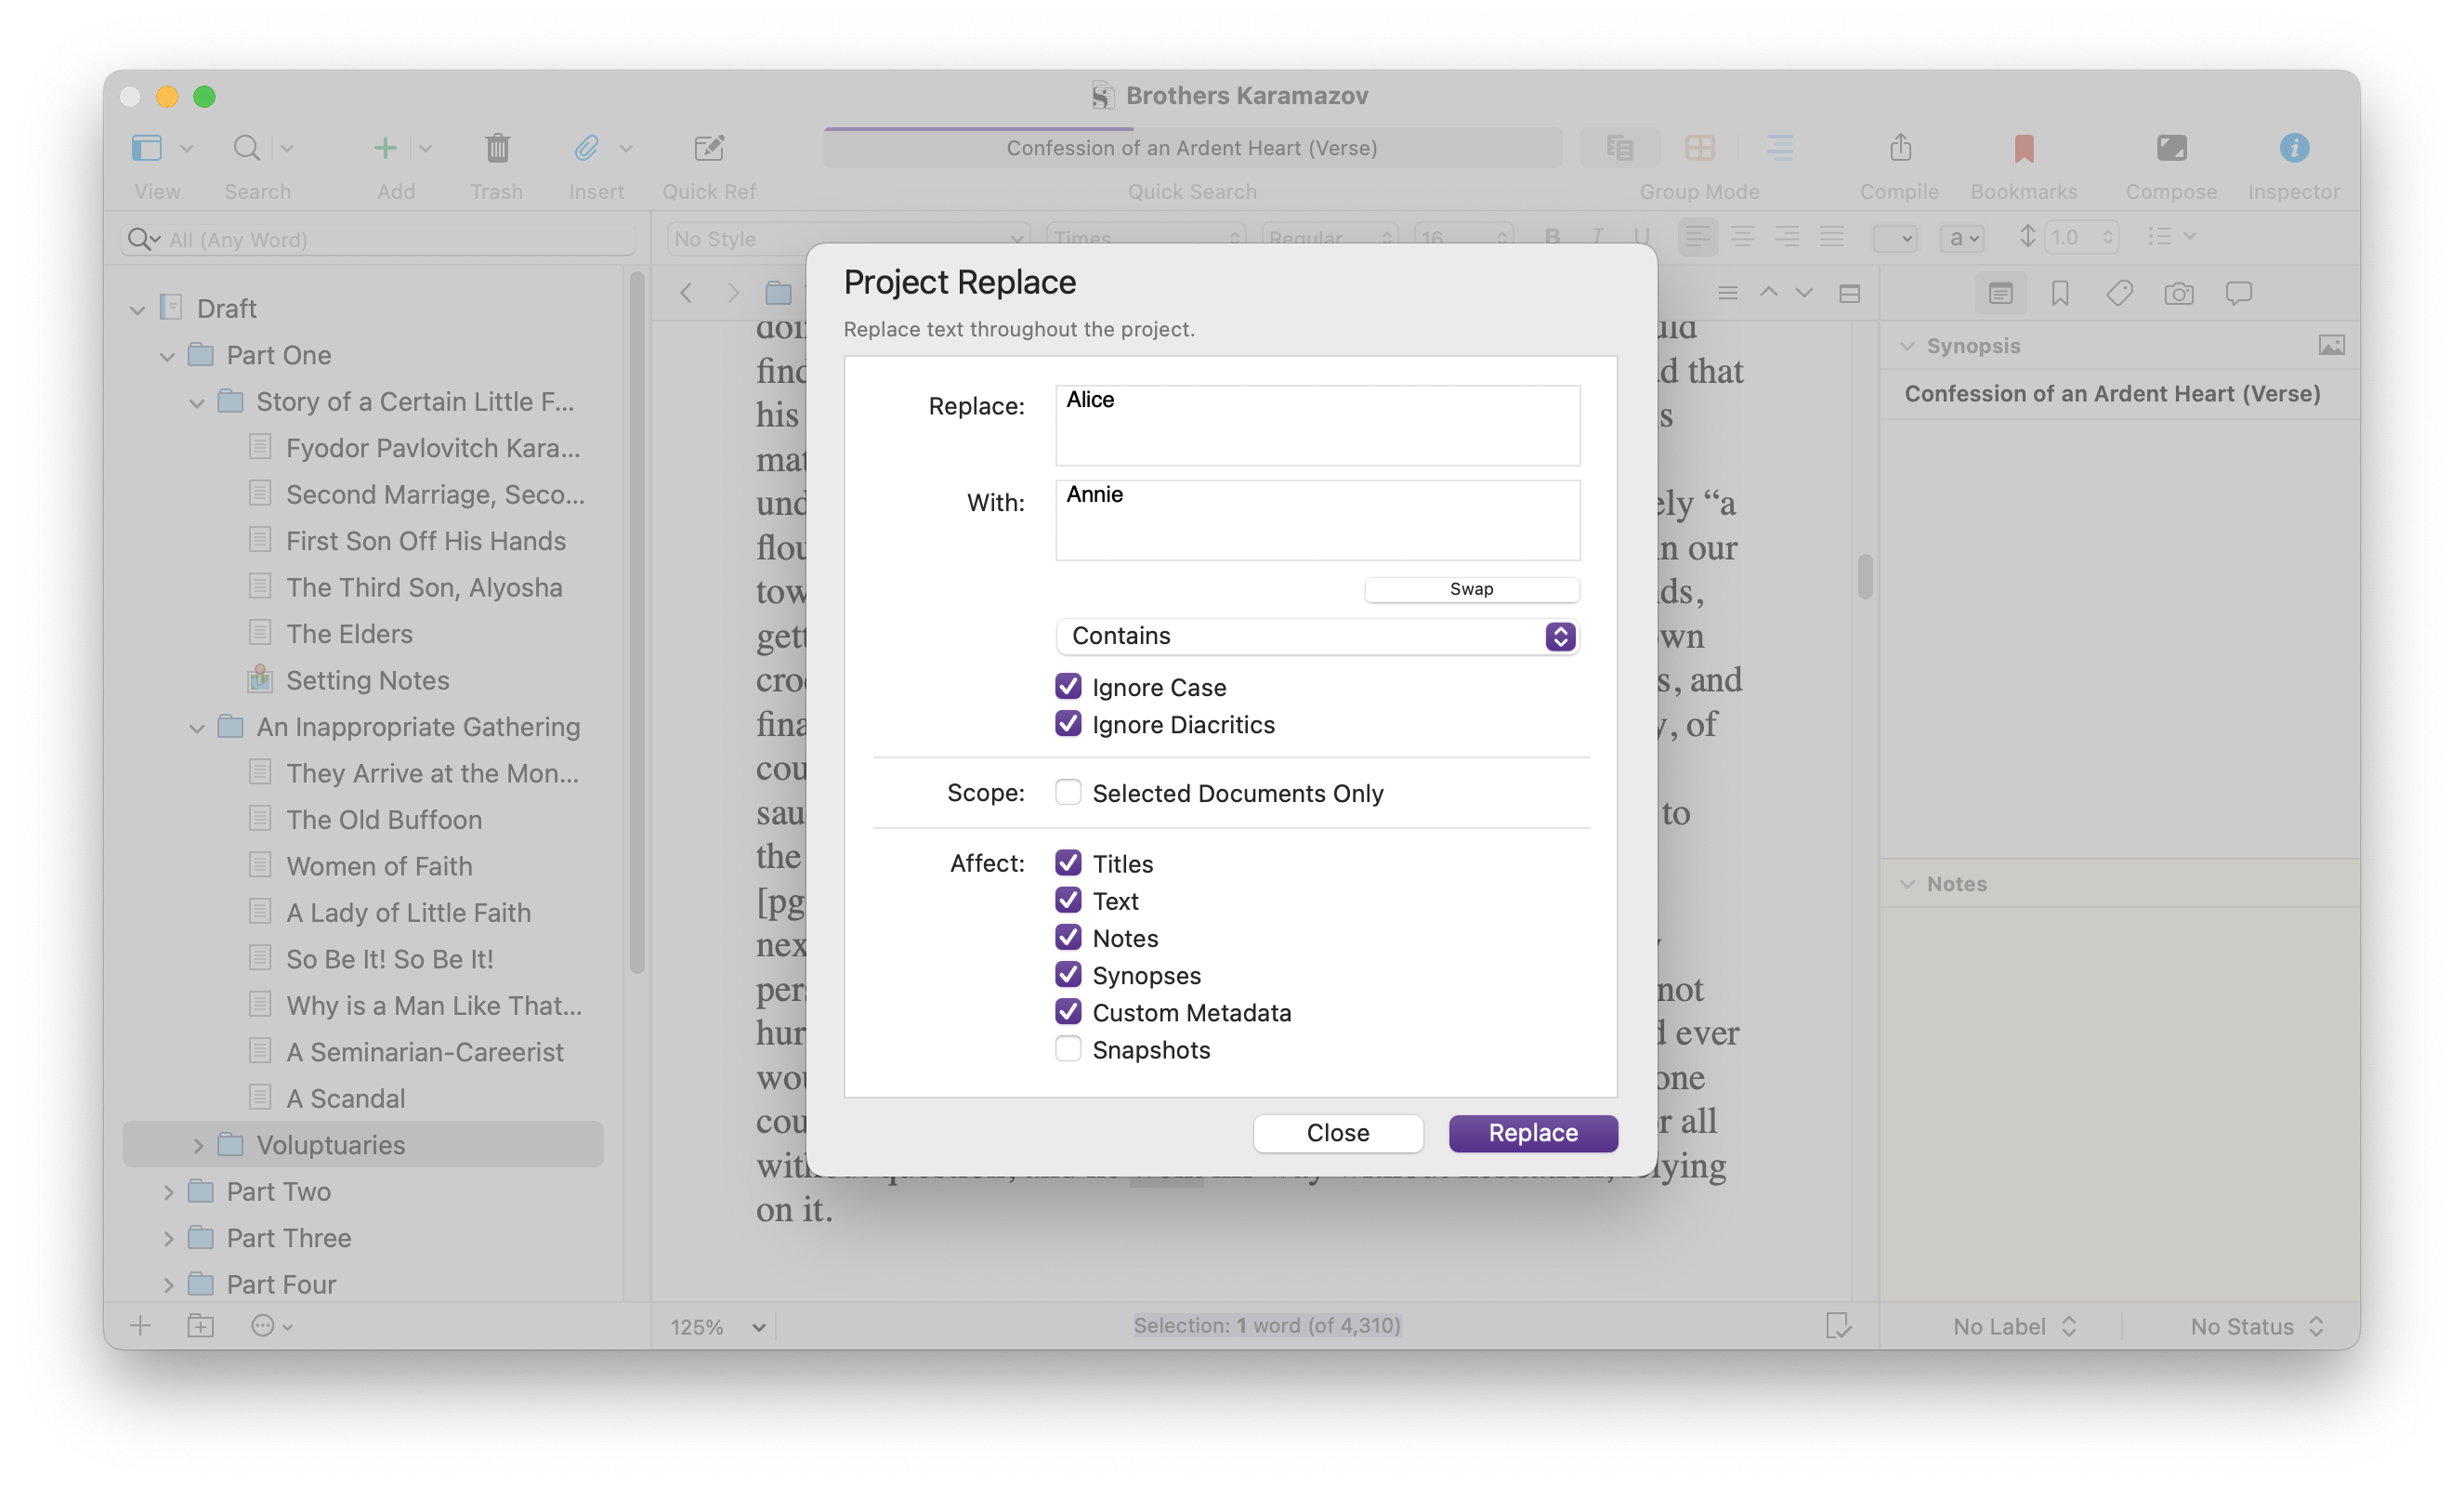
As you can see, this offers many of the search refinements in the standard Find dialog, but also allows you to choose more than just Binder documents. You can use it to find and replace texts in titles, texts, notes, synopses, custom metadata, and snapshots (though this is unchecked by default, because snapshots are previous versions where you might not want to make changes).
Note that when you use the standard Find dialog, you can undo changes you have made, but when you use Project Replace, you cannot do this. It’s a good idea to back up your Scrivener project before launching replacements like this. See How to Back Up Your Scrivener Projects for more on backing up your projects.
Kirk McElhearn is a writer, podcaster, and photographer. He is the author of Take Control of Scrivener, and host of the podcast Write Now with Scrivener.