

Scrivener lets you create internal links from specific words or phrases to documents in the Binder. These can be useful if you have a large, complex project.
The Scrivener Binder is where you organize your writing projects: it contains folders, files, research documents, character sketches, and more. For some projects, the Binder can contain hundreds of documents, making it difficult to navigate.
It can be useful in large projects to be able to quickly access certain files, especially for research documents. You can create links from your texts to specific documents in your Scrivener project, and, as you write, revise, and edit, you can click these links to jump to other documents to check their contents.
In this article, we’ll explain how to use internal links, and we’ll look at two types of internal links you can use in Scrivener projects: hyperlinks and wikilinks.
What are hyperlinks and Wikilinks?
Hyperlinks are similar to what you see on websites, where some underlined text links to other web pages or websites. In Scrivener, these hyperlinks can link to any file in your Scrivener project. When you click an internal hyperlink, Scrivener opens the linked document in the Editor splitting the editor to show the document with the link you clicked, and the linked document.
Note: See More of Your Project: Splitting the Scrivener Editor explains how to work with splits in the Binder. And you can change how Scrivener opens links in the Settings or Options: Click Behaviors, then click Document Links in the sidebar to choose how Scrivener opens links.
Wikilinks are similar to hyperlinks; they are like links on Wikipedia. When you create them, they either link to existing pages or create new pages if none exist. Wikilinks are a great way to build files in your project, as well as to quickly link to existing files.
Note: If you want to link to files on your computer that are not in your Scrivener project, you can use bookmarks to do this.
How to use hyperlinks in Scrivener projects
If you select some text, then right-click or Control-click the selected text, you can choose Link to Document from the contextual menu. This displays a sub-menu showing the contents of your Binder, with sub-sub-menus for your entire draft, Characters and Places folders, and other folders such as Research, Front Matter, etc. Choose one of these items to create a hyperlink.
You’ll notice that in the screenshot below, at the top of the Link to Document sub-menu, Scrivener is suggesting the Bob document. This is because, after the name Bob is selected in the Editor, Scrivener found a file with the exact same name. (Scrivener will also display any bookmarks you’ve created in the Suggested section of the menu.)
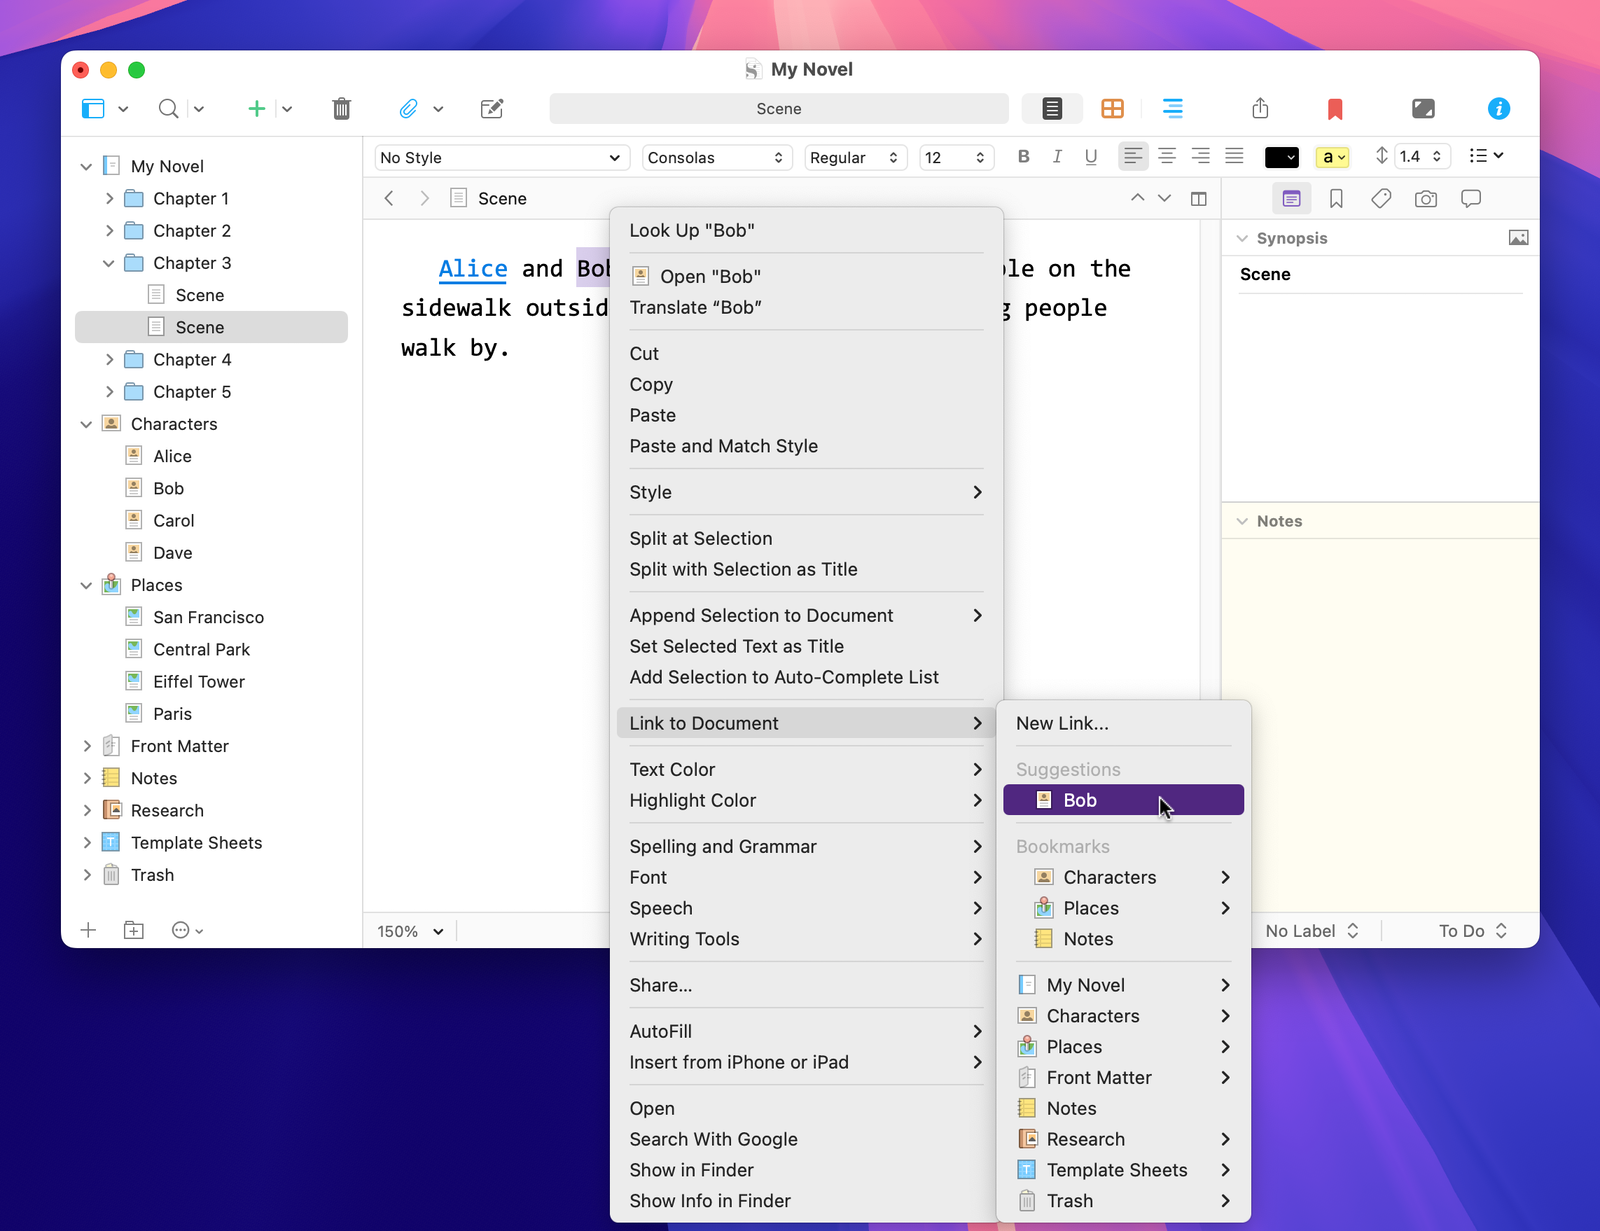
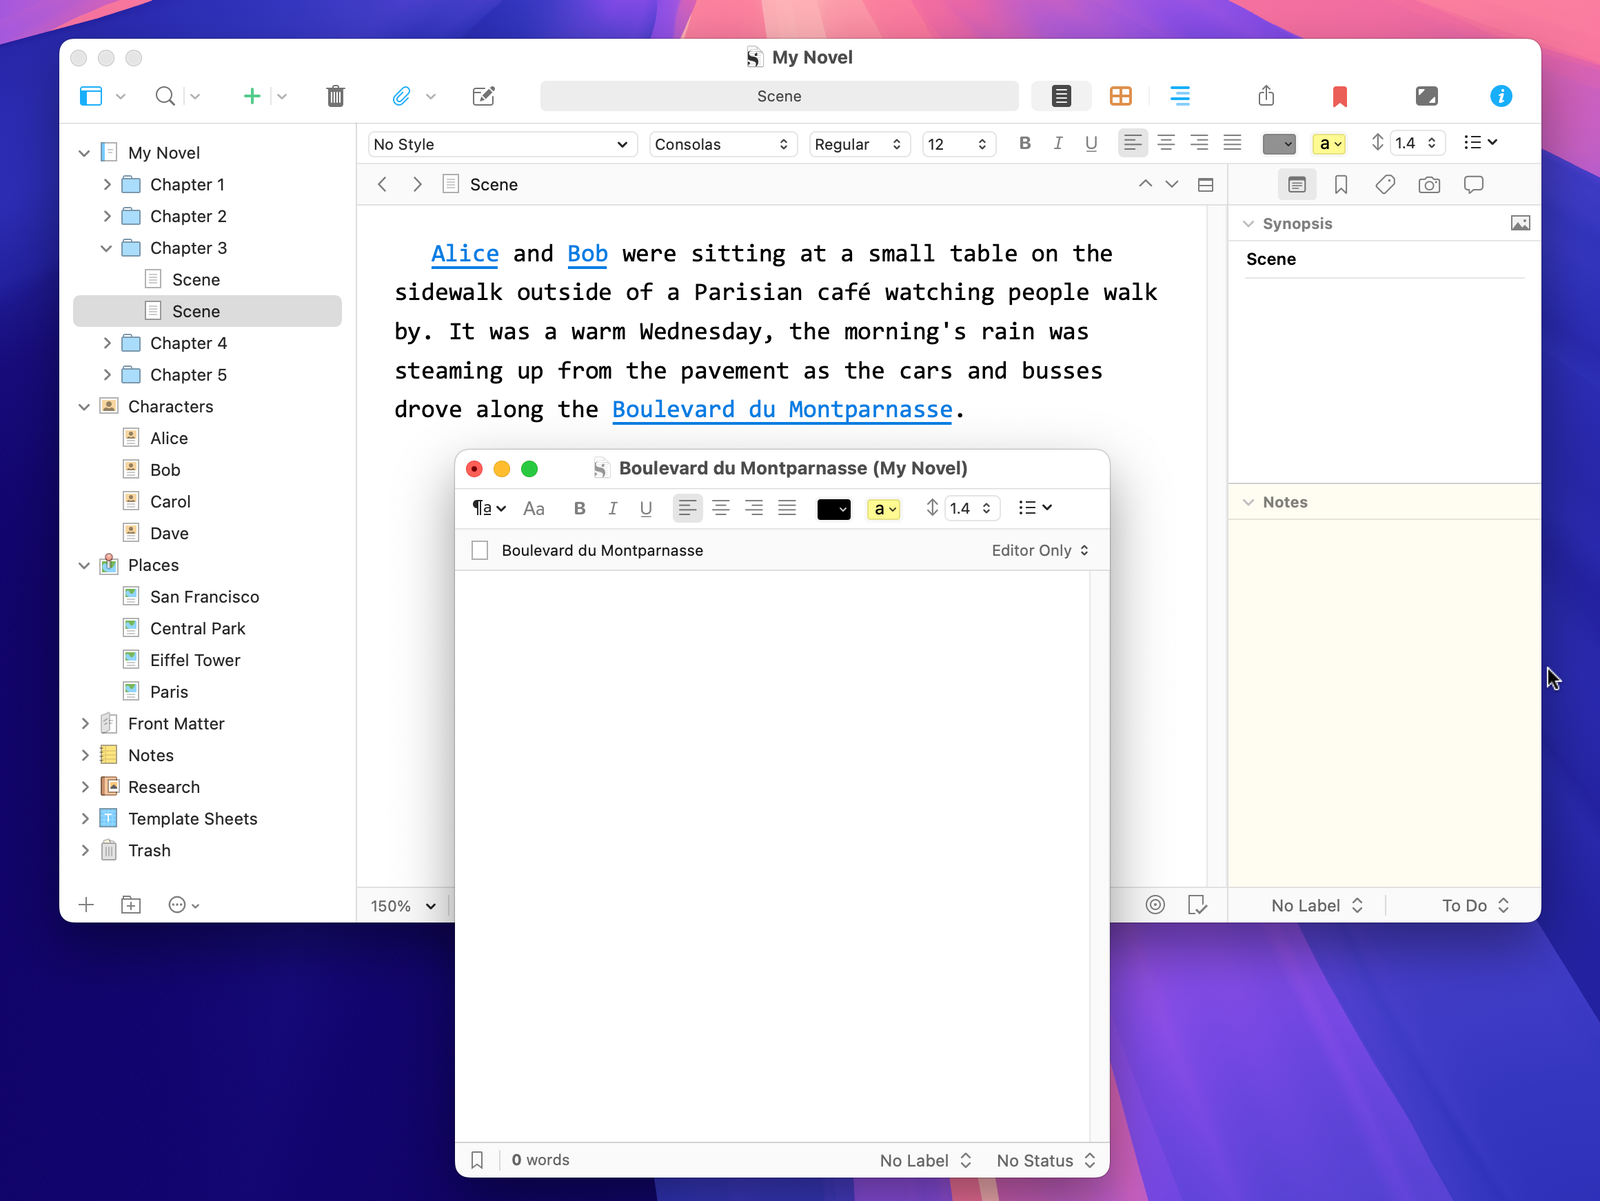
To the left, you see that Alice is underlined; that’s because I have already created a link to her character sketch.
The text in the Editor reads:
Alice and Bob were sitting at a small table on the sidewalk outside of a Parisian café watching people walk by.
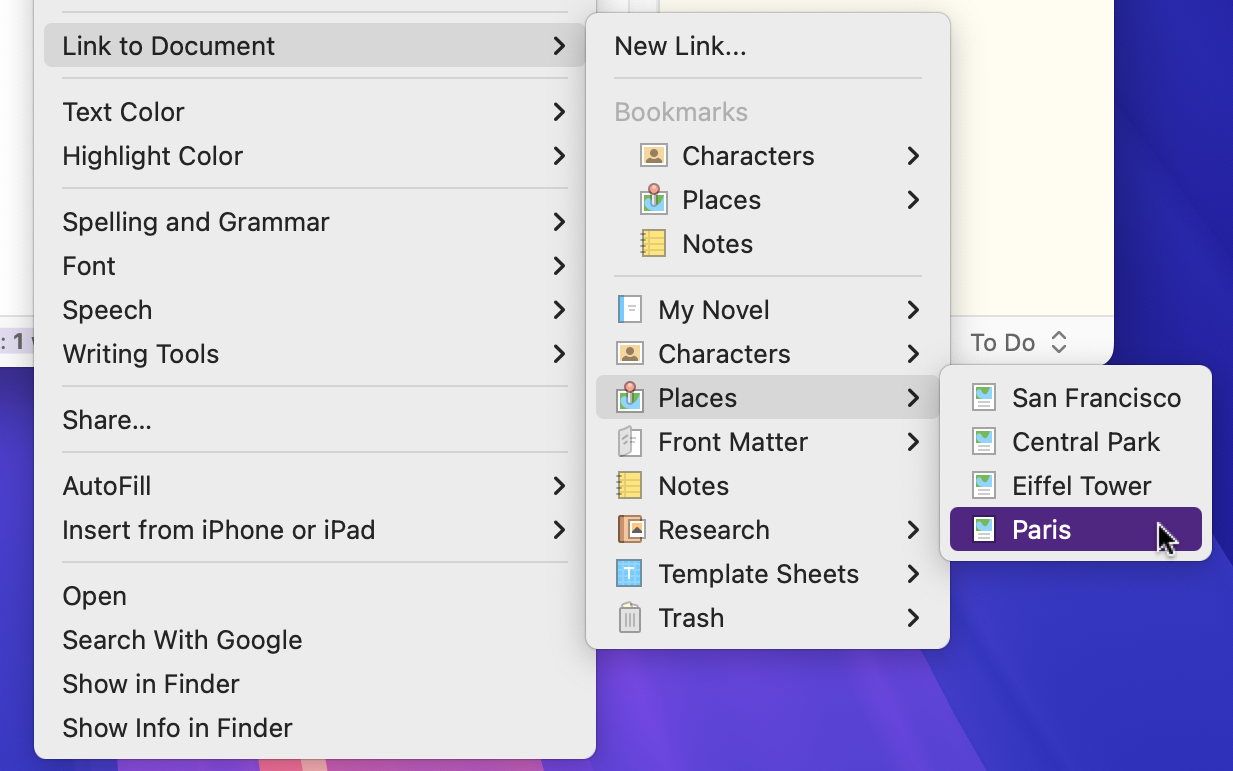
If I select the word Parisian, and right-click, Scrivener doesn’t suggest the Paris document in my Places folder, because the name doesn’t match exactly. So I can just select that file to create the link.
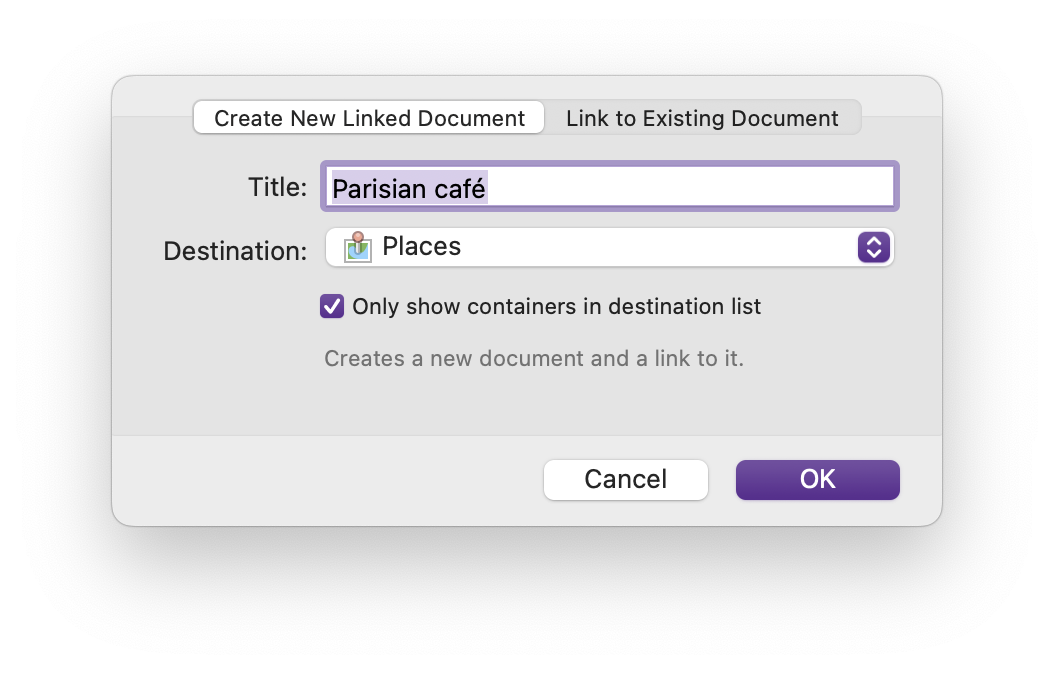
Perhaps I want to have settings sketches in my project for both Paris, the city, and the Parisian café, but the latter file doesn’t exist yet. Select that text, right-click, then choose Link to Document > New Link. A dialog displays allowing me to create a new document with the name of the selected text, and choose its destination folder.
I could also click the Link to Existing Document tab to choose a document in any other folder; this is similar to choosing a document from one of the sub-menus you see in the first two screenshots.
Note: you can also select text, then choose Edit > Link to Document to access perform these operations.
If you want to link to a website, select some text, then choose Edit > Add Link, click Web, then paste the link into the dialog.
You’re not limited to creating links in the Editor. You can also create links in the Notes pane of the Inspector of any document, allowing you to easily access certain files when you’re viewing a specific document. Or you could create a file containing nothing but links in your Research folder, or in any other folder.
How to use wikilinks in Scrivener projects
As I mentioned above, the main difference between hyperlinks and wikilinks is that the latter automatically create files when you type the special characters that build these links. To enable wikilinks, go to Settings or Options, then click the Corrections tab and enable Automatically Detect [[document links]].
To create a wikilink, type two left square brackets [[, then type some text, then two right square brackets ]]. You can also type the brackets around existing text. When you do this, Scrivener recognizes the brackets – even if there is a lot of text between them – and displays a dialog:
This dialog is similar to the one you see when creating a hyperlink, and it offers to create a new document or to link to an existing document. If you create a new document, that file opens immediately in a Quick Reference Panel where you can start writing, or close the document if you don’t want to fill it in right away.
Hyperlinks and wikilinks display the same in the Editor, as you can see above; they are both underlined. The only difference between the two is the way you create them.
Changing link display
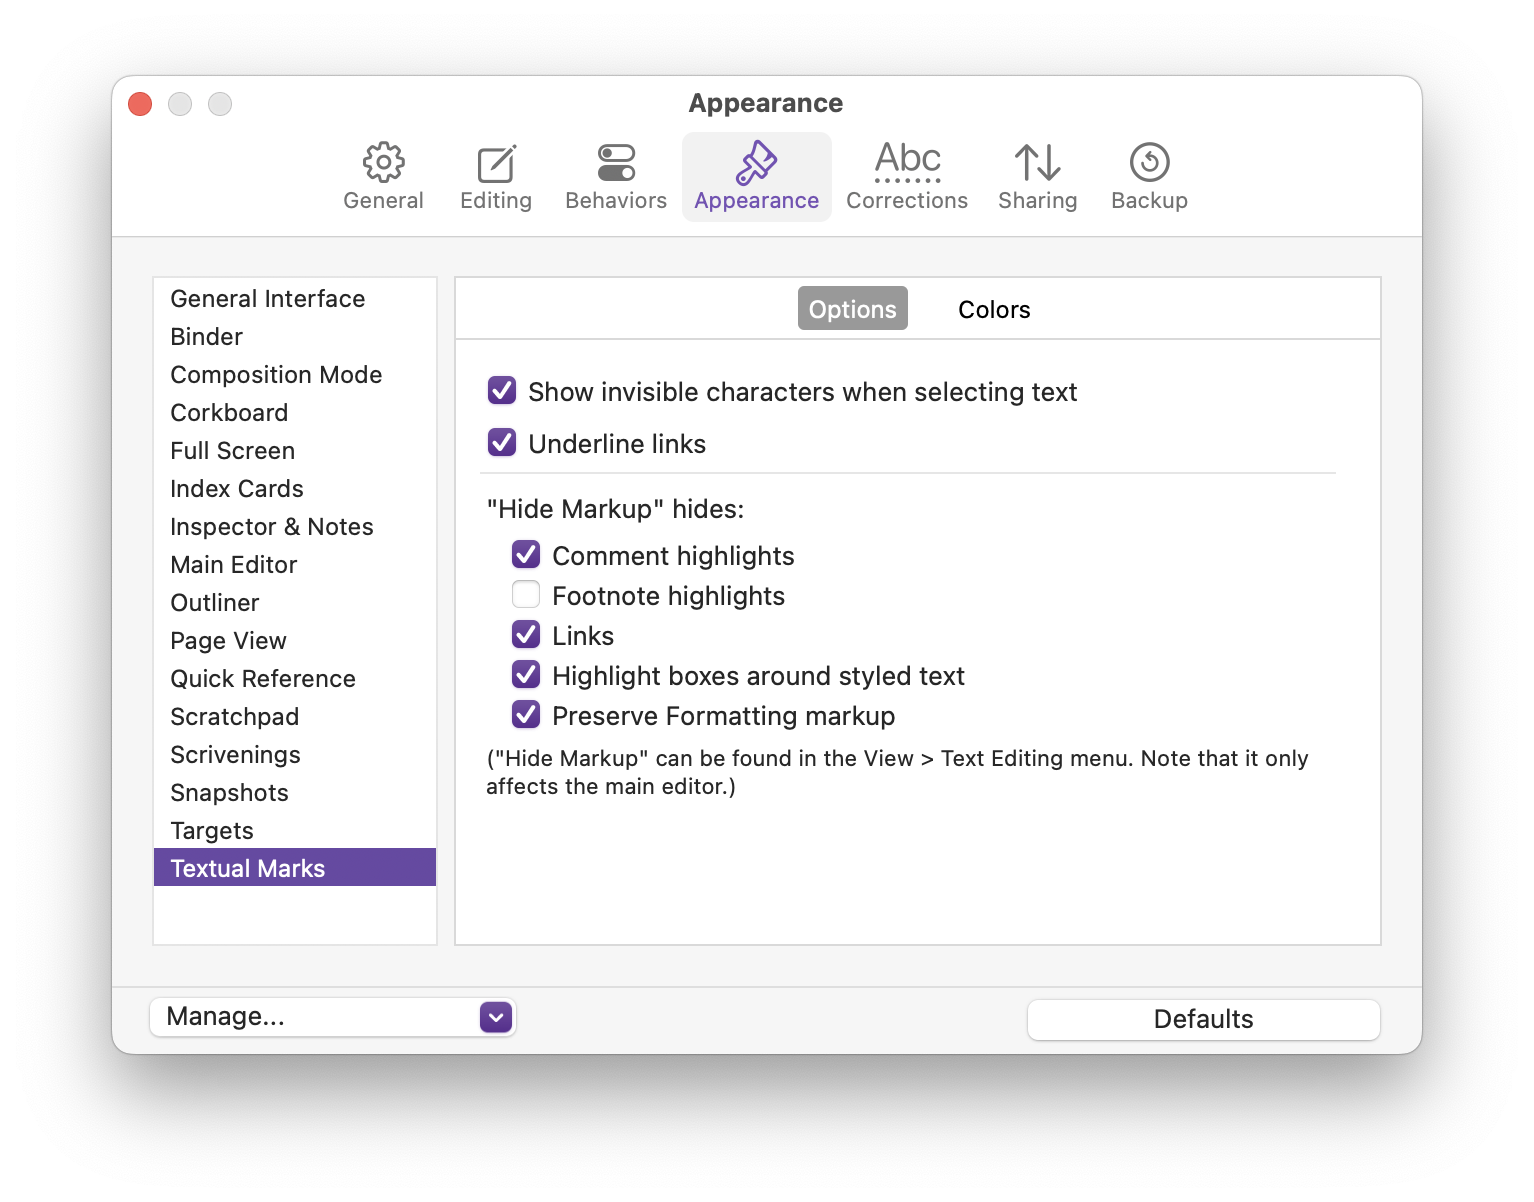
By default, Scrivener displays links underlined and in blue. You can change this is Scrivener’s Settings or Options. Click the Appearance tab, then click Textual Marks in the sidebar. If you uncheck Underline Links, they will display in color without underlines. If you click the Color tab of this pane, then click Links, you can change the color that Scrivener uses for links. It’s probably not a good idea to change this to black if you turn off underlining, because then you won’t see links.
Editing and removing links
If you want to change the target of a link – the document it links to – you can right-click the link text and choose Edit Link. This lets you choose a new target.
To remove a link, right-click it and choose Remove Link. This doesn’t delete the text.
You may have created links and decided to change their targets; for example, if you have linked to a character name Alice, and you decide to change her name to Ann. Or if you move the setting for your novel from Paris to Lyon, you may have renamed your setting sketch.
Scrivener remembers not just the visible text of a link, but also the path to the target document, as with HTML web pages. If you want to update link targets, choose Edit > Text Tidying > Update Document Links to Use Target Titles, and Scrivener will update the paths in links to the new targets. Scrivener will also remove any links if the target documents no longer exist.
As you work, you can build links throughout your project. You don’t want to have each mention of a character’s name or a setting link to documents, but it’s useful to include them in sections where you know you’ll want to refer to other documents. This is especially the case when working on a non-fiction project, where you may want to refer back to source material as you write and edit.
You can do a lot more with links: see chapter 10.1, Linking Documents Together, of the Scrivener manual for more information.
Kirk McElhearn is a writer, podcaster, and photographer. He is the author of Take Control of Scrivener, and host of the podcast Write Now with Scrivener.