

Scrivener lets you customize colors and fonts for much of its interface and save them as themes, to load when you want or share with others.
Modern operating systems are designed to be unobtrusive, almost bland, so they are not distracting. For some users, this is what software should be: a tool that doesn’t draw attention to itself. However other users may want to modify the appearance of their software so it has a distinctive look.
You can tweak the fonts and colors of Scrivener’s interfaces and save these settings as themes. In this article, we’ll show you how you can choose from the default themes available with Scrivener, where you can download more themes, and how to make your own.
Why themes?
Most users are happy with the way the software looks, but some people would like to change it. Maybe you’re tired of the boring white and gray interface elements of macOS or Microsoft Windows. Maybe you’re writing something where having some bright colors might inspire you. Maybe you don’t see well with the default colors and want to change to something with more contrast. Or perhaps you’d prefer different fonts in the interface, or even just different sizes for the fonts.
All of these are valid reasons to use themes in Scrivener. Changing the theme may be, for some users, practical, and for other users whimsical.
Note: the process of working with themes is similar to that of saving preferences and options as presets, as discussed in Saving and Sharing Scrivener Preferences and Options.
Light and dark mode
In recent years, it has become common on both desktop and mobile operating systems to offer a light mode and a dark mode. Light mode is the default, the way operating systems have looked for a long time, and dark mode is designed for people who want to use their devices in low light, or who just like the contrast of white text on a dark background.
You can switch between Scrivener’s built-in light and dark modes by choosing Scrivener > Appearance (Mac) or Window > Themes (Windows). If you choose System Default or Default from that menu, Scrivener will automatically display light or dark mode to match your current operating system settings.
To set Scrivener to dark mode when your system is light, choose Dark Mode from the Appearance submenu (Mac) or the Themes submenu (Windows). On Mac, choosing a theme causes Scrivener to change its look immediately. Themes only apply on Windows after you quit and relaunch the app.
If Keep Main Editors Light is selected at the bottom of this menu (Mac only), the Editor, where you type your text, remains light while the rest of the interface darkens. Disable this setting to darken the Editor as well.
Switching modes this way gives you an idea of what you can change in the Scrivener interface: just about everything.
Going further with Scrivener themes
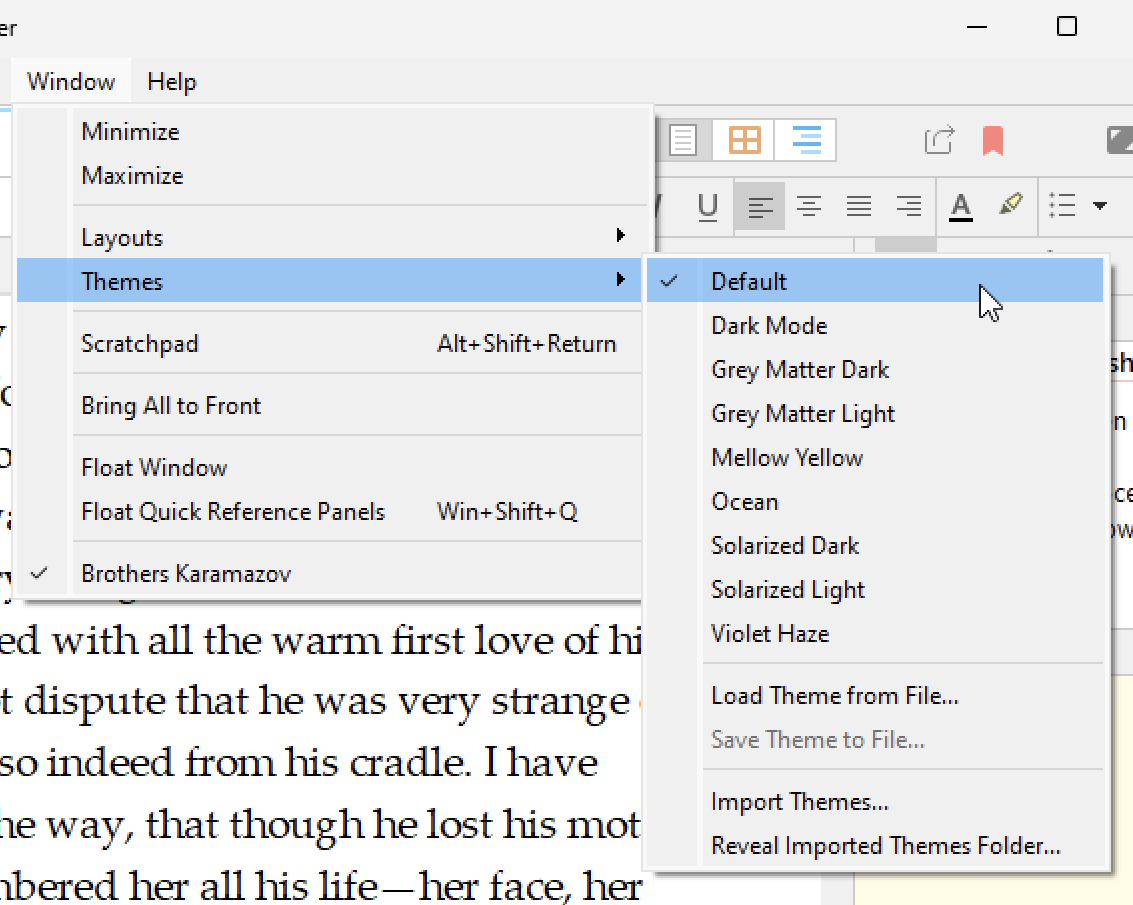
Scrivener lets you choose more than just light and dark mode. By default, there are five themes available from the Scrivener > Themes submenu on Mac, and nine on Window > Themes submenu on Windows:
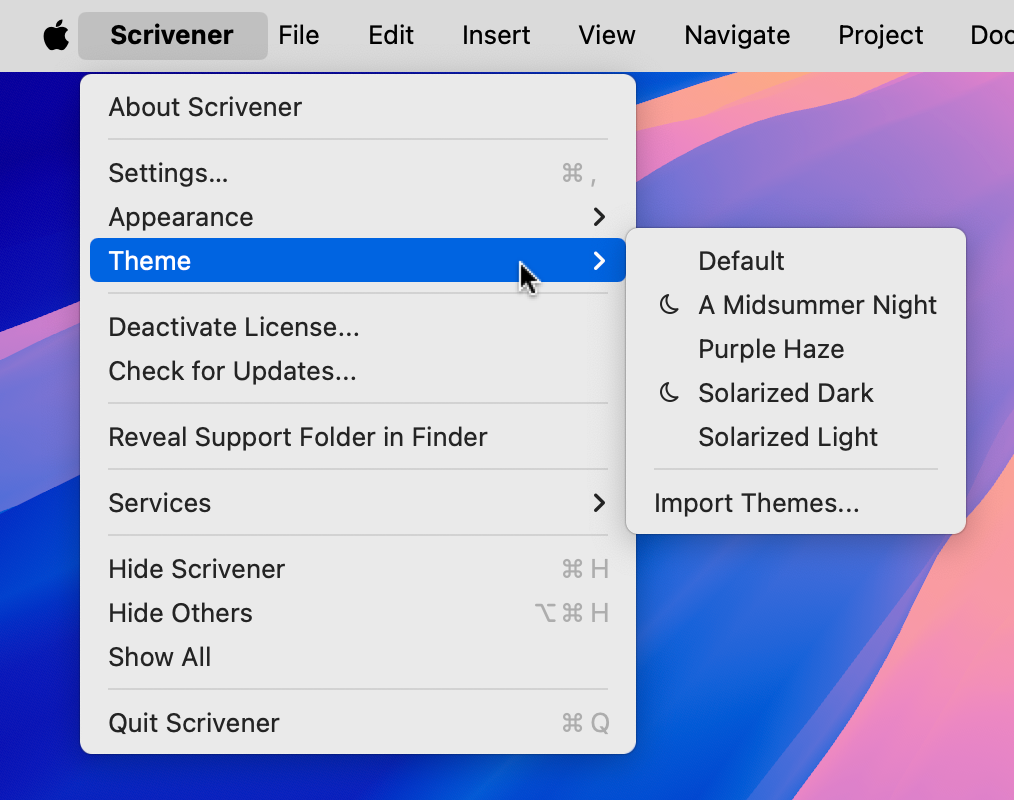
The themes with the crescent moon symbols before their names are dark themes. The first, A Midsummer Night, is the default dark mode theme you saw above. The Solarized Dark theme is similar but has blue-greenish colors in the Binder and Inspector. Purple Haze and Solarized Light are variants of the default light theme.
On Windows, dark themes have the word "dark" in them.
You can also create your own themes. If you go to Scrivener > Settings > Appearance (Mac) or File > Options > Appearance (Windows), you’ll see that many of the options in the sidebar show a Colors tab when you click them.
For example, let’s say you want to change the color of the Binder background. Click Binder in the sidebar, then click Colors. Click the color swatch, use the color picker to choose your color, and use the Opacity slider to determine how saturated you want the color to be.
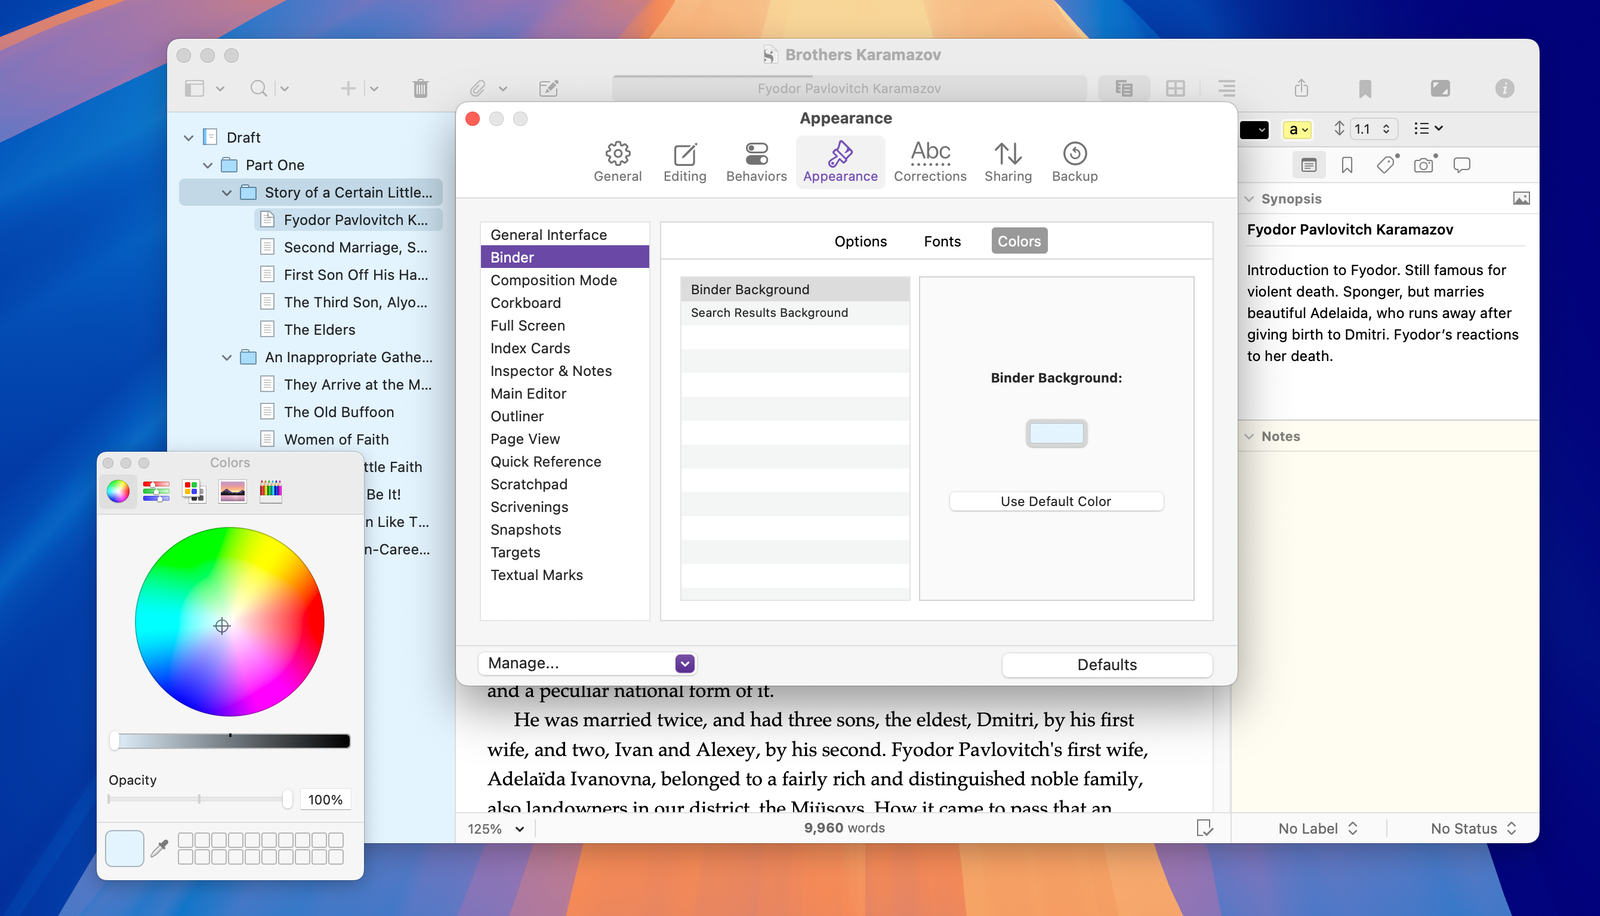
You can repeat this for many of the other interface elements: the Corkboard, Index Card background, the Main Editor, Outliner, Scratchpad, and more. Note that you can always reset colors by clicking Use Default Color for each interface element.
In the Fonts tab for each element, you can also choose a different font if you don’t like the default. This is especially useful if you want to change the size of fonts for some interface elements.
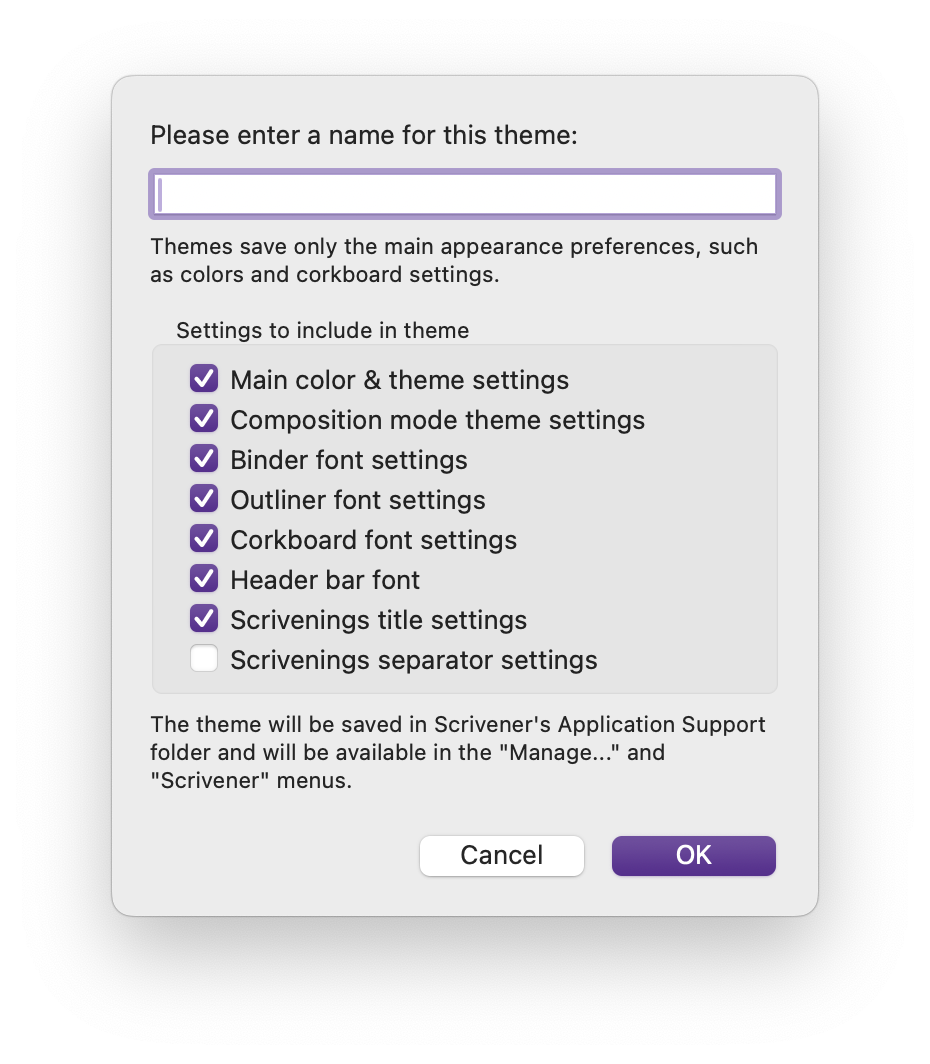
If you want to save these settings, so you can switch to them when you want, click the Manage menu at the bottom of the window and choose Save Theme. Scrivener asks you to choose a name for the theme and also lets you choose which settings are included in the theme. When you save a theme, you’ll be able to access it from the Manage menu in the Appearance settings, as well as from the Scrivener > Themes or Window > Themes sub-menu.
Installing themes
It can be a lot of work to create themes. You might want to start by checking out what Scrivener users have made. There are two threads in the Scrivener forum, one with themes for Mac and one with themes for Windows; each one contains links to download user-created themes. You can install any of these themes from the Manage menu in the settings; just choose Load Theme from File, select the theme file, and it will be available to you as the other themes are. These themes can give you ideas of what is possible; you might want to download a theme and alter it a bit to match your preferences.
You can also share themes you create by choosing Save Theme to File from the Manage menu. You can send them to other Scrivener users, or load them on a second computer that you use.
For more on Scrivener themes, see sub-section B.1.1 at the end of the Scrivener manual.
Themes are a great way of customizing Scrivener’s interface, making it yours. Whether you want to change colors or fonts, you can customize many elements of the Scrivener interface and save the settings to use when you want.
Kirk McElhearn is a writer, podcaster, and photographer. He is the author of Take Control of Scrivener, and host of the podcast Write Now with Scrivener.