

Scrivener’s Project Search lets you search for specific terms anywhere in your project: in files, synopses, notes, and more.
One of the basic features of any word processor or text editor is the find and replace feature. It allows you to search for something in a long document, or to replace words that you discovered that you have misspelled. When writing fiction, you might use the find/replace feature to change a character’s name, or change the name of the location.
Scrivener’s find/replace feature works like that of any other text tool: it allows you to search for and replace text in a file that you are viewing. In Find and Replace Text in Your Scrivener Projects, we look at how to use that feature.
Scrivener has another search feature, called Project Search. This expands the scope of the search feature to every item in your project. Here’s how to use Scrivener’s Project Search.
What is Project Search?
On a basic level, the main difference between the normal find feature and Scrivener’s Project Search is their scope. When you search for text using the standard Find dialogue, you search in the file that you are viewing. When you use Project Search, you search the entire project: every file in your Binder, Research folder, character and setting sketches, and anything else in the project. Find/replace also lets you replace words or text strings en masse; with Project Search, you make changes individually.
Project Search works in the Binder, and search results display in the sidebar, which means you have full access to the same document management tools you use in the Binder.
Think of a Project Search as a sort of filter, such as what is common in email apps. Rather than presenting search results like the Find/Replace dialog, which shows you one result, and allows you to step through the results by clicking a Next button, it shows all the files that contain your search terms, allowing you to explore them.
Scrivener’s Project Search is especially practical when you’re revising and editing a manuscript and you need to normalize or change names or other terms used.
How to use Project Search
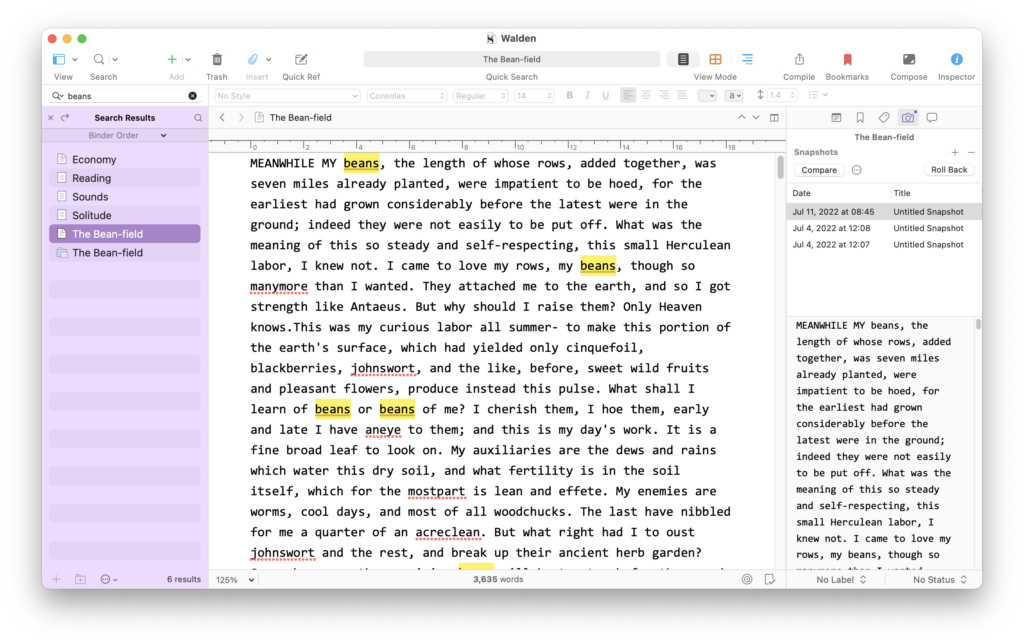
To perform a Project Search, click the magnifying glass icon above the Binder, or choose Edit > Find > Search in Project. You can also press Command-Shift-F (Mac), or press Ctrl+Shift+F (Windows) to enable Project Search. When you do this, a search field displays above the Binder.
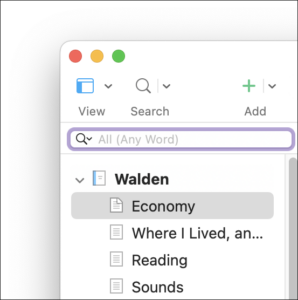
The Binder turns purple to show that you are no longer in the normal Binder, and it displays the items in your project that match your search term(s).

If you click on one of the search results, Scrivener displays the file and highlights the search terms. You can go from file to file among your search results, and, as long as you don’t delete what is in the search field, this highlighting will remain. This allows you to make revisions to a number of files based on a Project Search.
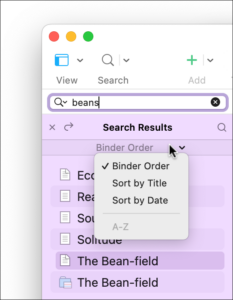
By default, search results are shown in the order in which the items appear in the Binder. If you click the header, which says Binder Order, you can choose a different sort order for the search results. Choose Sort by Title or Sort by Date, and you can then choose the alphabetical sort order or date sort order.
If you want to view an item in the Binder, and exit the search, choose Navigate > Reveal in Binder, or press Command-Option-R (Mac) or Ctrl+Shift+8 (Windows). This closes the search results and returns to the Binder with each selected result highlighted in the selected text.
To exit a search completely, click the small x icon to the right of the search field.
Project Search options
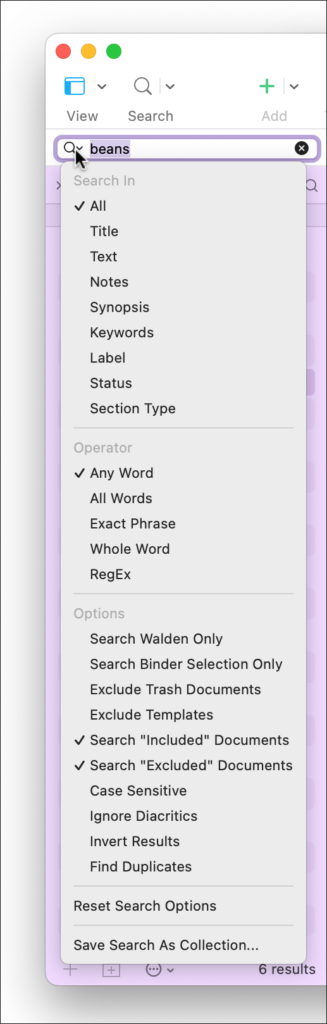
Scrivener’s Project Search has lots of options, which allow you to choose which items to search and how the search terms are treated. To see these, click the magnifying glass icon in the Project Search field.
You can choose from the following:
- Search in lets you narrow the focus of your Project Search. You can choose to search in all elements of your project, just titles, texts, synopses, keywords, and more.
- Operator lets you choose to search for any word, all words, an exact phrase, a whole word, or RegEx. Regular expression searches let you perform extremely detailed searches. If you are familiar with regular expressions, you’ll find them very useful.
- Options lets you choose what to search and exclude, whether searches are case sensitive, and more.
You can also restore the default Project Search options by choosing Reset Search Options beneath the Options menu.
Saving Search Collections
If Scrivener’s Project Search is good, then saving your Project Searches is even better. Scrivener lets you save Project Search Collections, which let you return to a search without having to re-enter its search terms. Think of this as a sort of smart folder, which you can view at any time. See How to Use Scrivener’s Collections to Access Groups of Files or Search Results Quickly for more on using Search Collections, as well as Standard Collections, which you populate manually.
Try out Scrivener’s Project Search when you need to make changes to your project. It’s a great way to focus on specific terms or character names, and find where you’ve used certain words.
Kirk McElhearn is a writer, podcaster, and photographer. He is the author of Take Control of Scrivener, and host of the podcast Write Now with Scrivener.