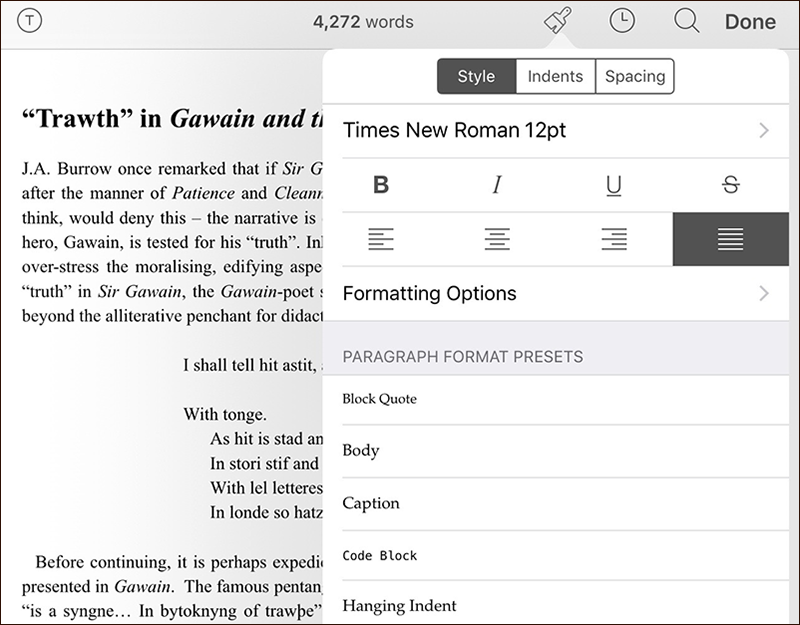
Scrivener’s editor on iOS is a full rich-text environment – in other words, you have complete control over the formatting and appearance of your text right inside the editor. When you start editing a document on the iPad, a paintbrush icon appears in the nav bar at the top of the screen. Tapping on this opens the formatting palette (if you’ve used Pages before, this will be immediately familiar). On the iPhone, the paintbrush icon can be found in the extended keyboard row (the extra row of buttons that appears above the keyboard).
Inside the formatting palette are three tabs: Style, Indents and Spacing.

The formatting palette on Scrivener for iOS.
The Style tab provides the most common formatting options. Here you can choose the font (you can import additional fonts at any time), text size and colour, and you can apply a highlight. It also provides bold, italic, underline and strikethrough options, along with paragraph alignment.
At the bottom of the Style tab is a list of paragraph format presets such as headings and block quotes. As on macOS and Windows, selecting one of these presets will apply a group of formatting settings at once. (Note, however, that they are not true “styles” – look out for news on true styles in the not-too-distant future.) Mac users can bring in custom formatting presets from Scrivener on macOS. The ‘Formatting Options’ area allows you to set up your preferred formatting as the default for Scrivener’s editor.
Indents, line and paragraph spacing for the current text selection can be set via the (drum roll…) ‘Indents’ and ‘Spacing’ tabs.
So, if you have a penchant for 96-point Futura text in bright red, you’re golden – and for those of you who aren’t Markdown enthusiasts, you don’t have to litter your text with asterisks.

