

You may need to import or export documents in Microsoft Word format to your Scrivener project. Here’s how.
Scrivener is the ideal tool for long-form writing, and you can build projects and compile them to many formats, from RTF and PDF to ebook formats that you can upload to online retailers. But many Scrivener users may need to export to Microsoft Word’s .docx format to send their projects to colleagues, agents, or editors, and you can save your project in that format if you need to. You may also need to import Microsoft Word documents to your projects, and you may want to split them so their different sections show up individually in the Binder.
In this article, I’m going to tell you how to work with Microsoft Word documents and Scrivener.
Importing Microsoft Word files
It’s easy to import Microsoft Word files to Scrivener. The .docx format is used for Microsoft Word, but other word processors can save files in that format, so you you may have .docx files that were not created by Word.
To import a .docx file, choose File > Import > Files, then navigate to the file you want to add to your project. Scrivener imports the file and adds it to the Binder. If you have selected the top-level folder in the Binder – such as Novel, Manuscript, etc. – Scrivener adds the imported file just below that folder; if you have selected another folder in the Binder, Scrivener adds the imported file to that folder. You can, of course, move the file to a different location in the Binder.
It’s worth noting that, while Scrivener imports .docx files directly, it is recommended you install Java for .doc and .odt formats. Since this may be problematic, it’s best to ensure that you receive .docx or .rtf files for import from people using Microsoft Word.
Importing and splitting files
Rather than import your .docx file to a single file in the Binder, you may want to import the file and split it. Scrivener can examine the document and create individual text files, in the Binder, for different sections. This works in two ways.
Start by choosing File > Import > Import and Split. The Import and Split dialog shows the two options:
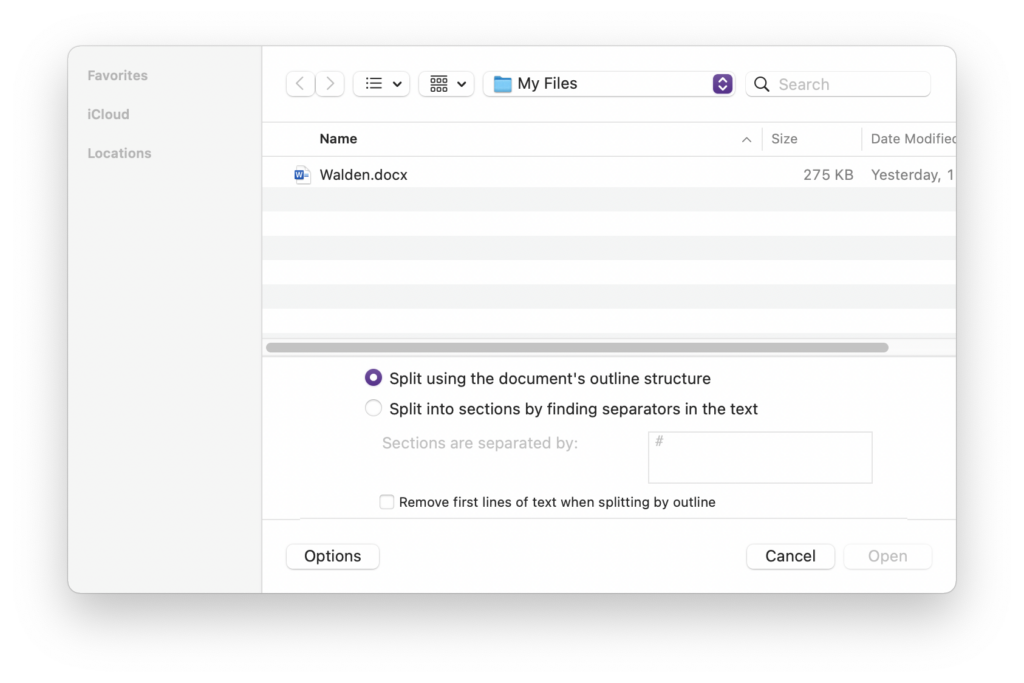
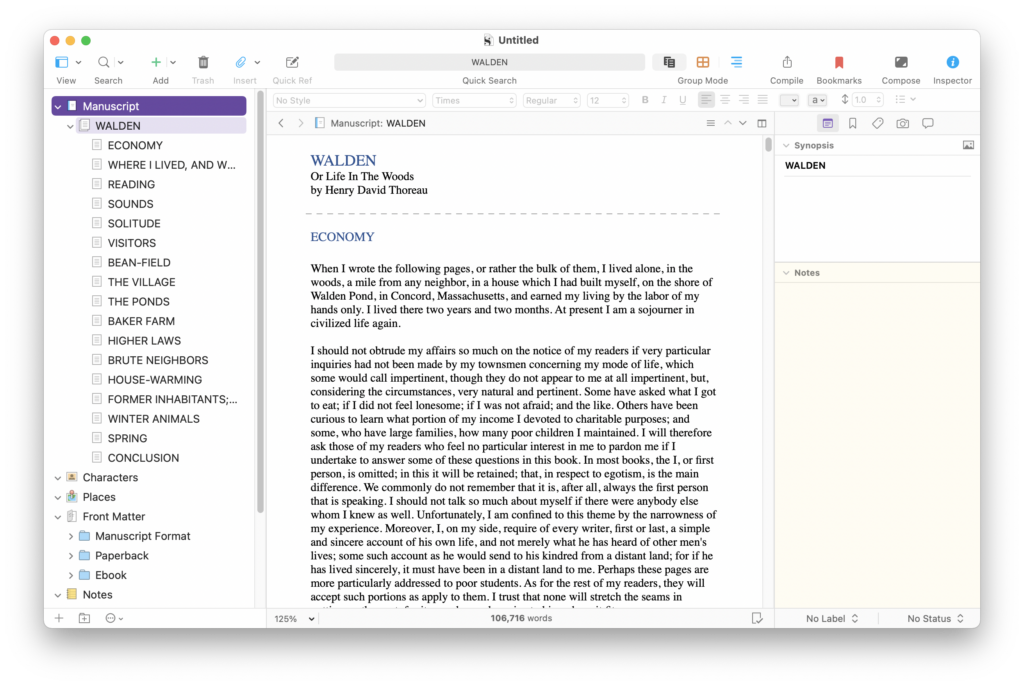
If you’re importing a Microsoft Word file created with styles, such as Heading 1, Heading 2, etc., Scrivener can detect these headings and split the document into separate files at each heading, with the file names adopting the names of the headings. Choose Split using the document’s structure, then click Import. Here’s what the Scrivener Binder looks like after I imported a copy of Henry David Thoreau’s Walden, where the title was styled with Heading 1, and each chapter title styled with Heading 2.
If you choose the second option, Split into sections by finding separators in the text, you’ll need to prepare the document with characters that delineate sections. This is best used for documents that aren’t formatted with styles. By default, the split character is #, but you can use any character or sequence of characters. You’ll need to go through your document and insert these characters where you want the document split. If I had added a # character before each chapter title in Walden, it would look the same as above after importing using this method.
Exporting projects in Microsoft Word format
There are two ways you can export your project in .docx format. The first is to export the individual files in your Binder. To do this, choose File > Export > Files, choose a format in the Export text files as menu, select a location, then click Export.
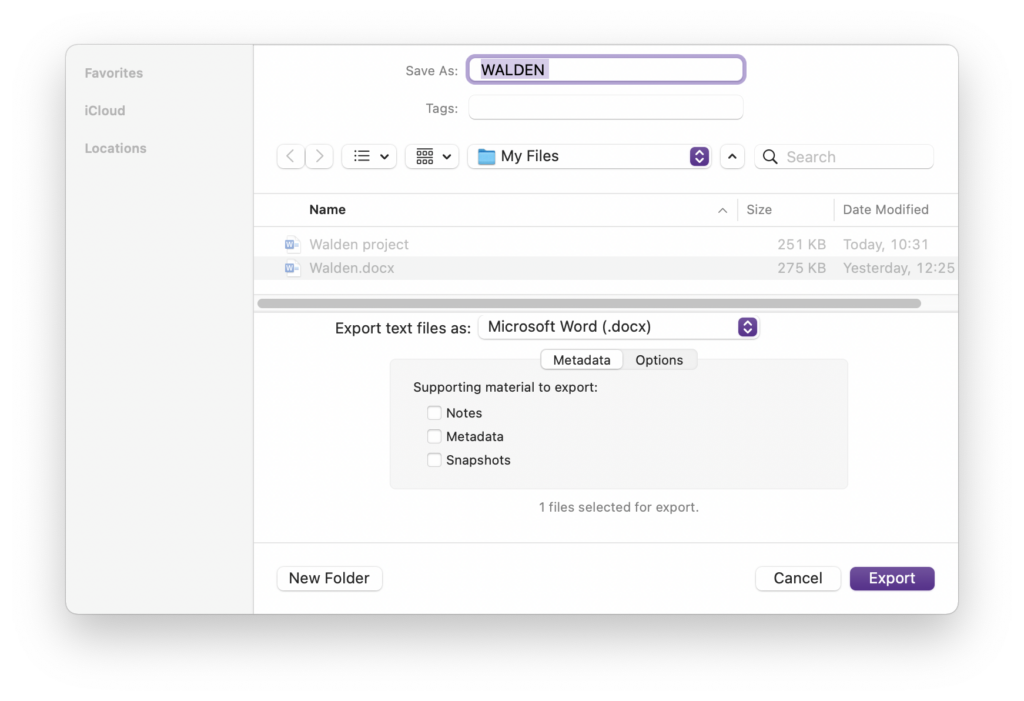
If you’ve selected a single file, Scrivener exports that file; if you’ve selected a folder, Scrivener saves a folder with the name of that folder, and with text files in the selected format in sub-folders, if any, as in the Binder. If you wish to not export subdocuments, click the Options tab in the bottom section of the dialog, then click Do not export subdocuments. You’ll note other options in this dialog, regarding notes, metadata, snapshots, etc. See chapter 25 of the Scrivener manual for more on export options.
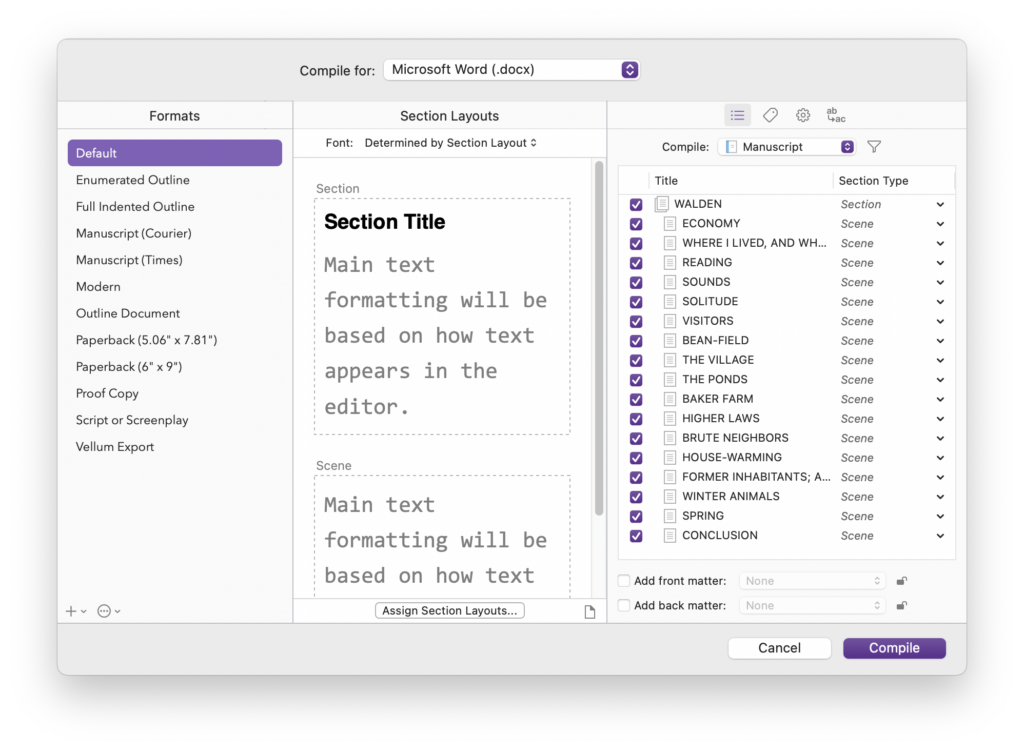
The second method involves using Scrivener’s compile feature. The compile feature offers many powerful options, which we’ll cover in other articles in the future, but you can easily save your project to a Microsoft Word file with a few clicks.
Choose File > Compile, then click the Compile for menu at the top of the dialog and choose Microsoft Word (.docx). In the Formats sidebar, click Default if it’s not highlighted. You don’t need to make any other changes for a basic export, so just click Compile, and choose a location for your file. Scrivener will piece together the various elements of your Binder and generate a Microsoft Word file. When compiling, Scrivener includes files in the top-level folder, which could be Manuscript, Novel, or something else, but not other folders such as your Research folder.
It can be practical to export a file like this at the end of each day as a backup. Scrivener has its own backup feature, which you can read about in this article, but you can never have too many backups. Some people compile a Microsoft Word document like this at the end of the day and email it to themselves. Those emails will remain on their mail server, so they can access them if needed.
Chapter 23 of the Scrivener manual discusses the many options the compile feature offers. Future articles here will look at compiling your project in more detail.
Kirk McElhearn is a writer, podcaster, and photographer. He is the author of Take Control of Scrivener, and host of the podcast Write Now with Scrivener.