Note: This blog post pertains to upcoming features in Scrivener 3, which will be released on macOS later this year and will follow on Windows during early 2021.
Over the years, one of the most oft-requested features for Scrivener has been a styles system such as can be found in most word processors. For those unfamiliar with styles systems, this is what they offer:
- Styles are essentially named sets of formatting instructions. For instance, you might have a “Block Quote” style that contains instructions for making the text indented with a smaller font, or a “Heading 1” style which makes the text large and bold.
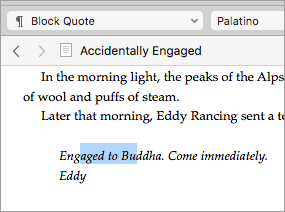
- When you apply a style to a section of text, that section of text knows what style it is. So, when you click into some text formatted as a “Block Quote”, some control in the UI will report that the cursor is currently inside a “Block Quote” paragraph.
- If you change the formatting of a style, the formatting of all text associated with that style is automatically updated. This is really the big advantage of a styles system. For instance, suppose you decide that you want all your “Heading 1” paragraphs to be blue and all “Block Quote” paragraphs to be italicised. Rather than having to go through all the text and update each paragraph one-by-one, with a styles system you just update the style, and all text to which it has been applied is updated automatically.
Scrivener 2 on macOS and Scrivener 1 on Windows currently has “Formatting Presets”, but not a true styles system. Formatting Presets provide (1) above but not (2) or (3). You can use them to quickly format a piece of writing, but you can’t easily update formatting to multiple areas of text after you’ve applied it.
All of this changes with Scrivener 3, which introduces a true styles system.

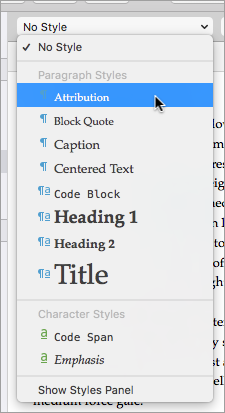
Scrivener comes with a number of styles predefined out of the box:

Assigning them is as easy as clicking in the text whose formatting you want to change and selecting a style from the list. Styles are available from the format bar, the Format > Styles menu, or from the contextual menu. You can even assign keyboard shortcuts to your most frequently-used styles.
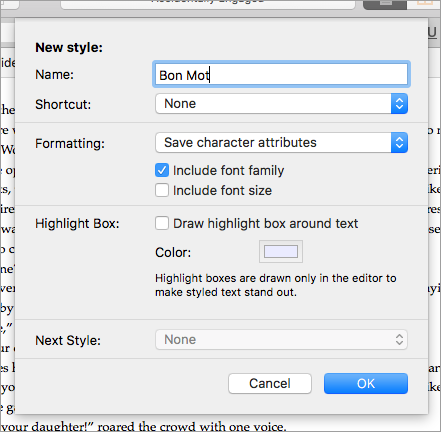
Defining new styles works much the same as defining formatting presets in Scrivener 2. You simply select or put the cursor in a piece of text that uses the formatting you want for your style, then go to Format > Styles > New Style from Selection to bring up the New Style panel:

Once you’ve done that, the new style will appear in the styles list for the project, ready for use.
If you want to change the formatting of a style, you follow the same procedure but instead choose Style > Redefine Style from Selection. When you confirm the changes, all text using that style will be updated to use the new formatting across the entire project.
There’s a styles panel that allows you to search through text looking for and selecting particular styles, too.
Scrivener 3 differs from most word processors in that you’ll generally only want to apply styles to text that you want formatted differently—to headings, block quotes and such. In most word processors all text is styled, with the main text using a “Body” or “Normal” style (depending on the word processor). In Scrivener, you’ll want to use “No Style” for most of your text, as this will give you more flexibility when you come to compile or reset your editor default formatting. This system also means that you don’t need to use styles if you don’t want to. For this reason, there is no “Body” or “Normal” style provided by default.
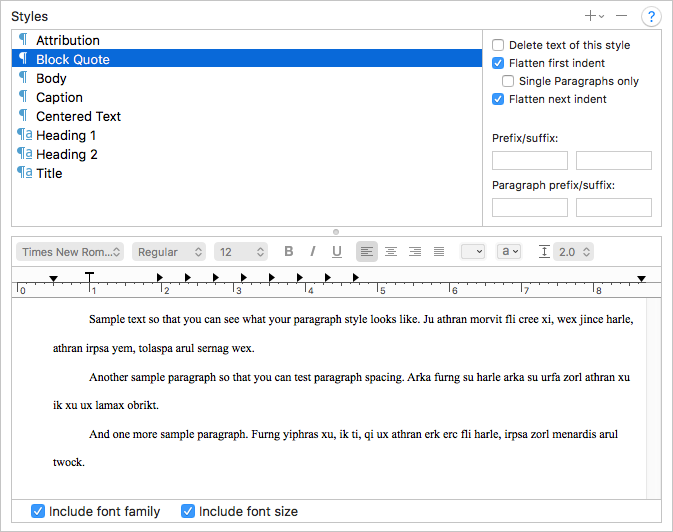
Talking of which, styles are useful enough on their own, but they gain a whole lot more power in Compile. Styles are exported to numerous formats, including Word, and you can use styles to set up the CSS of Epub 3 and Kindle files. Not only that—just as you can override text formatting during Compile in Scrivener 2 (which you can still do), in Scrivener 3 you can, if you wish, override the formatting of individual styles. So, you can style your block quotes in one way when exporting for printing and in another way when creating an ebook. Those working with more technical formats can even enclose styles in custom codes using the prefix and suffix feature.

One of the core ideas of Scrivener has always been that you can write using whatever formatting you want and not have to worry about how the finished product will look until you come to export (Compile). However, historically, one of its weak areas in this approach has been that, although you can override formatting during Compile, any text formatted differently (block quotes and such) can end up getting mangled by these overrides unless you use a complex series of options provided specifically to work around this problem (for instance, Compile > Formatting > Options > Preserve Tabs and Indents). The new styles system solves all of these issues. Now you can tag some text as a block quote or a caption or an email—or whatever you want—and have complete control over how all of this looks in the compiled document, without needing to worry how it looks in the editor (unless you want to—as ever, you don’t have to override anything, it’s up to you).
You might be wondering how this affects the iOS version. In fact, Scrivener for iOS already supports Scrivener 3’s styles system. When you open a Scrivener 3 project in the iOS version, the formatting presets in the formatting palette are replaced by styles.
All in all, styles bring a lot of extra power, flexibility and convenience to Scrivener 3.

