Learn how to merge and split texts in the Scrivener Binder to make your projects easier to structure.
Merge and Split Files in the Scrivener Binder
The Scrivener Binder lets you organize your projects in texts and folders, and you can use these texts for chapters, sections, or even scenes. We discussed this in Use Folders and Texts to Power Up the Scrivener Binder. As your project progresses, you may want to combine certain texts, or split others, as you refine your project and its direction.
With Scrivener, you can do this in the Binder: you can merge two or more texts into a new text, or spit a text into two or more texts. You can also import texts in different formats, and have Scrivener automatically split them to create a hierarchy in the Binder.
Merging texts
When you begin writing a project, you may have ideas about how you want to structure it. For example, you may initially write in scenes or subsections, then want to combine them later into chapters or higher-level sections. To do this, select one or more texts in the Binder, then choose Documents > Merge. These texts don't have to be contiguous; to select multiple texts, click one, then on Mac, click the Command key, and click others; on Windows, click a text, then click Ctrl and click others. I'll merge the first two texts in the Binder, as shown below.

When you do this, Scrivener combines the texts in one new text, and keeps them in the same order they were in the Binder. Any synopses, notes, bookmarks, keywords, and snapshots, are retained in the new text. For any metadata that cannot be combined - if you have different labels, section types, etc. - the next text uses the data of the topmost item. Below, you see the two synopses are both present in the merged text.

Do you need to merge?
If you want to view or edit multiple texts, you may not need to merge them; you can use Scrivenings view. Select multiple texts, then click the Scrivenings View button in the Group Mode control in the toolbar.
Scrivenings view lets you view and edit multiple texts in the Binder as if they were one, with a separator showing where one text ends and the next one begins. Multiple selections also display together in Outline and Corkboard view.

And even easier, if you want to view all the texts in a Binder folder in Scrivenings view, just click that folder; Scrivener displays them all sequentially.
Split texts
Perhaps you've started a chapter of your project and it's too long, and you want to split it into two shorter texts. Place your cursor where you want to split the text, then choose Documents > Split at Selection. Scrivener creates a new text and displays a separator, like that in Scrivenings view, at the spot where you've made the split. you can now treat that new text independently, moving it around in the Binder, Outliner, or Corkboard as you want.

When you split a text, any synopsis or notes will remain with the first text, snapshots will remain, and all other metadata will be duplicated in the second text.
If you ever want to undo a split, you can simply select the two texts and merge them, as explained above.
Import and split documents
If you want to import a document to add to or create a Binder structure in your project, you can do this in a couple of ways. If you import a .docx document created with heading styles, such as Heading 1, Heading 2, etc., Scrivener can import that document and split it according to its headings. Scrivener can also import Markdown documents in the same way; if you use hashtags to indicate different heading levels, Scrivener can automatically split the document at each heading, and name each text in the Binder with the headings.
Choose File > Import > Import and Split, select the document, then choose Split using the document's outline structure.
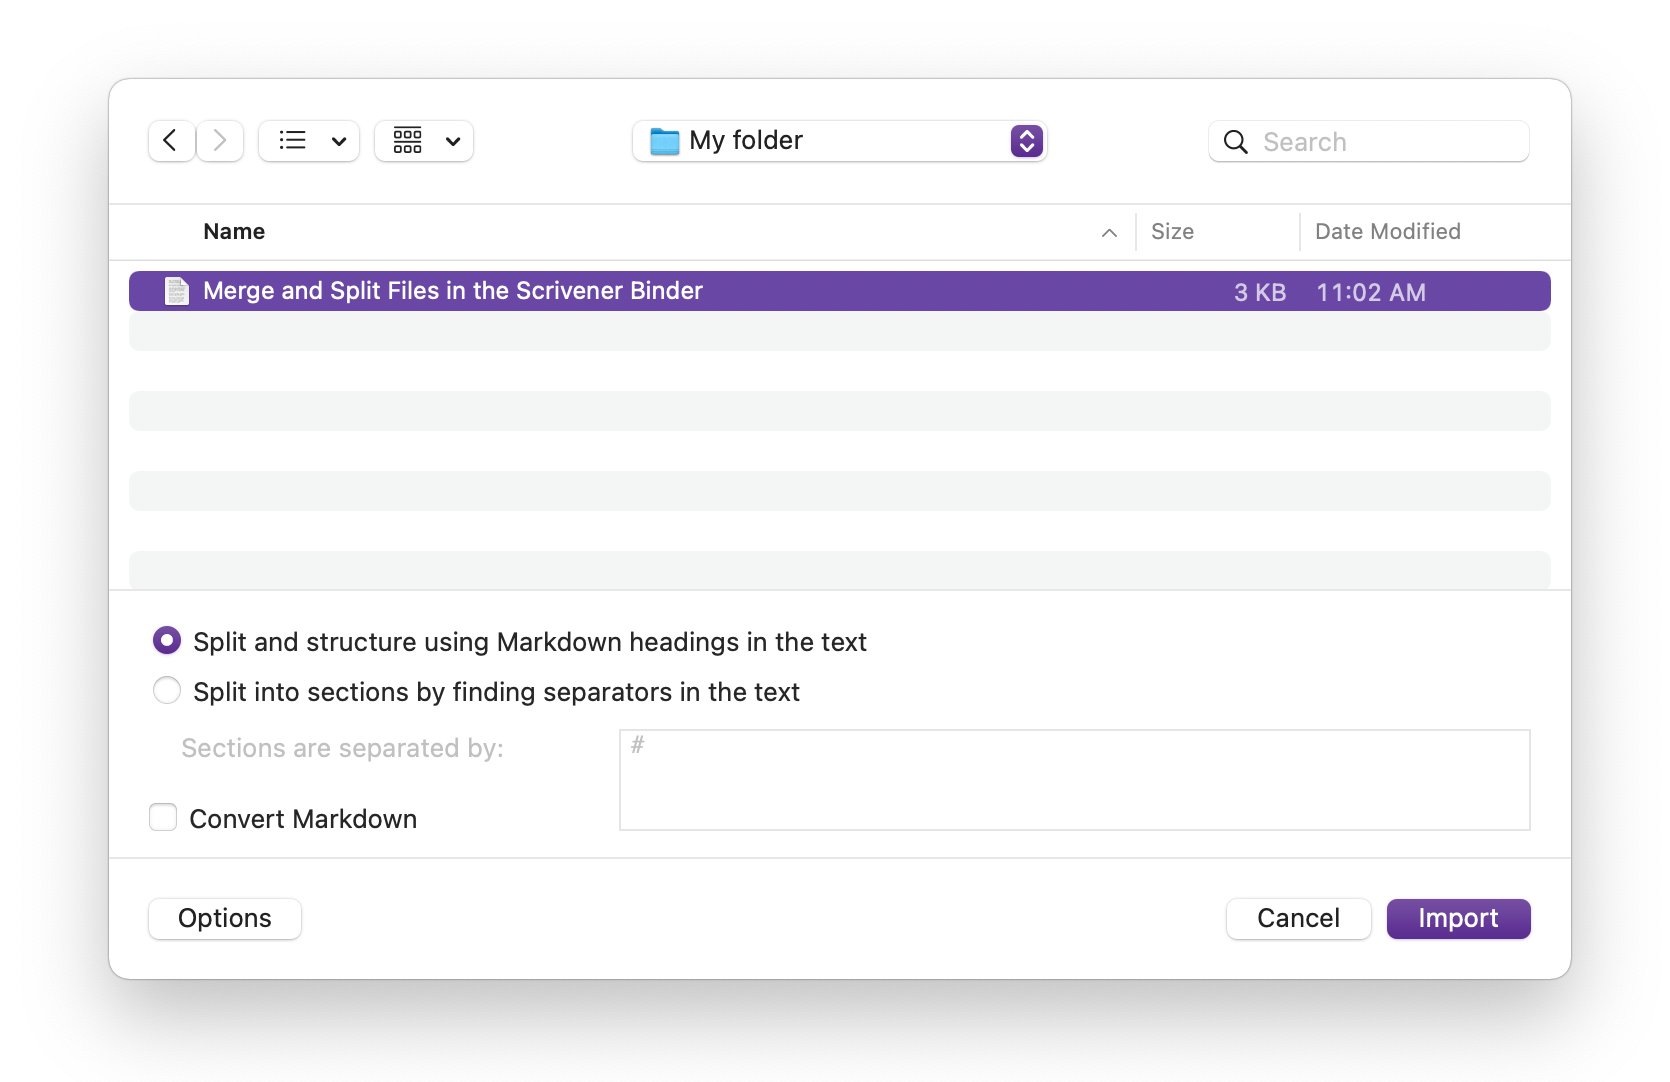
And if you have a document with no structure, and still want to import it and split it, you can go through the original document and separate sections by a character, which Scrivener will recognize. By default, this is the # character, but you can choose any character, as long as you specify it in the Import and Split dialog.
For more on importing and splitting files, including how to import and split files created with Scapple, Final Draft, or Fountain see chapter 9.1 of the Scrivener manual, File Import.
Kirk McElhearn is a writer, podcaster, and photographer. He is the author of Take Control of Scrivener, and host of the forthcoming podcast Write Now with Scrivener.