

Scrivener is well suited for journaling. It’s easy to set up a template and start journaling in Scrivener, recording your life events and more.
Scrivener is ideal for developing and writing long-form projects, but the unique nature of the Scrivener writing environment makes it an ideal tool for journaling. You can create a Scrivener project to use as your daily journal, recording your thoughts, notes, and the events in your life. Here’s how.
Setting up a journal in Scrivener
The key to organizing projects in Scrivener is the Binder. This gives you a folder and file view of your writing project. But the folders in the Binder don’t have to be chapters; you can use them for a journal, where they can represent months, weeks, or even days if you want.
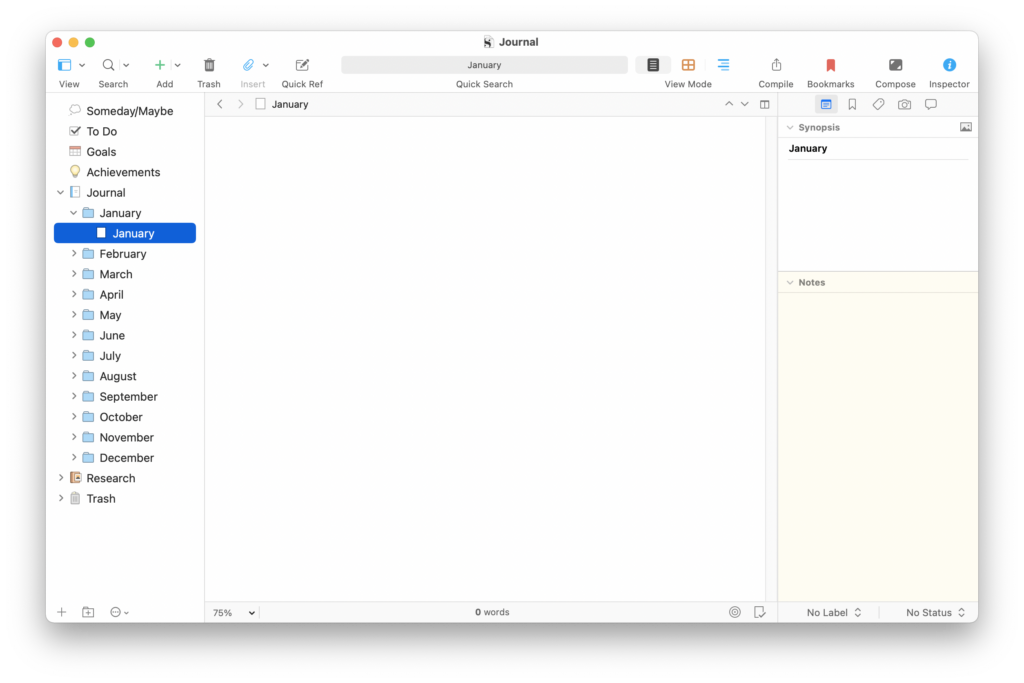
The simplest way to journal with Scrivener is to set up a project with folders for each month. When you open Scrivener, click Blank in the sidebar of the Project Templates window, click the Blank template, then click Choose. This is the simplest template, with only a few basic items: a Draft folder, which contains one untitled document, a Research folder, and a Trash folder.
It’s easy to set this up for journaling. Double-click the Draft folder and name it Journal, or something else if you prefer. Next, Choose Project > New Folder, and a new folder will appear below the Journal folder, with its name highlighted. Type January, then press Return. Now, press Command-Option-N (Mac) or Alt+Shift+N (Win); another new folder appears. Type February, and press Return. Continue until you have new folders for each month of the year.
Select the January folder and press Return; this creates a new text document in that folder. Its name is highlighted, and you might want to name it January, or 1, or something else. You can choose to have a single file per month, or multiple files. Continue adding files for each month.
You may want to add some additional files, outside your monthly folders; you can do this by adding new texts and dragging them to the top, above the Journal folder. Press Command-N (Mac) or Ctrl+N (Win) to create a new text.
You can also add custom icons to any of these texts or folders; to do this, right-click on an item and choose Change Icon, and select from one of the many icons available. If you choose Manage Custom Icons from the contextual menu, you can use your own photos or icons for your project.
When completed, you’ll have something like this:
Journaling in Scrivener
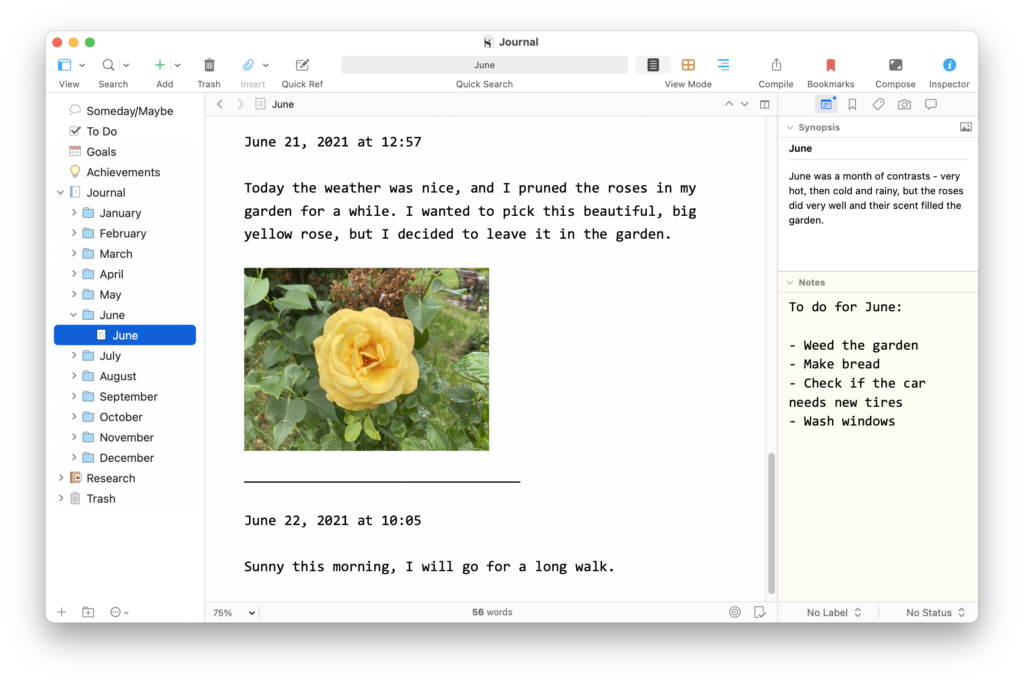
Most people, when keeping a journal, want to record the date of their journal entries. In Scrivener, you can do this easily from the keyboard: just press Command-Option-Shift-D (Mac) or Win+Alt+Shift+D (Win) to insert the date and time according to your system’s long date and short time format. It will look something like this:
June 23, 2021 at 16:21
After you insert a date at the top of a file in your journal project, you can just press return and start writing. You can enter text, and you can also drag photos or links to web pages. You could, if you want, also add footnotes, comments, and more, but it’s probably best to keep your journal simple.
If you display the Inspector – choose View > Show Inspector, or press Command-Option-I (Mac) or Alt+Shift+I (Win) – then you’ll be able to compose a synopsis for each month, and you can use the Notes panel to record things you want to accomplish that month.
Each time you want to write a new journal entry, just insert the date and time, press Return, and start writing. If you want to add files to your journal, you can drag them to the Research folder: this can hold text files, PDFs, music files, videos, and more. You can create sub-folders in the Research folder if you want to organize files by month or by type.
Here’s an example of a journal in progress, with text, a photo, and some information in the Inspector:
At the end of the year, if you want to move to the next year, and store all of your journal entries in this project, just create a folder whose name is the year, drag all your monthly folders into it, then create a new set of monthly folders and files. Or, you might want to create a different project for each year, in which case, set up a new project the way you want.
Kirk McElhearn is a writer, podcaster, and photographer. He is the author of Take Control of Scrivener, and host of the podcast Write Now with Scrivener.