

You can export your Scrivener project in many formats, and work with its contents in different apps.
When you have completed your Scrivener project, you can use the compile feature to stitch together all the files in your Binder into a PDF, or .docx file, or even create an EPUB e-book file. You might compile your project to send it to an agent, editor, or a friend who’s going to read your manuscript. Scrivener’s compile feature is quite powerful, and gives you many options about how your project is assembled.
But you may also want to export some or all of your Scrivener project. You can do this in several ways, for various reasons. In this article, we will explain how to export a Scrivener project, and when this feature can be useful.
Exporting files
There are a couple of reasons why you might want to export files from your project’s Binder. One reason would be to create a backup of your project. While Scrivener regularly and automatically backs up your projects, it never hurts to have additional backups. You can export your entire manuscript to a folder, which contains all the items in your Binder: files, folders, subfolders, images, etc.
You might also want to export individual files, if you’re collaborating with a co-author, or if you want to send a single file to an agent, editor, or friend for them to read.
To export files, select an item, then choose File > Export > Files, then choose a location to save it on your drive. If you have selected a single file in the Binder, Scrivener will export that file. If you’ve selected a folder, or the top-level folder, Scrivener will export the contents of that folder.
You can export files in many formats, including:
RichText (.rtf), Microsoft Word (.doc or. docx), FinalDraft (.fdx), PlainText (.txt), and MultiMarkdown (.md).
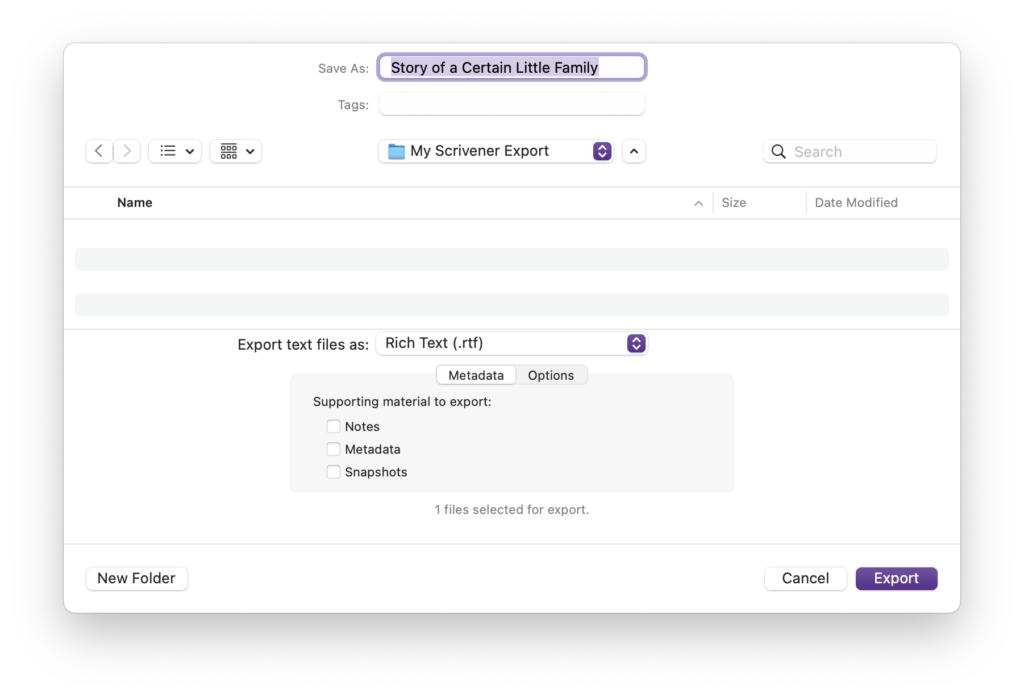
If you export an individual file, Scrivener will save that file. If you export a folder, you’ll see that it reproduces the file and folder structure of the Binder.
The Export dialog presents a number of options: you can choose to save notes, metadata, and snapshots, from the Metadata tab, and, from the Options tab, you can tell Scrivener to not export subdocuments, number exported files, and remove comments and annotations.
Exporting an OPML file
While Scrivener has a built-in outlining feature, some people like to work with outliners that offer more advanced options. You may also want to export the outline of your Scrivener project to send to an editor or agent. Scrivener can export your project to an OPML (Outline Processor Markup Language) file, which most outliners support. (Note that some other types of apps, such as RSS readers and podcast apps, also support OPML files, but not for outlining.)
You can then import this file into an outliner to view the outline in a different app from Scrivener, which might help you view your project differently, or let you view your outline in a different window while you’re working on your manuscript.
To export an OPML file, choose File > Export > OPML File, then choose a location to save it on your drive. There are several export options you can choose:
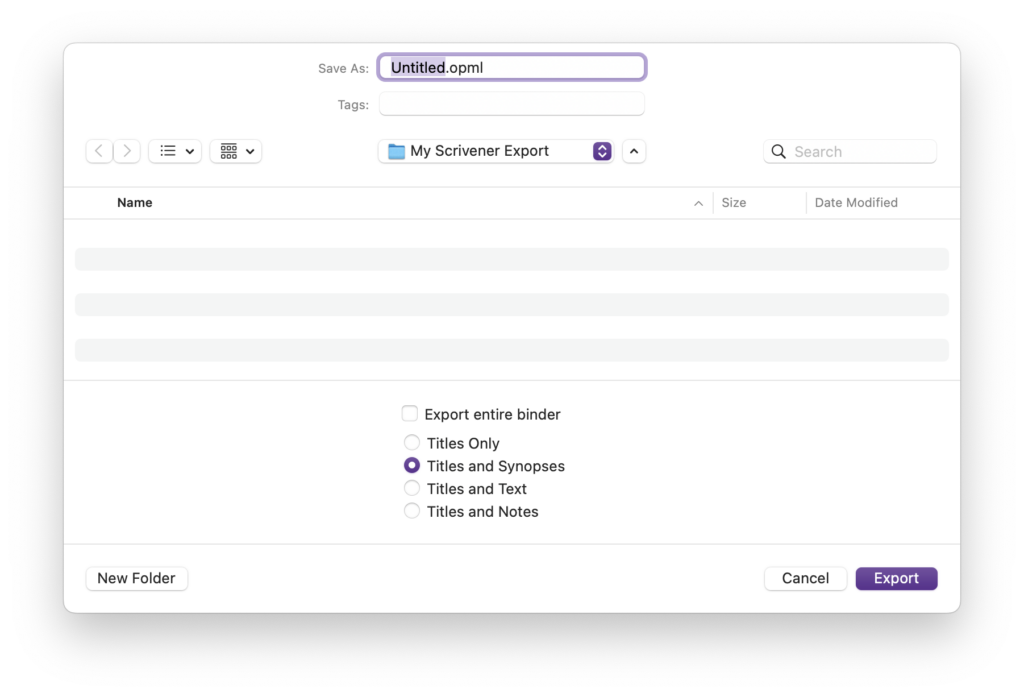
In most cases, you’ll want to export Titles Only or Titles and Synopses. If you choose Titles and Text, this includes all the text in each item, converted to plain text. If you choose Titles and Notes, document notes are added to the OPML file.
If you choose the top option, Export Entire Binder, Scrivener will export everything in your Binder: your Character and Setting folders, Research folder, and everything in the Trash. You most likely don’t want to do this.
Exporting Outliner Contents as CSV
In addition to exporting your project as an OPML file to use with outlining apps, you can export the contents of the Scrivener Outliner as a CSV (comma-separated values) file, which you can open in a spreadsheet app, such as Microsoft Excel or Apple Numbers, or a database app.
To export Outliner contents, you must be in Outliner view: choose View > Outline, or click the Outline button in the toolbar. (For more on using Scrivener’s Outliner, see this article.) Choose File > Export > Outliner Contents as CSV, then select from the options in the dialog:
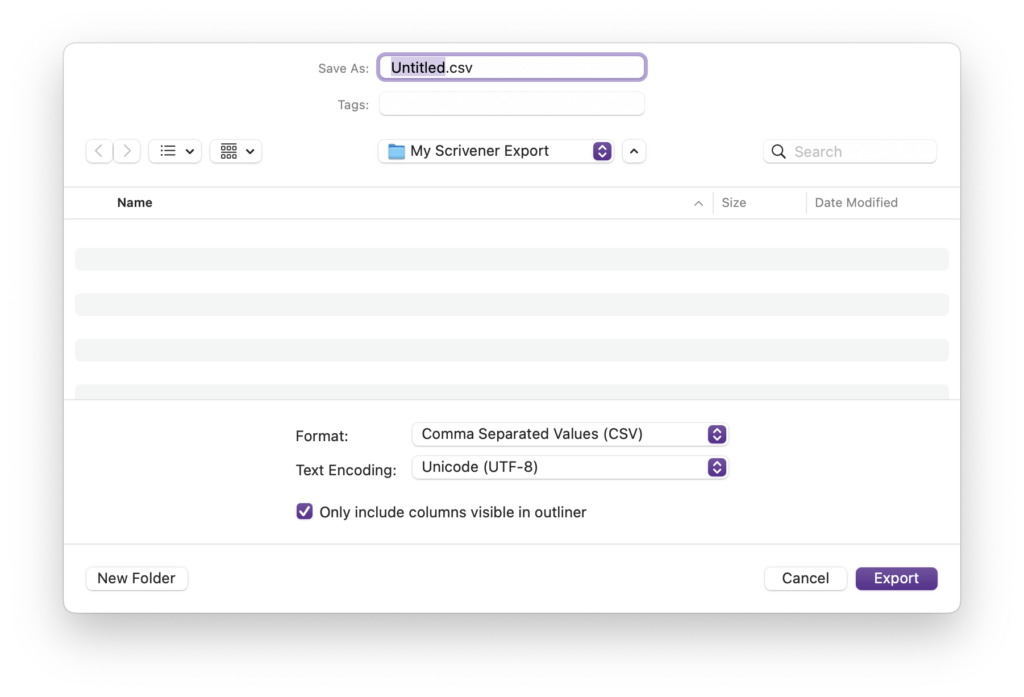
You can choose from three formats, using commas, tabs, or semi-colons to separate values; this choice depends on the software you want to import the file into.
When Scrivener exports the Outliner contents, it includes all the metadata available; if you want to limit this to the columns visible in the Scrivener Outliner, check Only include columns visible in outliner.
Exporting Comments and Annotations
If you add comments and annotations to your Scrivener project, you might want to export them if you print out your project and start revising it. This way, you can access the comments and annotations easily as you make changes to your printout. You can also send these comments and annotations to an agent or editor.
To export comments and annotations, choose File > Export > Comments and Annotations. You have several options:
You can export comments and annotations for the selected documents only, you can include titles (if you don’t, it’s hard to see what the comments refer to), and you can include links to Scrivener sections. This latter option has clickable links that open each section where there are comments; this is useful if you’re viewing the comments on a computer.
Remember, exporting a Scrivener project is very different from compiling it. However there are many use cases where you may want to export your project.
Kirk McElhearn is a writer, podcaster, and photographer. He is the author of Take Control of Scrivener, and host of the podcast Write Now with Scrivener.