

Scrivener’s file management and export options make Scrivener the ideal tool for writing blog articles and posts.
Most people think of Scrivener as a tool for long-form writing, and that’s where it stands head and shoulders above other software. But you can also use Scrivener for writing short texts, such as articles or blog posts. In addition to being a tool for writing articles, Scrivener can organize your blog posts, providing a library of all you have written.
Here’s how to blog with Scrivener.
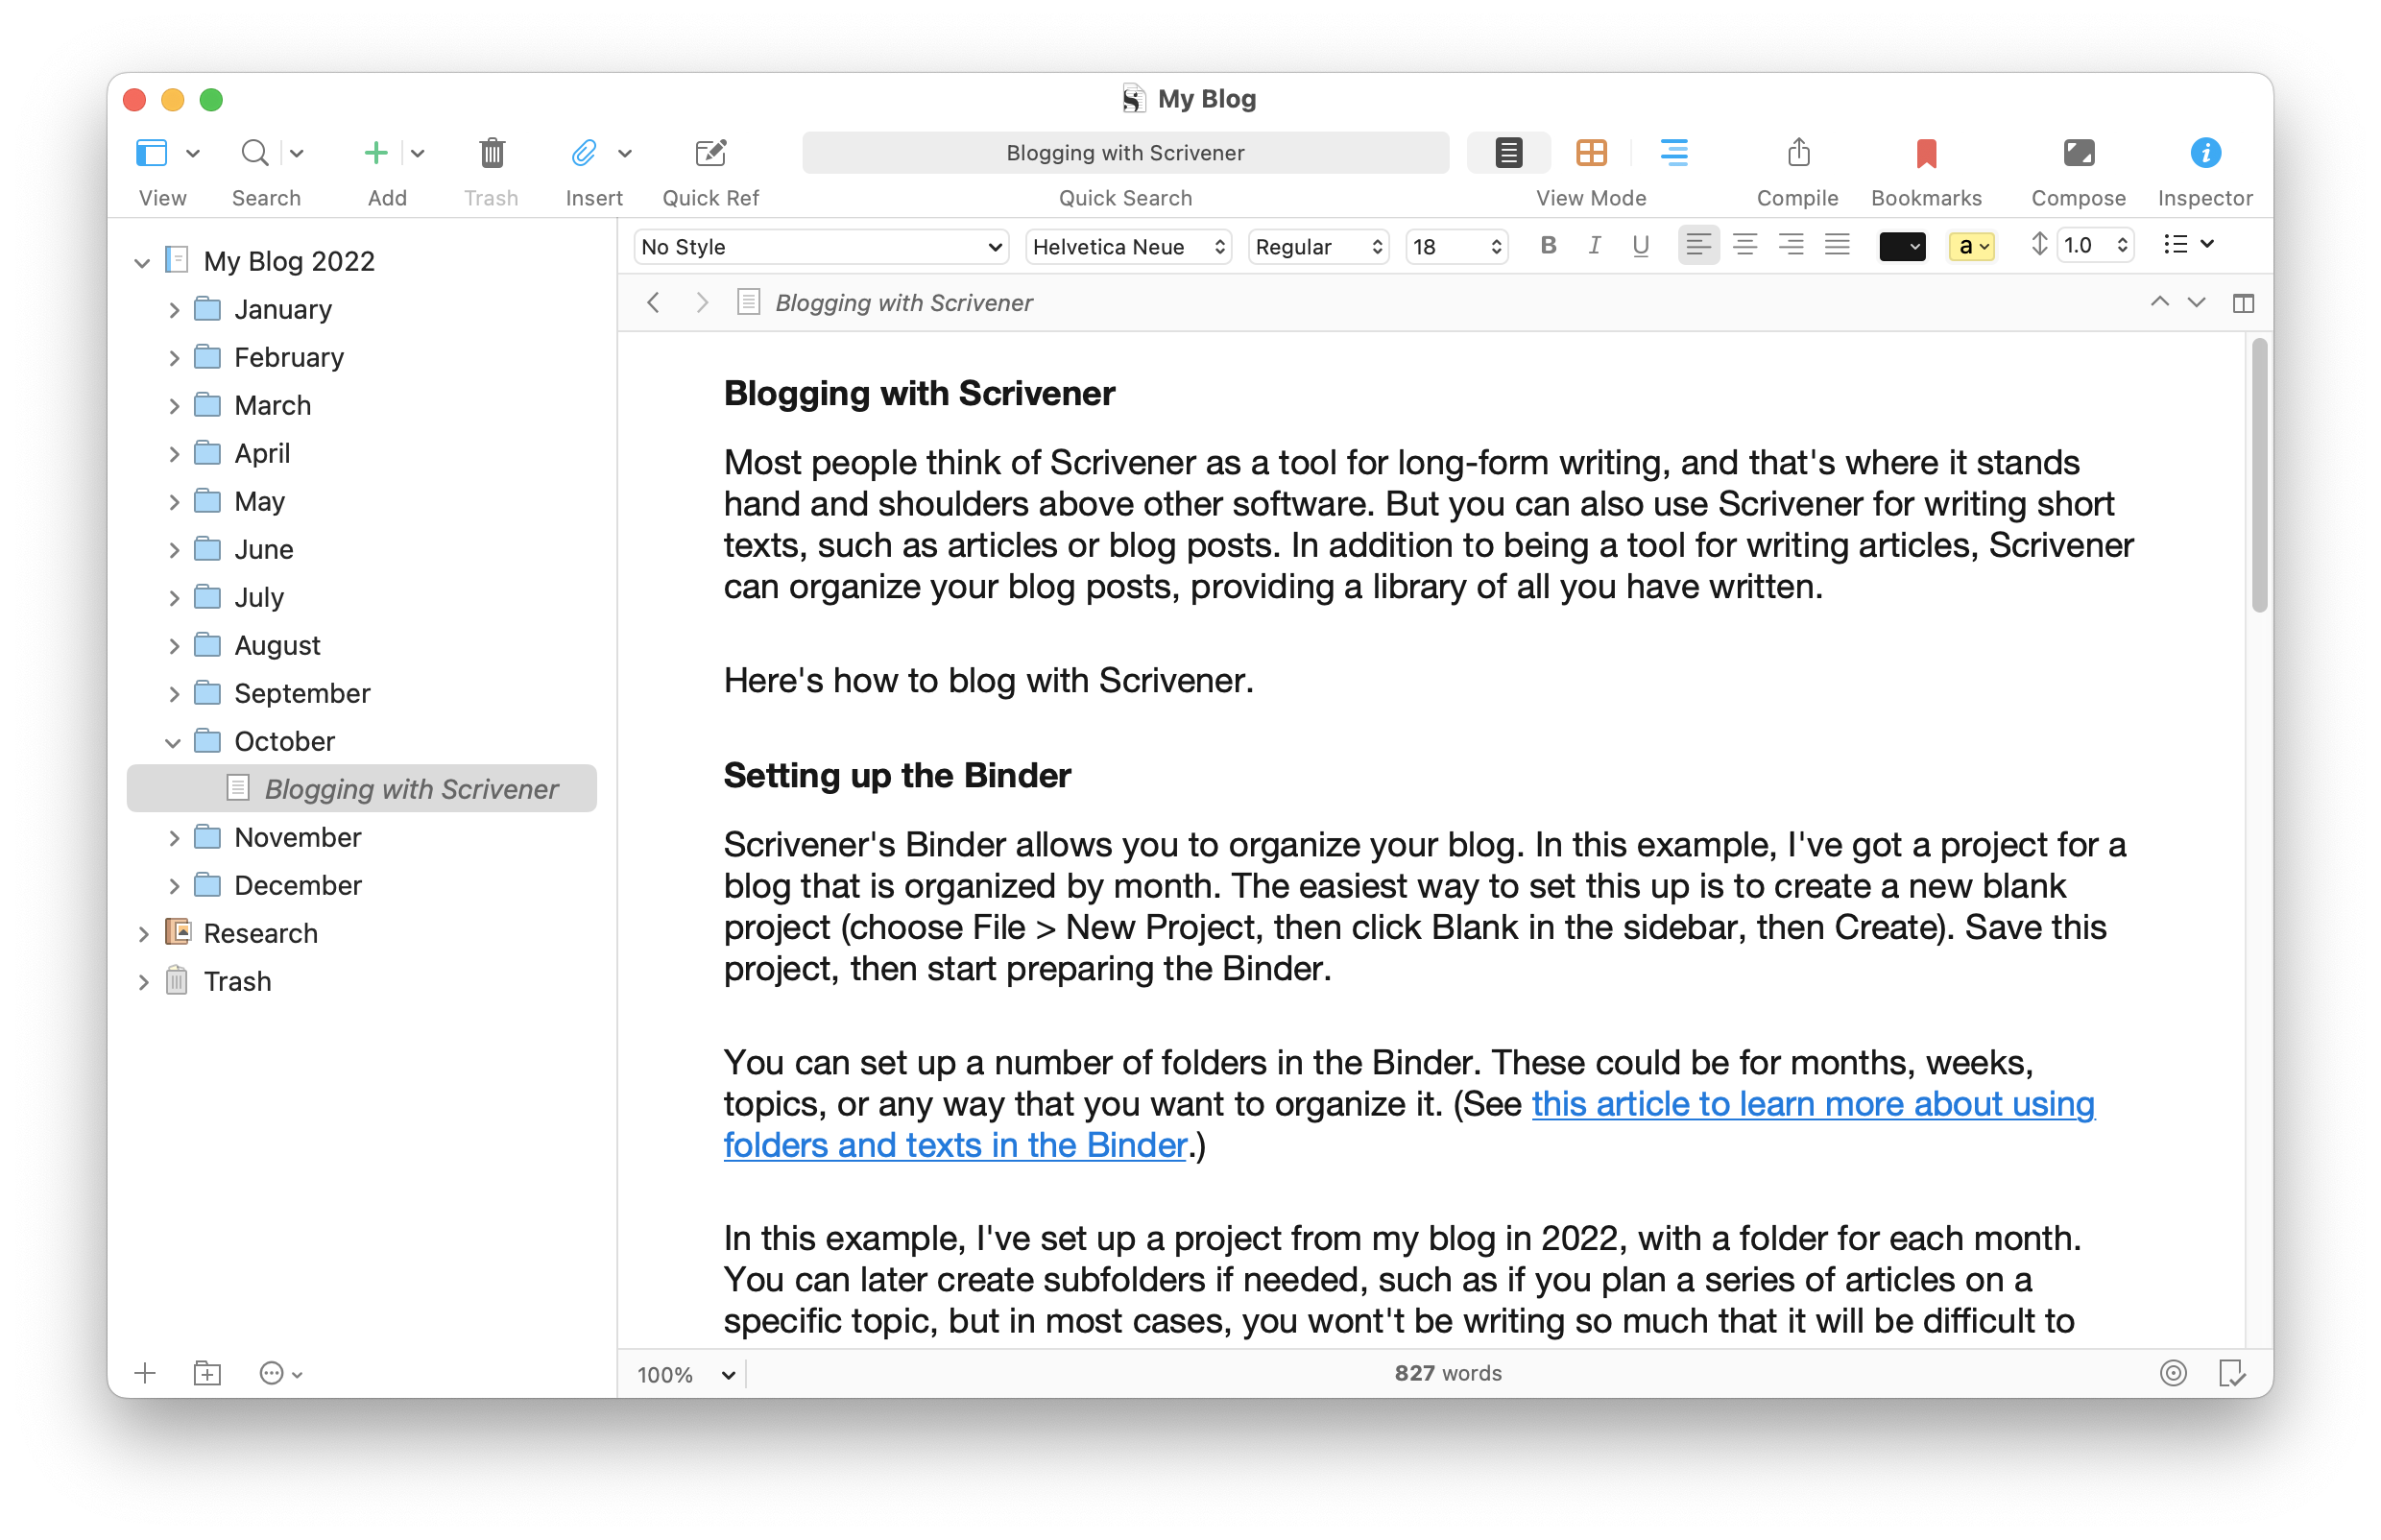
Setting up the Binder
Scrivener’s Binder allows you to organize your blog. In the example below, I’ve created a project for a blog that is organized by month. The easiest way to set this up is to create a new blank project (choose File > New Project, then click Blank in the sidebar, then Create). Save this project, then start preparing the Binder.
You can set up as many folders as you want in the Binder. These could be for months, weeks, topics, or any way that you want to organize it. (See this article to learn more about using folders and texts in the Binder.)
In this example, I’ve set up a project from my blog in 2022, with a folder for each month. You can later create subfolders if needed, such as if you plan a series of articles on a specific topic, but in most cases, you wont’t be writing so much that it will be difficult to browse them to find an article when you need to.
You could create a new project like this every year, or you could move the monthly folders into a year folder at the beginning of the new year, and create another set of monthly folders. 
Writing articles
From here on, it’s pretty simple. Just create a new file in the appropriate folder when you start working on a new article. If your organization is monthly, select the current month’s folder, then click + in the toolbar to create a new file; name it with the title of your article, and start writing.
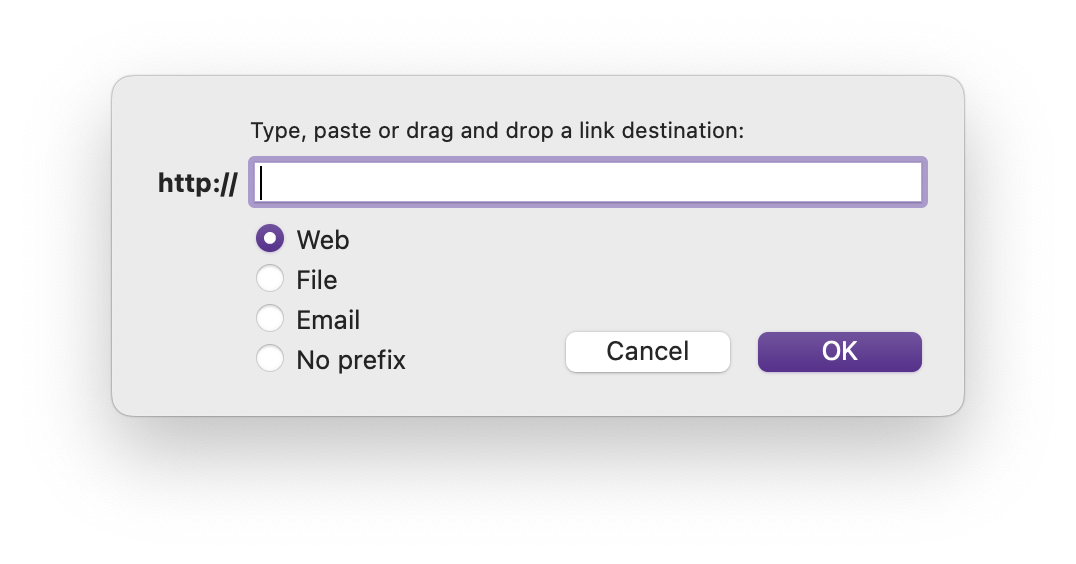
Unlike creative writing, blogging often uses links to other websites. To add a link in Scrivener, select the text you want to link to, then choose Edit > Add Link, or press Command-K (Mac), or Edit > Add Link, or press Ctrl+Shift+L (Windows). Scrivener displays a dialog where you can paste or drag a link; make sure Web is selected, as below.
Many of Scrivener’s tools can help you when blogging. For example, if you have a word count to meet, use Scrivener’s word count and targets feature to make sure you hit the mark. You can use Scrivener’s distraction-free mode when you want to focus on your writing, and not be distracted by other windows. And you can check back on older articles using Scrivener’s Quick Reference Windows.
While you could store research in your monthly folders, it’s a good idea to use Scrivener’s dedicated Research folder for that purpose. You can create subfolders in the Research folder, by month, by theme, or by topic.
Many blog articles use images, and you can add images to your Scrivener documents just by dragging them into the Editor. If you want to scale images, right click on an image, choose Scale image, then make adjustments in the Edit Image panel.

Moving your articles to your blog
There are a couple of ways you can post the articles you’ve written in Scrivener on a blog, depending on how you work with your blog. Most writers will simply copy the text they’ve written and paste it into their blog’s editor, and format it there. Some blogs let you paste the contents of your Scrivener document into their blogging interface; this depends on the blog and how it works. For example, WordPress’s Visual Editor accepts text pasted from Scrivener and retains formatting and links. Other blogs may require that you use text in HTML, and you can export your articles in that format.
Scrivener has a powerful Compile feature, that allows you to stitch together complex projects into single files, such as PDFs, Word documents, and even ebooks. But you can also use Scrivener to export a single file from the Binder in HTML. To do this, select a file, then choose File > Export > Files. In the Export text files as menu, choose Web Page (.html), then click Export. Scrivener saves your file formatted in HTML, which you can then open in a text editor, copy, and paste into a blog editor.
If your Scrivener document contains images, Scrivener exports it to a folder bearing the name of the document in the Binder; that folder contains the HTML file and a subfolder with your images.
On a Mac, you can use TextEdit to open the HTML file and copy its contents; on Windows, you can use Notepad. To view the source code of an HTML document in TextEdit on Mac, launch TextEdit, press Command-O or choose File > Open, then, at the bottom of the window, click Options, then check Ignore rich text commands. If not, TextEdit will open the file as an RTF file, and you’ll see all the formatted text, not the code. On Windows, right click the HTML file, then choose Open With, and, if you don’t see Notepad in the submenu, opt for Choose another app and find Notepad or another text editor.
You’ll see something like this:
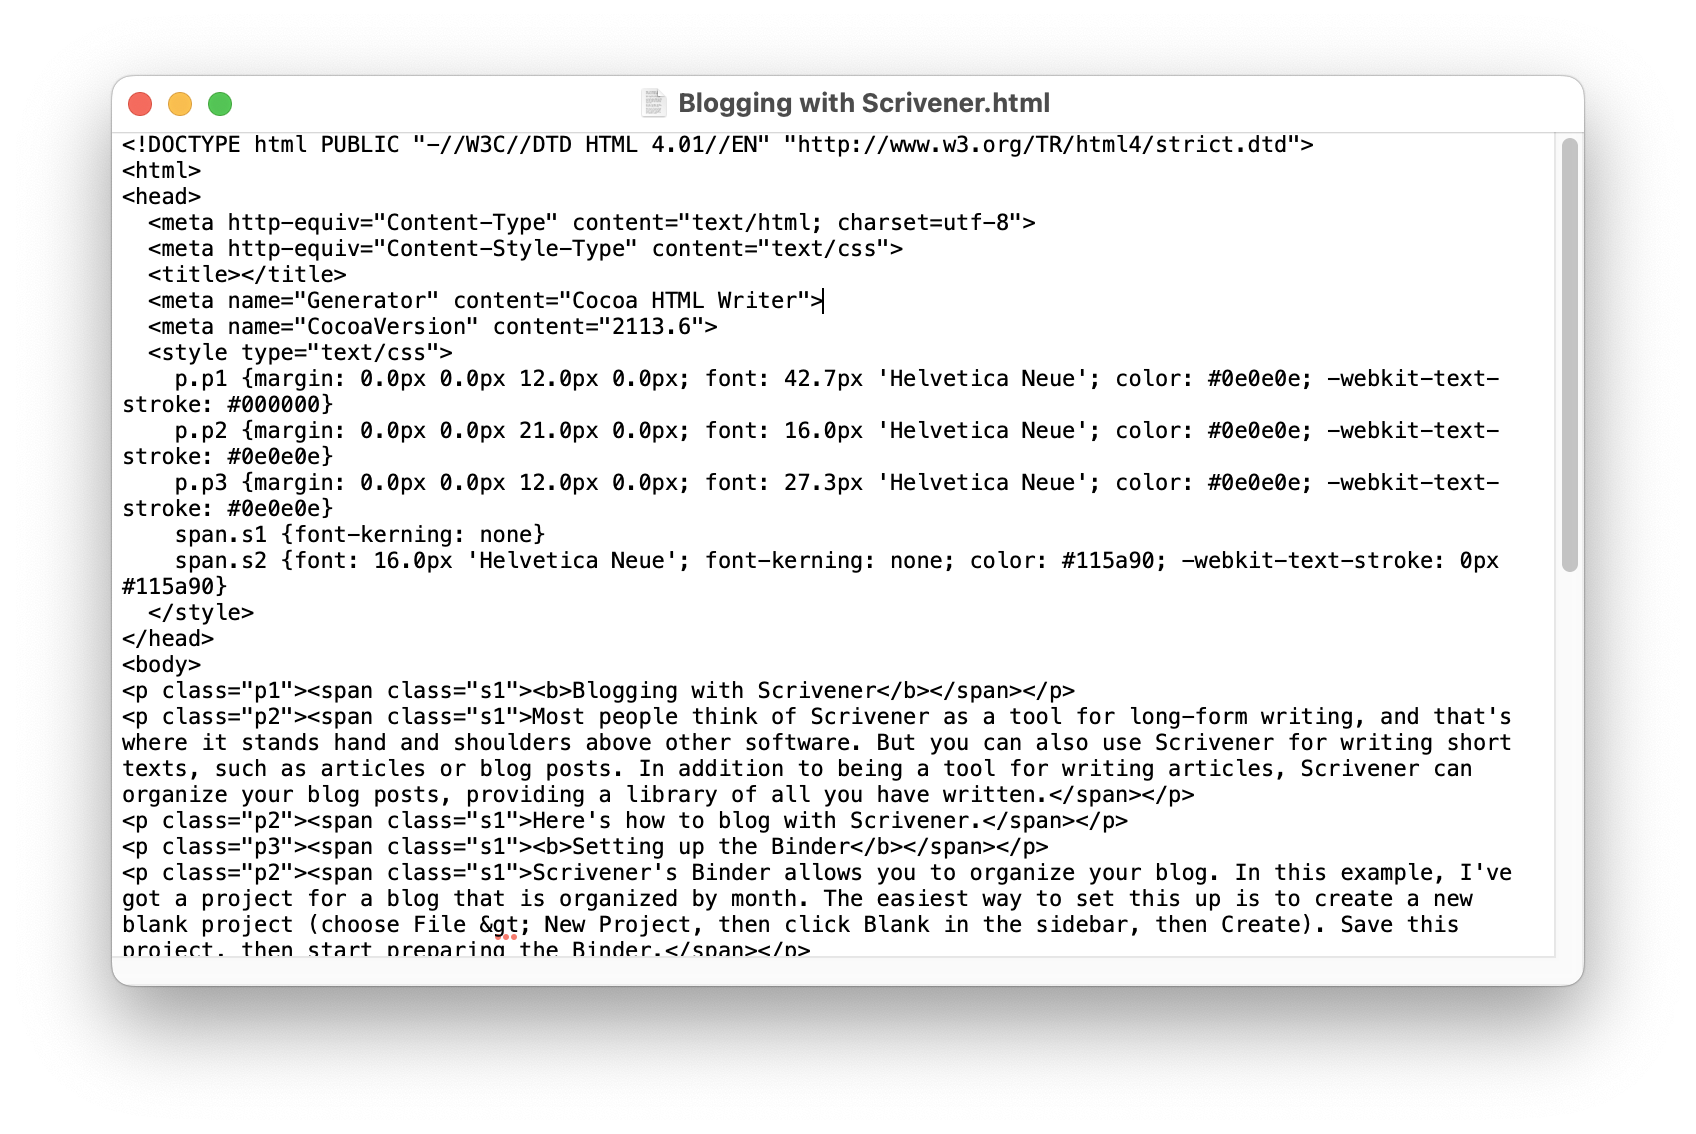
This may look messy, but it’s easy to work with. Start by deleting everything from the <body> tag to the top of the file; then go to the bottom, and delete the last two tags, </body> and </html>. What remains is what you paste into your blogging interface. You’ll note that the first line after the <body> tag contains the title of your article, if you’ve started your Scrivener document with a title. Select the text without the surrounding code and paste it into the Title field of your blogging interface; the rest goes into the main body field.
You might need a full HTML page; this could be the case if you need to send an article to someone who manages a blog and posts your articles. In this case, just leave all the content in the file that Scrivener has exported.
With Scrivener’s Binder as a file management tool, you can write and archive blog articles in a single project. And with Scrivener’s easy HTML export, you can get your text in the right format with a few clicks. You may find that Scrivener is the ideal tool for writing blog articles and posts.
Kirk McElhearn is a writer, podcaster, and photographer. He is the author of Take Control of Scrivener, and host of the podcast Write Now with Scrivener.