

Note: This blog post pertains to upcoming features in Scrivener 3, which will be released on macOS later this year and will follow on Windows during early 2021.
Ever since Scrivener 1, you have been able to split Scrivener’s editor in two and view two documents alongside one another. In Scrivener 2 we added a new feature which is often missed: the ability to have one editor control the other. So, if you have the corkboard in the left editor, for instance, you can click on the “Automatically open selection in other editor” button in the footer bar (the button showing an box icon with an arrow pointing out of it). With this turned on, selecting a card in the corkboard (or a row in the outliner) causes the document associated with that card (or row) to be opened in the other editor. This added more flexibility to how you could use the two editors.
Ioa recently wrote a blog post on the new bookmarks feature in Scrivener 3. This provides an additional way of referring to documents and research in your projects, because you can now view bookmarked documents right in the inspector. There’s another place you can open documents, too: in Copyholders.
Copyholders
The ability to split Scrivener’s editor in two is very useful. But why only split it two ways? What if you want to refer to more than two documents at a time (or more than three if you’re using Bookmarks)? One problem is the relationship between the two editors: “Automatically open selection in other editor” makes sense if there is one other editor, but no sense if there are several. Likewise, by default, clicking on an internal link causes it to be opened in the other editor—if there were several other editors, you’d have no idea where it would be opened. For Scrivener 3 we wanted to make it possible to split the editor more ways, but without causing the confusion that would ensue with multiple full editors. The solution we came up with we call “Copyholders”.
In the real world, a “copyholder” is a small stand to which you can clip documents in order to refer to them as you write or type—and that’s exactly what Copyholders are in Scrivener, too. In Scrivener 3, both editors now have a Copyholder available. A Copyholder is essentially a subsidiary editor that appears inside the existing editor and which can only show single documents (so it doesn’t support corkboard, outliner or Scrivenings modes). Other than this limitation, copyholders are full editors in their own right, allowing you to view and edit text or look at research files.
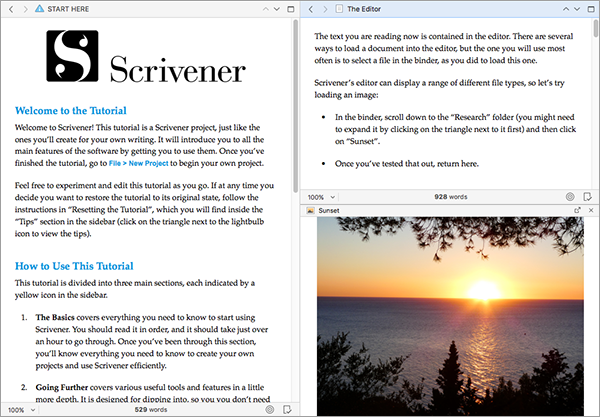
To open a Copyholder, you simply drag a document from the binder and drop it onto the editor’s header bar holding down the Option key. (You can also use the Navigate > Open menu, but dragging is fastest.) Below you can see a Copyholder has been opened in the right editor, showing an image of a sunset:
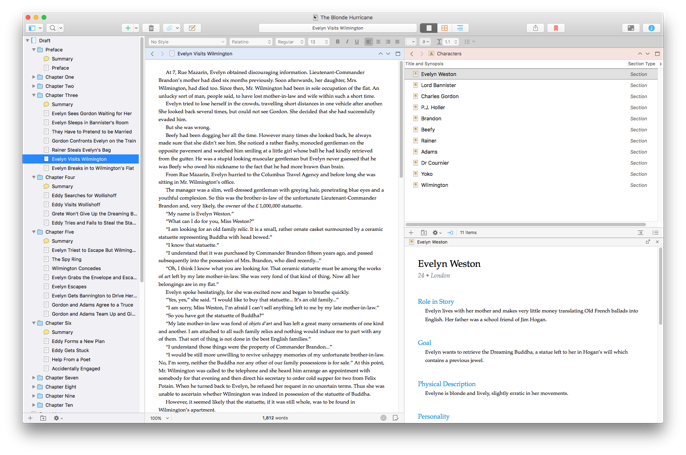
Copyholders therefore provide a great way of referring to more documents at once, but their usefulness doesn’t end there. We’ve extended the “Open selection in other editor” feature introduced in Scrivener 2 so that it can now affect Copyholders. Supposing you have both editors open; one editor is showing the outliner and it has a Copyholder below it:
- Clicking on the “Open selection in other editor” button in the outliner footer bar works as before – the icon turns blue to indicate that the feature is active and selecting documents in the outliner will cause them to be opened in the other editor.
- Clicking on the button again, though, will cause it to stay blue (on) but the icon will change to indicate that the selection will now affect the Copyholder. So now when you select items in the outliner, they will be opened in the Copyholder instead of in the other editor.
- Clicking the button a third time turns it off again.
This makes possible one of my favourite new setups in Scrivener 3. Here’s how I’ve been setting things up:
- I split the editor vertically.
- In the right editor, I load up the outliner, showing the contents of a folder containing lots of research or notes to which I want to refer while I’m writing.
- I Option-drag one of these notes onto the outliner’s header bar to open it in a Copyholder below the outliner.
- I click twice on the “Open selection in other editor” button in the outliner’s footer bar so that selecting documents in the outliner will cause them to be opened in the Copyholder below it.
- I lock the outliner editor, so that clicks in the binder will not affect the outliner editor even when it is focussed. By doing this, the binder will always affect the left editor.
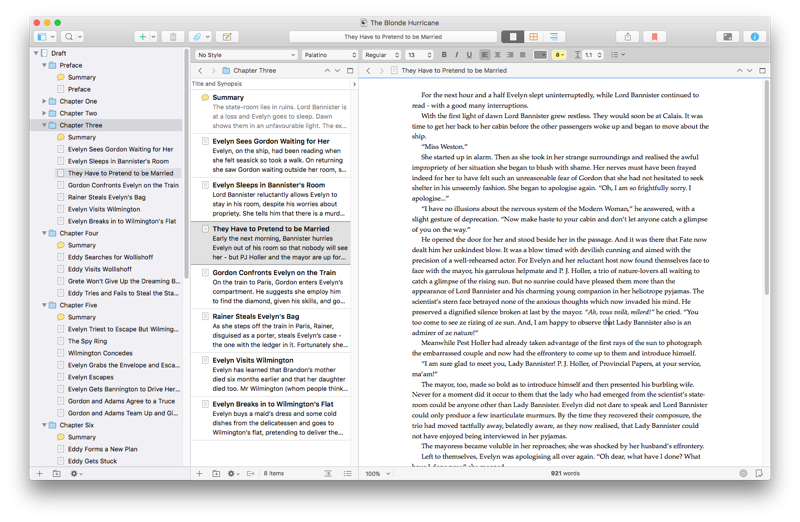
This results in a dual navigation UI:
Now, whenever I select something in the binder, it opens in the left editor, no matter what. When I select something in the outliner, it is opened in the Copyholder below it. It’s a fantastic way of referring to a bunch of notes and research on the right side of the interface while writing and creating new content on the left. It’s probably the new feature I have used most.
Layouts
Perhaps that five-step sequence above seems a little too much effort—after all, you’re in Scrivener to write, not play around with the settings. Moreover, Scrivener has a tonne of useful features like this that many users may never discover. We think the dual navigation feature is so useful that we want to make it easy for users to access. To this end, we’ve added several default Layouts that you can choose from the Layouts menu, or from the leftmost toolbar button, and these include the “Dual Navigation” setup:
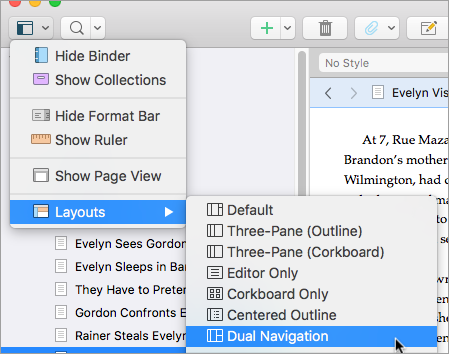
You’ve been able to create your own Layouts (a way of returning to a particular UI setup with one click) ever since Scrivener 2, but these default Layouts provide some out-of-the-box UI setups that we think will be useful to many users. So instead of following the five steps above, you can simply choose the “Dual Navigation” Layout and all of those steps are done for you. When you’re ready to return the UI to regular navigation, you can choose the “Default” layout (or “Clear All Navigation Options” from the new “Navigation” menu).
Here’s another Layout I think a lot of users will find handy—the “Three-Pane” layout:
And—another favourite of mine—the “Centered Outline” layout:
So, Copyholders provide even more possibilities when it comes to referring to your notes and research, and the new built-in Layouts make it easy to switch between some useful UI setups with just a single click. These are just two of the ways in which we hope Scrivener 3 will prove both more powerful and yet simpler at the same time.