Scrivener helps you manage characters for your fiction, and even provides a tool to suggest names for your characters. Discover how to create a character profile from your character ideas.
When you’re writing fiction, your novel will have characters. There might be just a single character, or it could have dozens, like a Dickens novel that teems with a wide variety of people. Scrivener’s fiction and scriptwriting projects have a special section in the Binder where you can store character sketches, specially formatted documents you can use to flesh out and store information about your characters. And if you can’t come up with good names for your characters, Scrivener even has a built-in tool to help you find them.
Here’s how to work with characters in Scrivener.
Character sketches
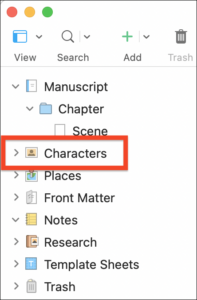
When you create a new fiction or scriptwriting project, the Binder contains folders for your work, research, and more, and it also contains a Characters folder for your character profiles.

This folder is empty, but if you want to add a character sketch to the folder, click the Characters folder to select it, then press Return. You can also click the Add button in the toolbar, and choose Character Sketch. If you do the latter when another folder is selected, the character sketch will be placed in that folder; you can move it to the Characters folder, or you can leave it in, say, a chapter folder, if you wish.
Only fiction templates can create character sketches. Even if you are writing a non-fiction book, you may want to create character sketches. If you’re writing a biography, for example, you may want to create a Novel project, which contains the Characters folder, so you can fill out these sketches for the people who appear in the biography.
Using character sketches as a character profile template
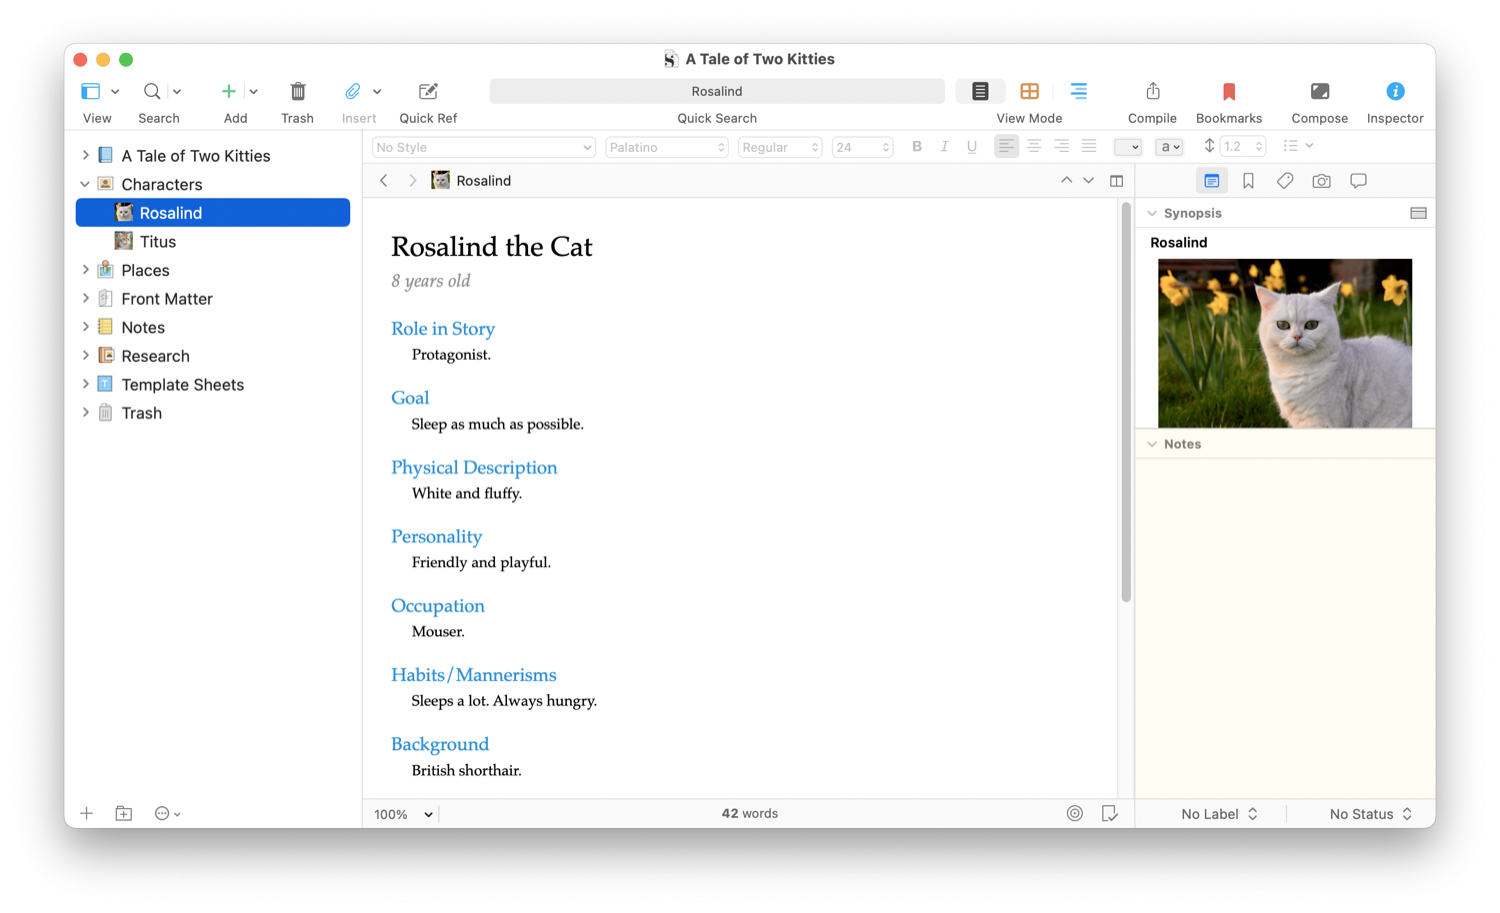
The character sketch is a pre-formatted document with a number of headers that you can use to create and flesh out your characters, like a character worksheet. You start by entering a name at the top of the character sketch, then add any other information that is useful. The blue headings are just suggestive; you can type over them to create your own headings, or format character sketches any way you like.
Character sketches may only contain a few elements to guide you in building your characters as you write, or you can write their entire backstory in these documents. You can refer to them as you work, going back and editing them, or updating them as you develop new information about your characters.
Character sketches don’t need synopses, and if you display the Inspector – click the Inspector button in the toolbar, or press Command-Option-I (Mac) / Alt+Shift+I (Win) – the Synopsis section at the top of the Inspector shows the character’s name, and says Drag Image Here. If you have images for your characters – such as if you’re inspired by real or historic people – you can drag their photos to the synopsis section. Some authors like to find photos that they feel resemble their characters, such as the actors they might see playing their roles.

You can also record notes in the Inspector if you want to add more information than what’s in the character sketch, effectively creating a character sheet for writers.
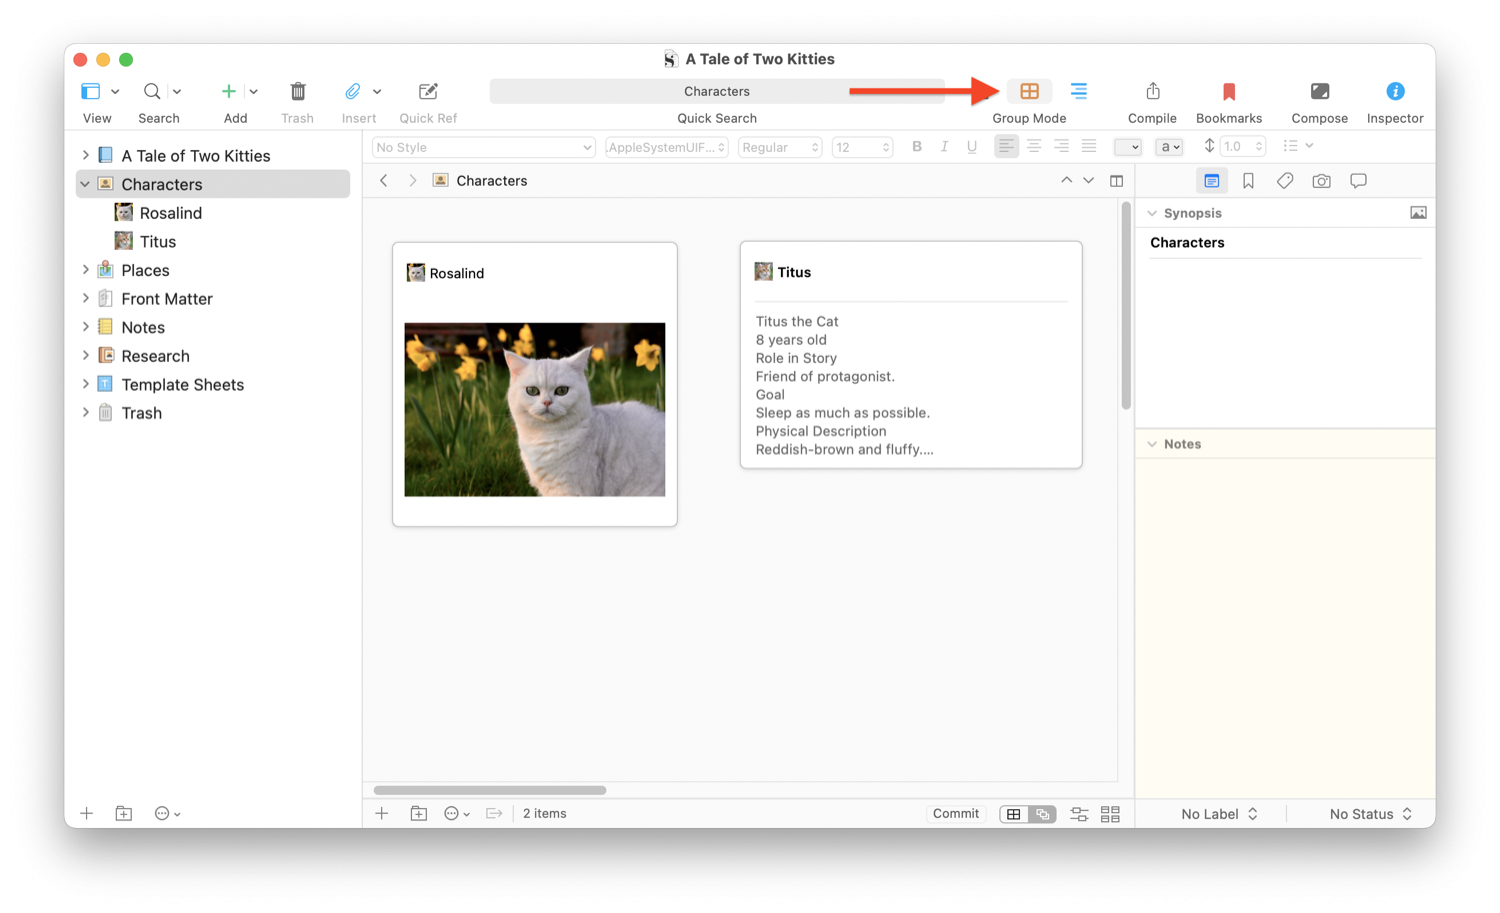
If you click the Characters folder, then click the Corkboard button in the toolbar (it’s the middle of the Group Mode button, indicated below), you can view all your characters in the Corkboard. Those with photos will display their photos; others will only display the beginning of the texts in their sketches.

Finding names for your characters
Some writers may easily come up with character names that are both descriptive and unique – again, think of Dickens with characters such as Charity Pecksniff, Anne Chickenstalker, and Rogue Riderhood – while other authors struggle to find names that work for them.
Scrivener includes a powerful name generator, which includes thousands of common names, dictionary words that sound like names, and some names from literary classics. In addition, it includes names from various languages, such as German, Hindi, and Japanese, and provides many options to help you find the right names for your characters.
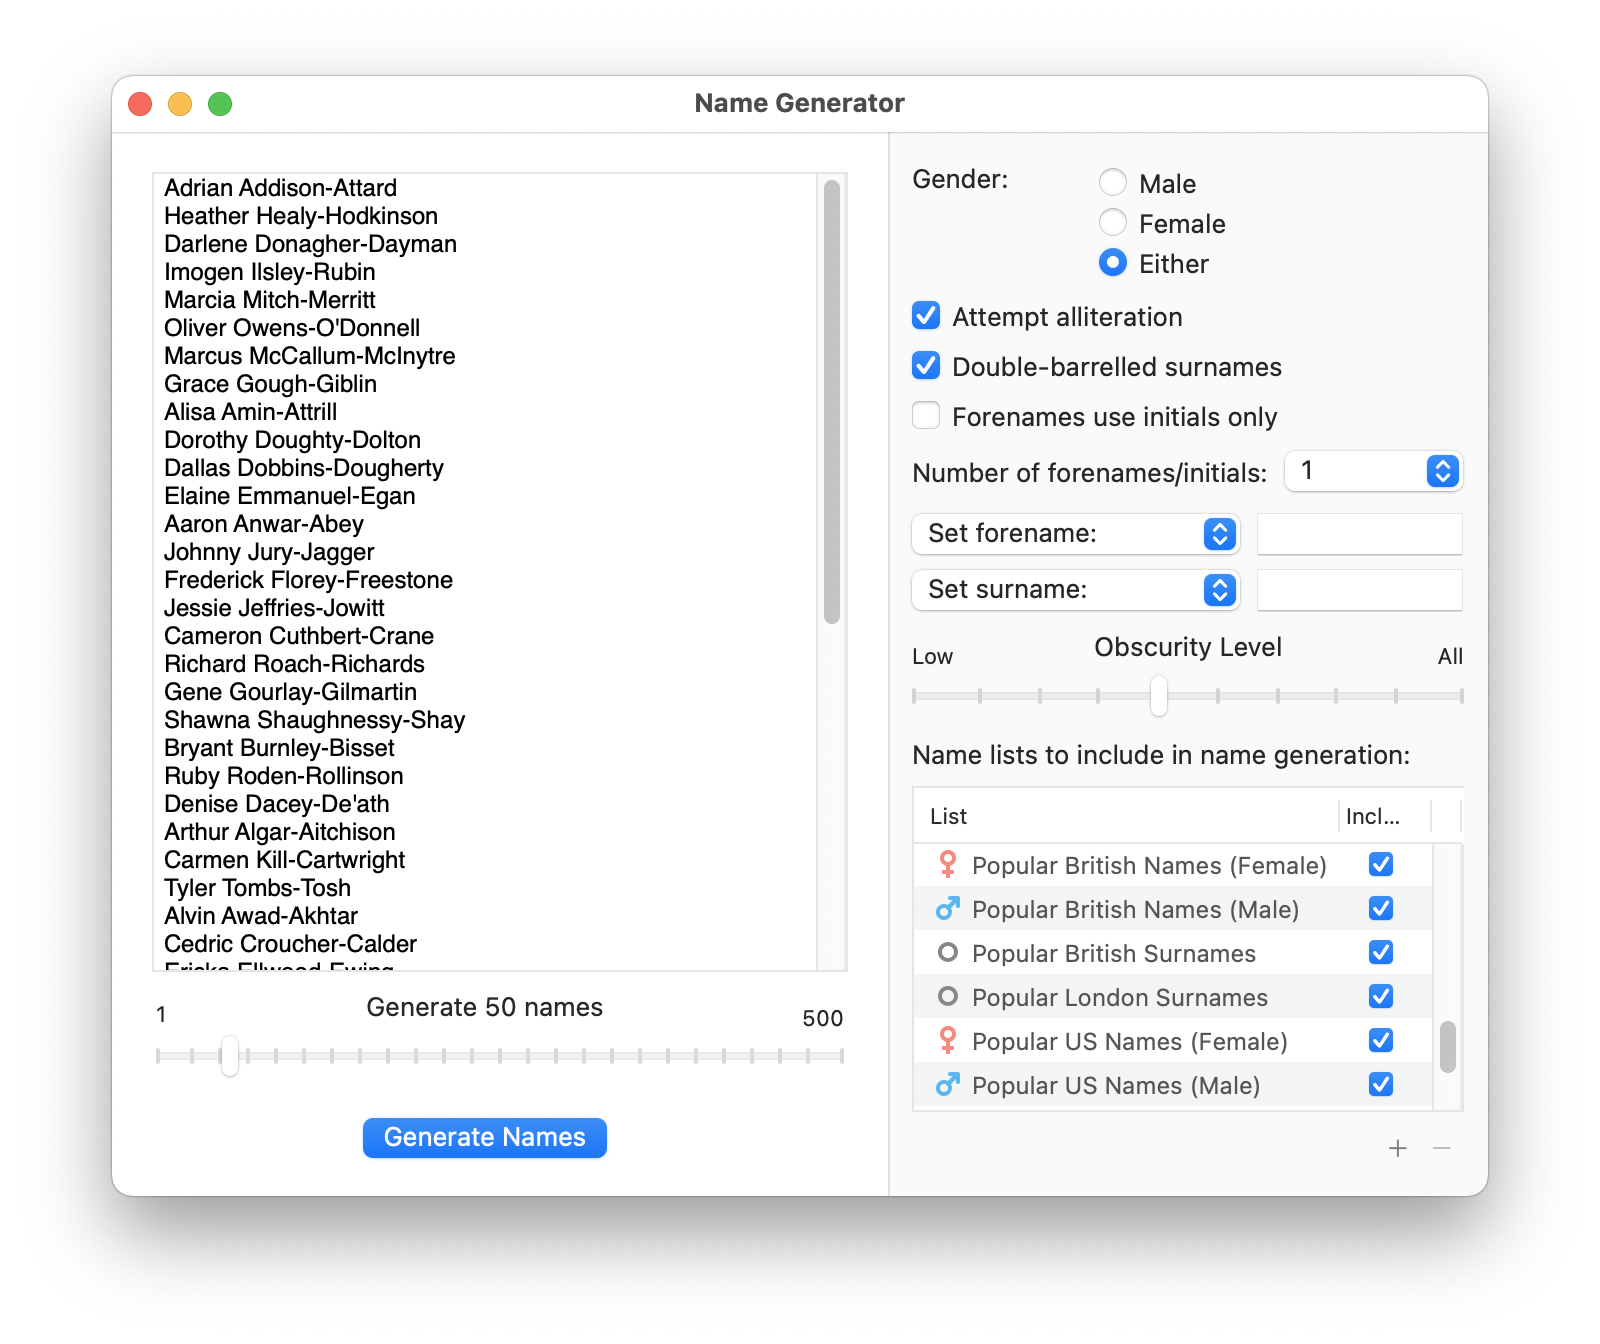
Choose Writing Tools > Name Generator to display the Name Generator window.

By default, a number of name lists are enabled; you can view the name lists and enable or disable them at the bottom right of the window.
You have a number of options at the top right of the window:
- Gender: you can generate male or female names, or both.
- Attempt Alliteration: this tries to find names that sound trippingly on the tongue, where the first letter of the first and last names (or forenames and surnames) are the same, such as Lisa Lowe or Thomas Thompson.
- Double-barreled surnames: this is a British thing, where a last name has two parts, and is hyphenated. This is a sign of a certain class of British people. Examples: Steven Wilson-Kennedy and Sarah Cox-Mills.
- Forenames use initials only: check this if you want to have names like M. Chambers or K. Bradley.
- Number of forenames/initials: you can set this to more than one, if you wish.
- Set forename / Set surname: you can set names if you want to have, say, a character named John or Jane, and find an appropriate surname. There are also options in this menu to choose the beginning or ending of either the forename or surname.
- Obscurity level: you can drag this slider to change the range of names from, say, common names like Smith and Jones to more obscure names Winterbourne and Dunsford.
When you’ve chosen your settings, click Generate Names at the bottom of the window. By default, this creates 50 names, but if you drag the slider, you can change this number to anything between 1 and 500. You can scroll up and down in the results and copy any of the names you want to use.
Warning: the Name Generator can be a distraction; you may find it a fun way to while away the time when you’re short of words, so beware.
Kirk McElhearn is a writer, podcaster, and photographer. He is the author of Take Control of Scrivener, and host of the podcast Write Now with Scrivener.

