

After you’ve taken snapshots of documents in your Scrivener projects, you can manage them, compare them with your current documents, and restore them if you want.
In a recent article, we looked at how you can use snapshots to save versions of your Scrivener projects. We explained what snapshots are, how they work, and how to take snapshots.
In this article, we want to go further, showing you what you can do with snapshots. We’ll look at how you can manage snapshots, how you can compare them to current versions of documents in your project, and how you can restore snapshots if you want to.
How to manage snapshots
If you make snapshots in your Scrivener projects, you will want to be able to manage them. Some people may make snapshots daily, as a sort of backup; in this case, you’ll have lots of them. Others only take snapshots before making major edits to a document, to ensure they can go back and restore text they cut, if they change their mind. In both cases, there are several ways you can view and manage snapshots.
The Inspector
If the Inspector is visible (View > Show Inspector), and you click the Snapshots icon (which looks like an old-fashioned camera), you’ll see any snapshots available for a document selected in the Binder. In this example, you can see that there are three snapshots attached to this document.
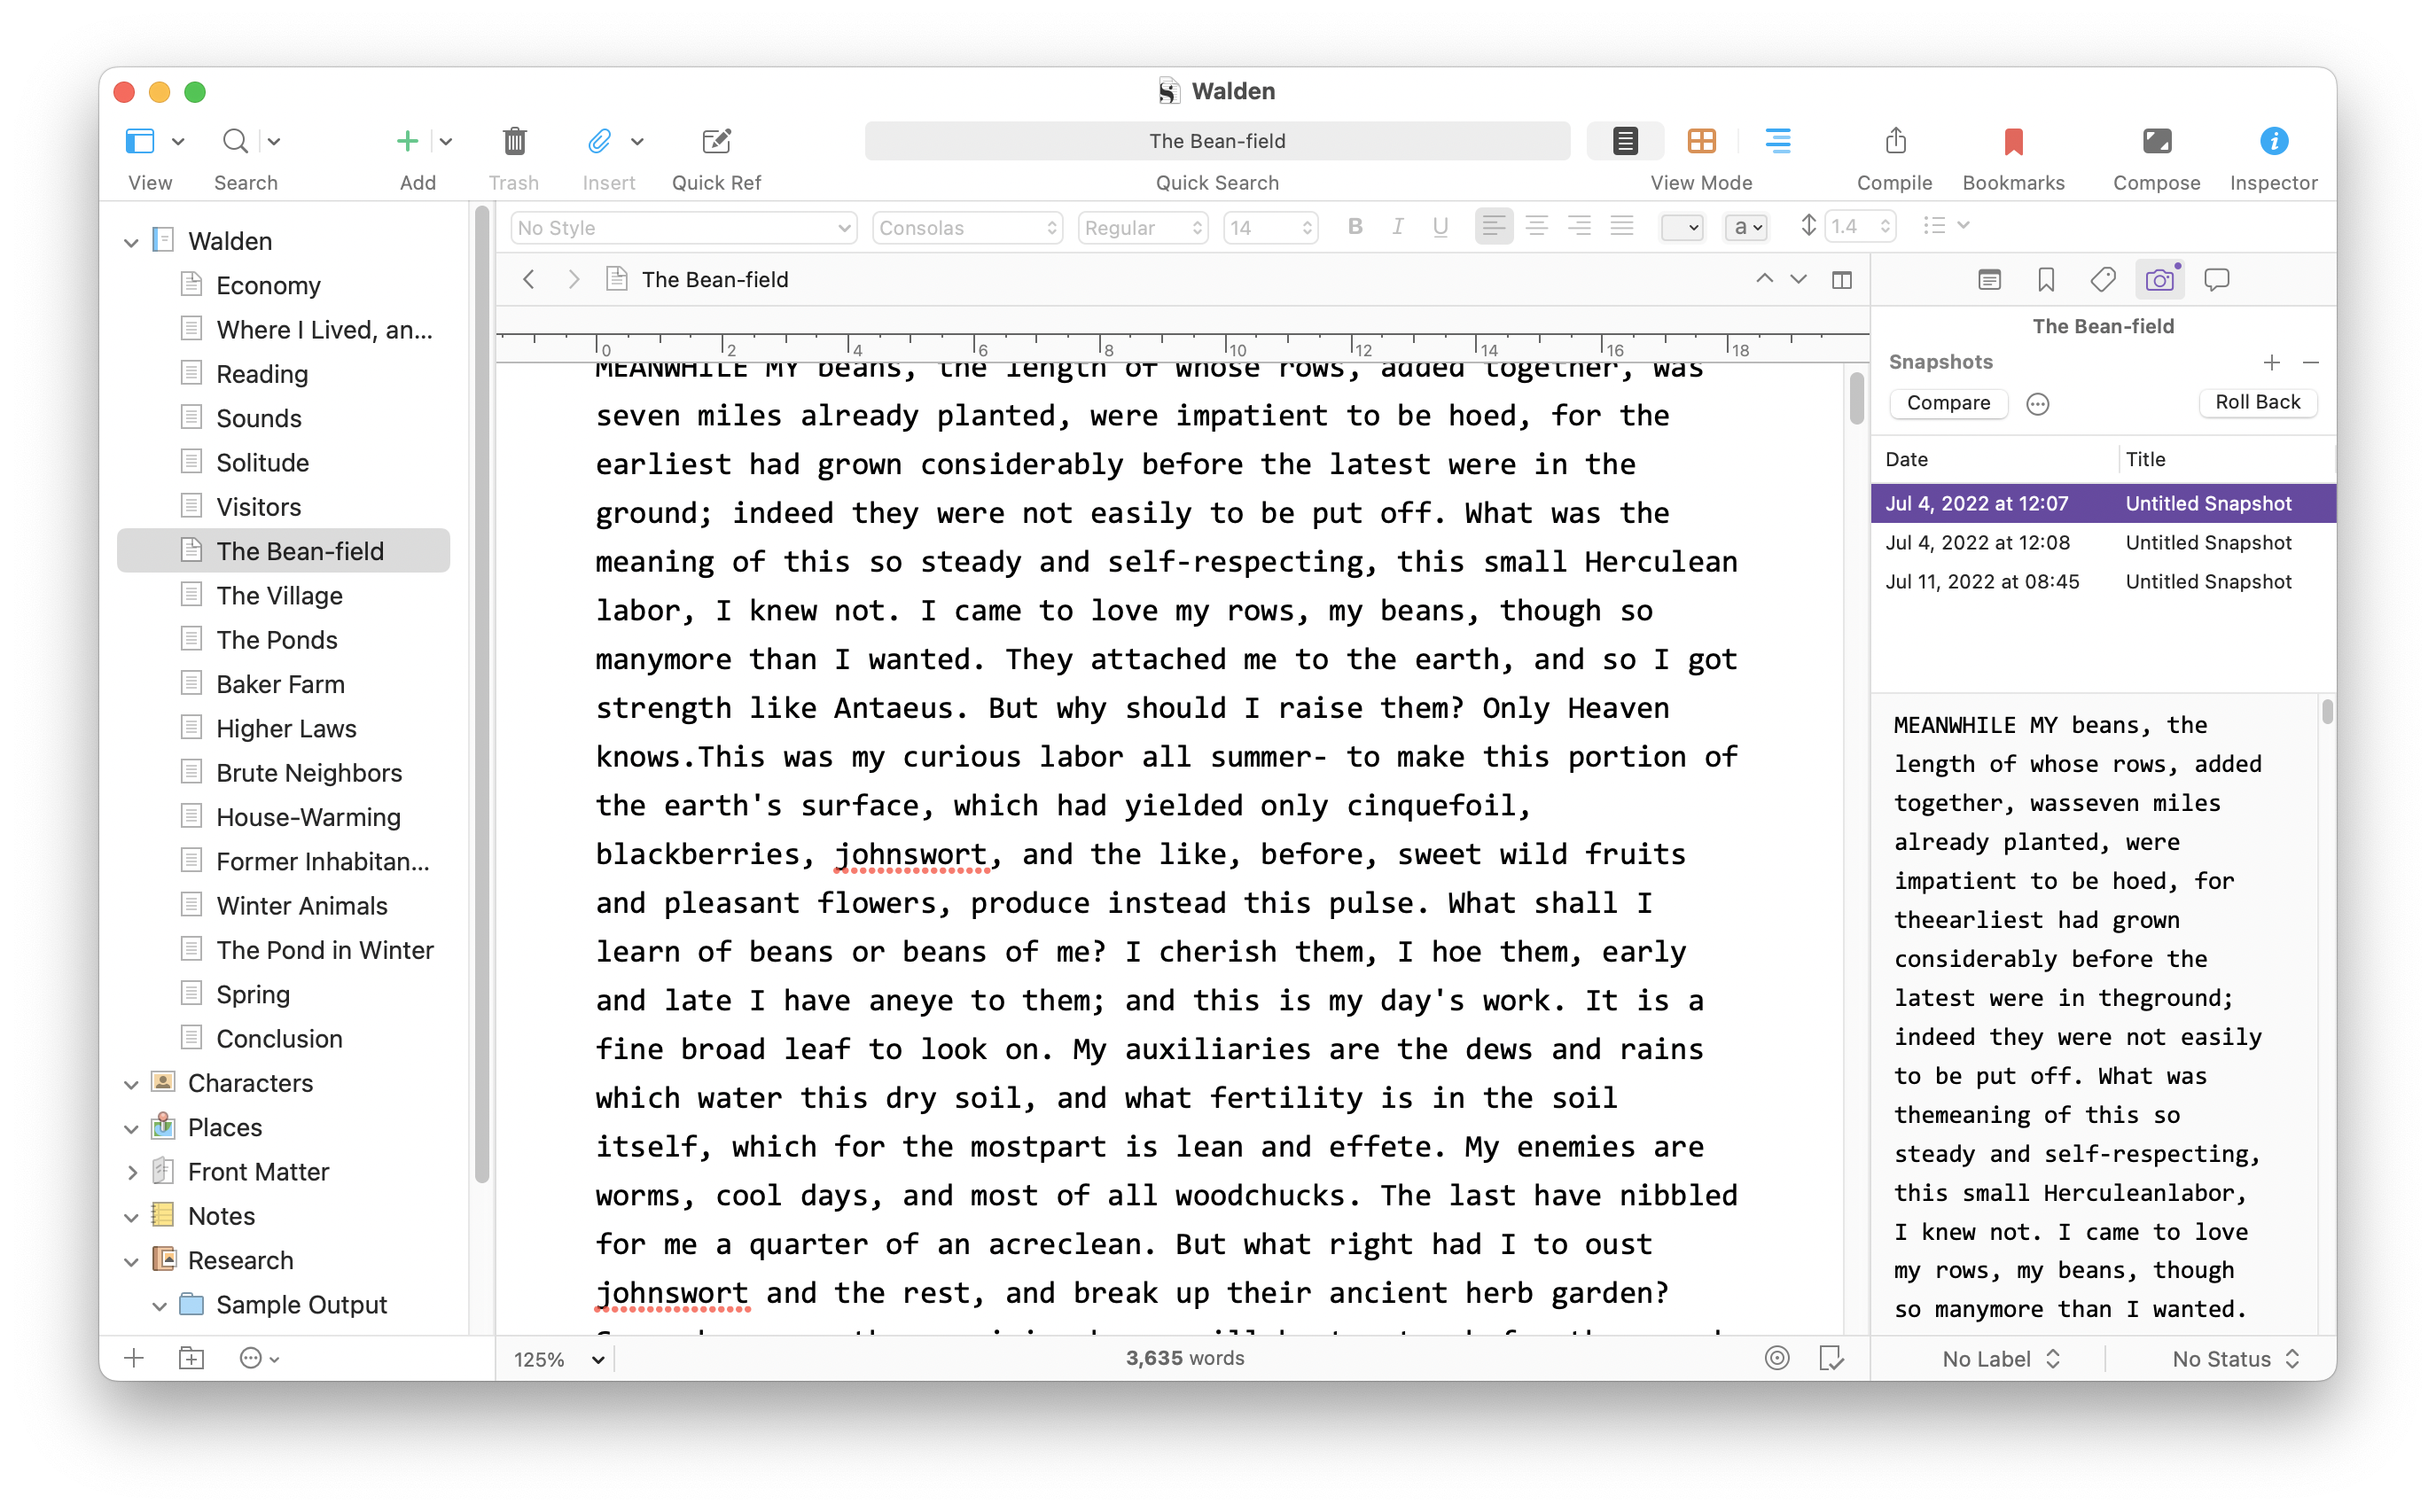
Each one shows its date and time, and, in this case, they all say Untitled Snapshot, since I didn’t give them titles when saving them. If you want to name snapshots in the Inspector, just double click the name and type a new name. If you have a lot of snapshots, and especially if any of them are specific waypoints in your writing progress, it’s a good idea to name them.
The Snapshots Manager
If you use snapshots a lot, you may find it more efficient to use the Snapshots Manager. To display this, choose Documents > Snapshots > Show Snapshots Manager.
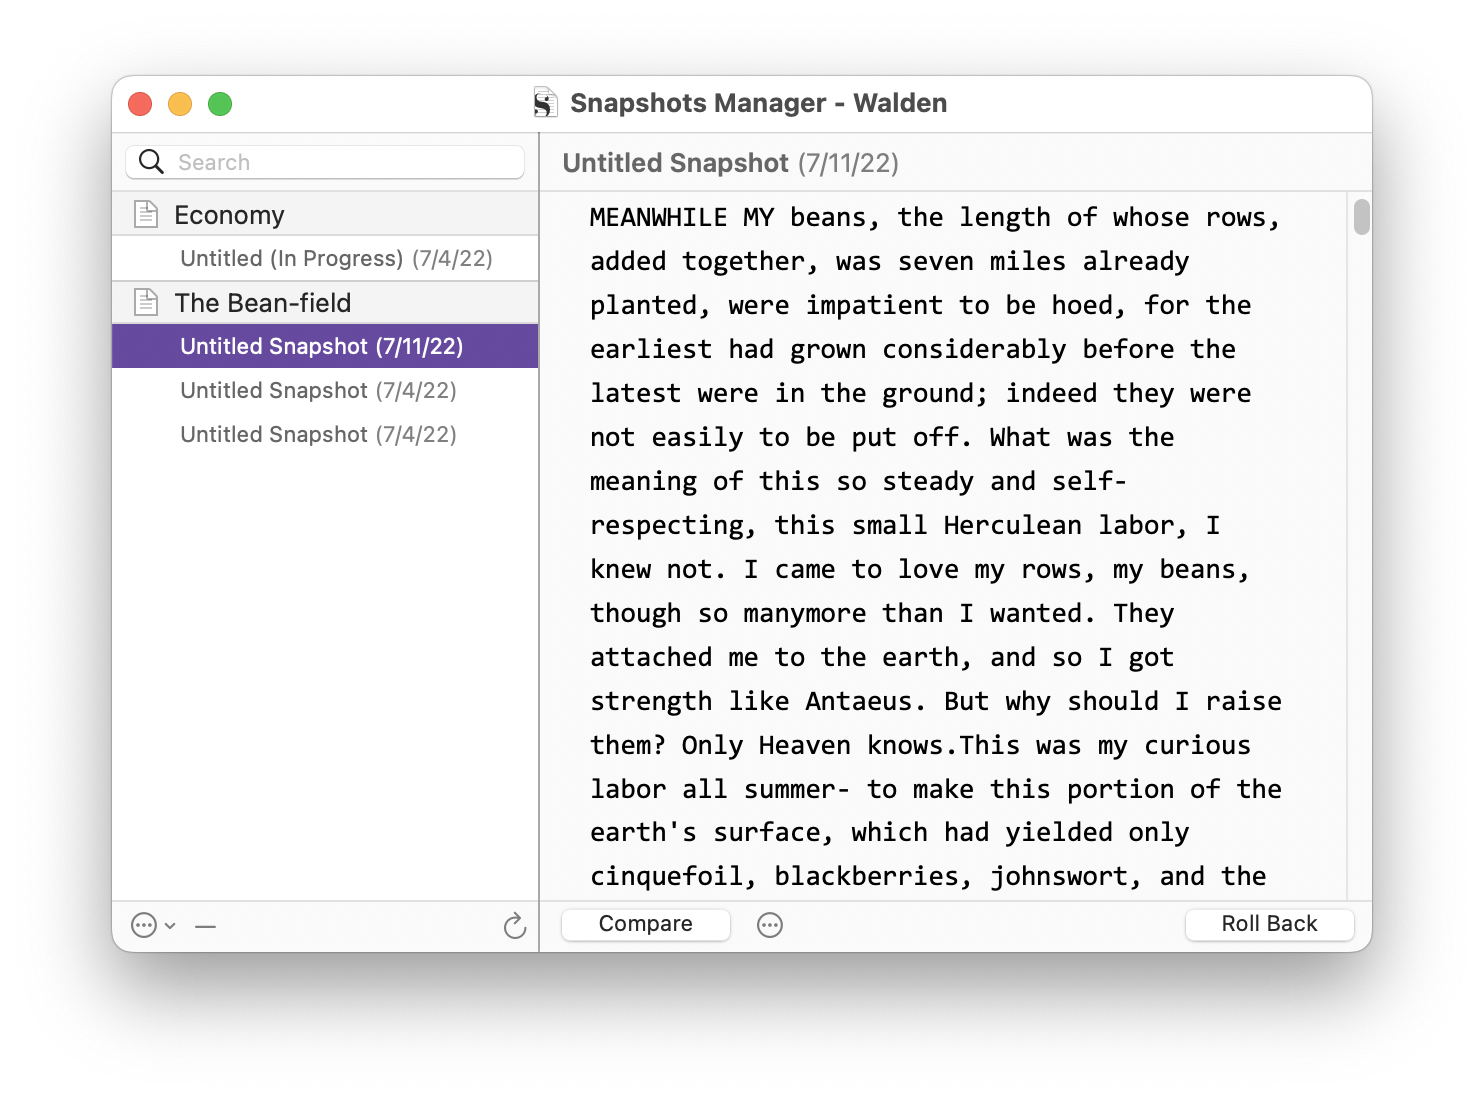
As you can see, this window gives you an overview of all the snapshots in your project, and lets you view the contents of each one. The Search field lets you search for snapshots (another reason why naming snapshots can be helpful), and you can manage snapshots from the footer of this window. Click the … icon to display a menu which lets you perform actions on the snapshot.
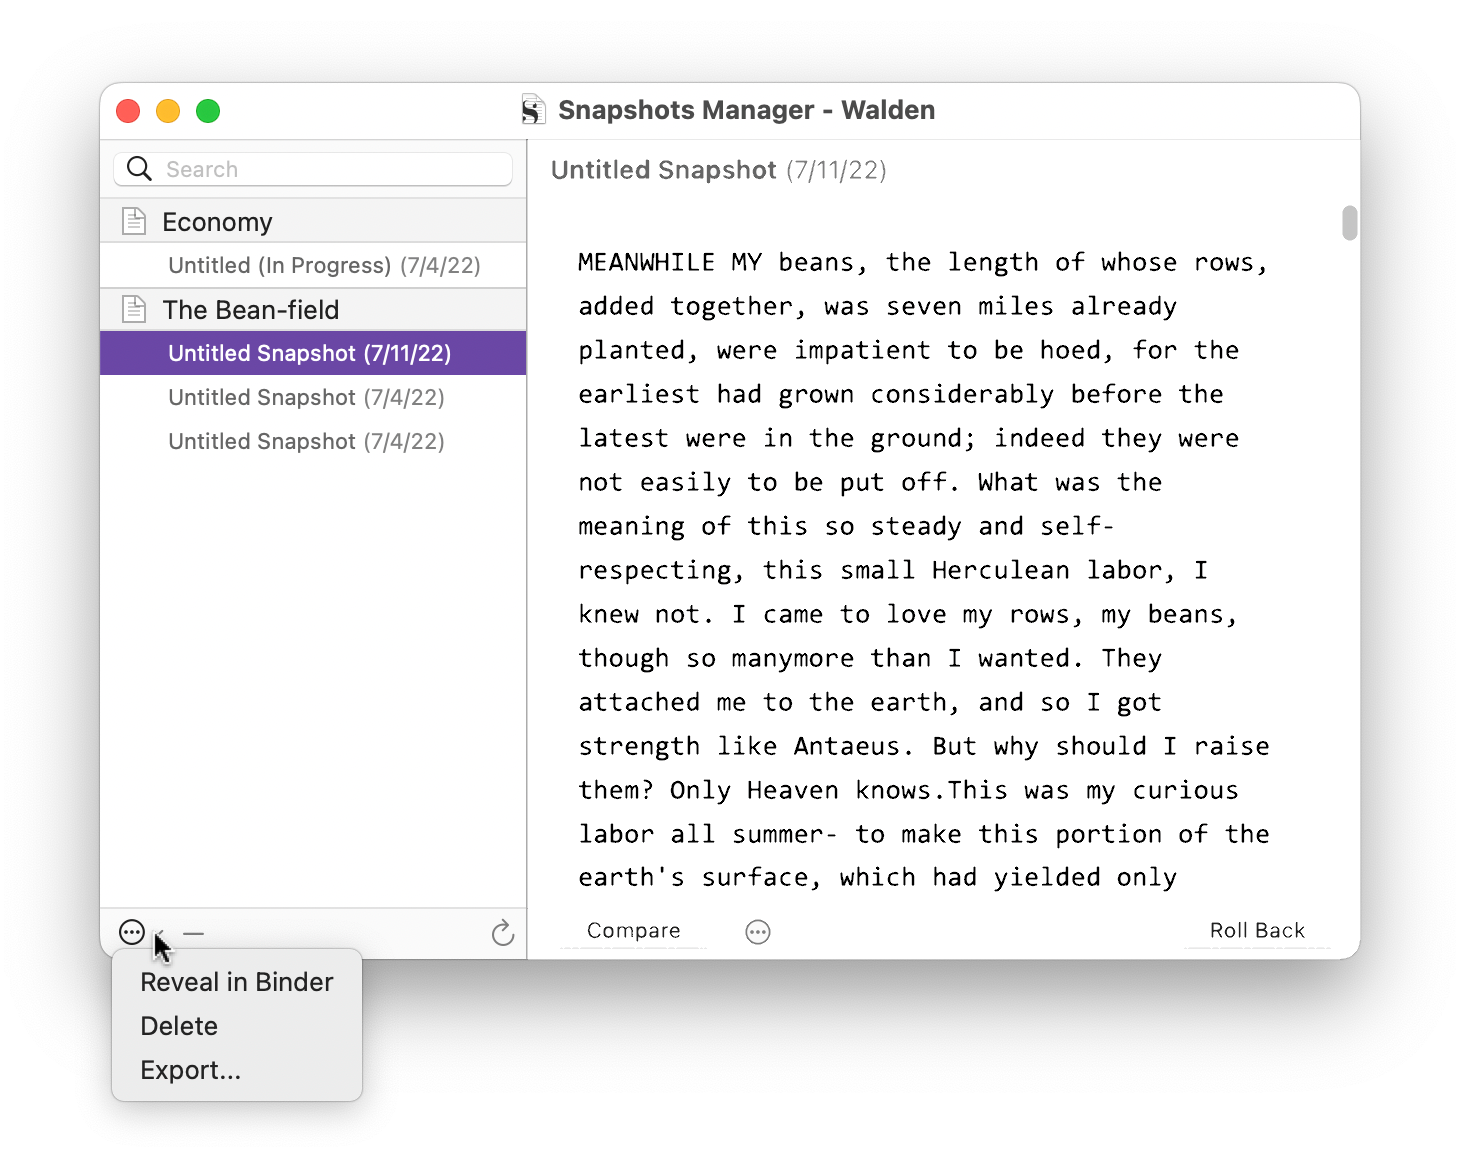
You can reveal a selected snapshot in the Binder, delete a snapshot, or export it. The latter option is useful if you want to share a snapshot of part of your project with a co-author, editor, agent, or writing buddy.
You can also rename snapshots by double-clicking a name in the snapshots list.
How to compare snapshots
It can be useful to compare snapshots, to see which changes you have made in one version of a document, and to perhaps restore some of the original text, whether this is small edits or an entire scene. When you select a snapshot then click Compare (near the top of the Inspector, or in the footer of the Snapshots Manager), Scrivener highlights changes you’ve made. You may find it easier to do this in the Snapshots Manager, since its window is larger, and you can resize it. Here’s an example of some changes:
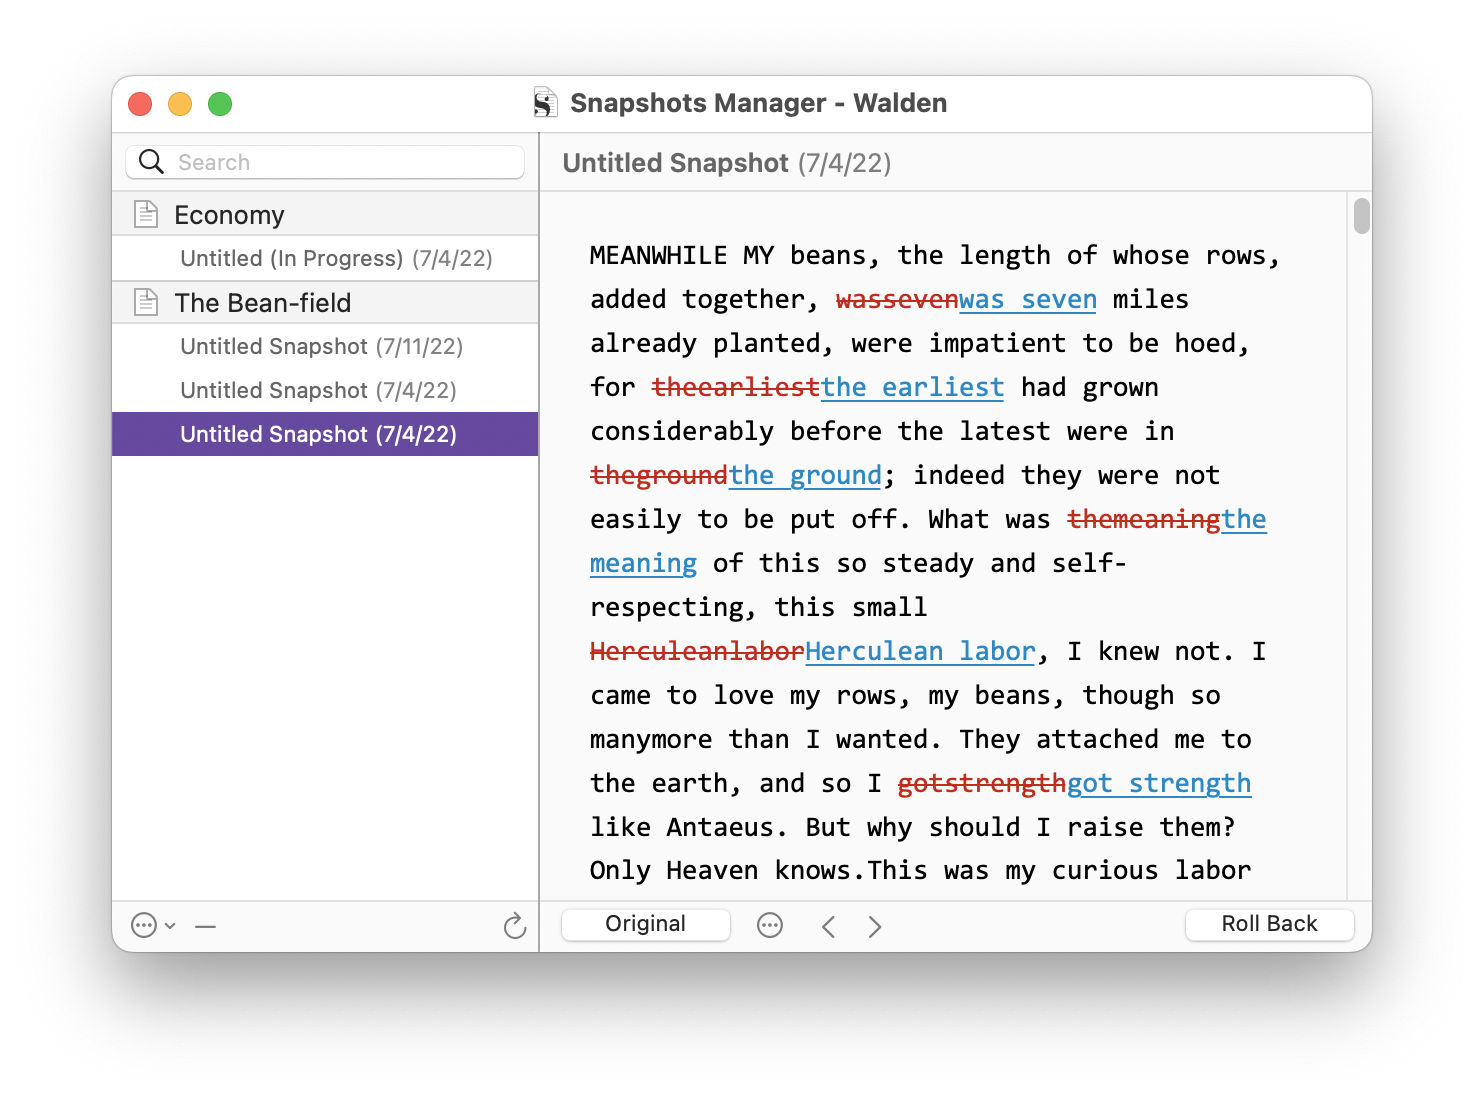
In this example, I just did simple proofreading; the public-domain text of Walden that I used in this project has many words that run together, and you can see, in red, the words that were replaced by my edits, which show in blue.
When you compare a snapshot to your current text, Scrivener offers three levels of granularity. If you click the … icon next to the Compare button (in either the Inspector or Snapshots Manager), a menu offers three options:
By Paragraph: Paragraphs are marked as modified if there are any changes in them. This is useful if you have cut or changed large sections of text, but display individual words that you’ve changed won’t display. Use this option if you are looking for longer changes. 
By Clause: Any changes made within a clause or sentence will show the entire clause as having been modified. You might use this option if you’ve made changes to dialogue and want to see changes to entire sentences.
By Word: As in my example above, this shows changes to individual words. This is best to compare a snapshot with a document that has had minor changes and copyedits.
How to restore snapshots
So you’ve finished your draft, and you’ve been snapshotting as you progressed, and you realize that there were sections or chapters where the text in the snapshot is better than your current version. You can restore, or “roll back,” any document to its snapshot.
There are two ways of doing this. The first is to just copy the text of the snapshot and paste it into the current document, replacing its text. This is quick, but it does delete the latest version.
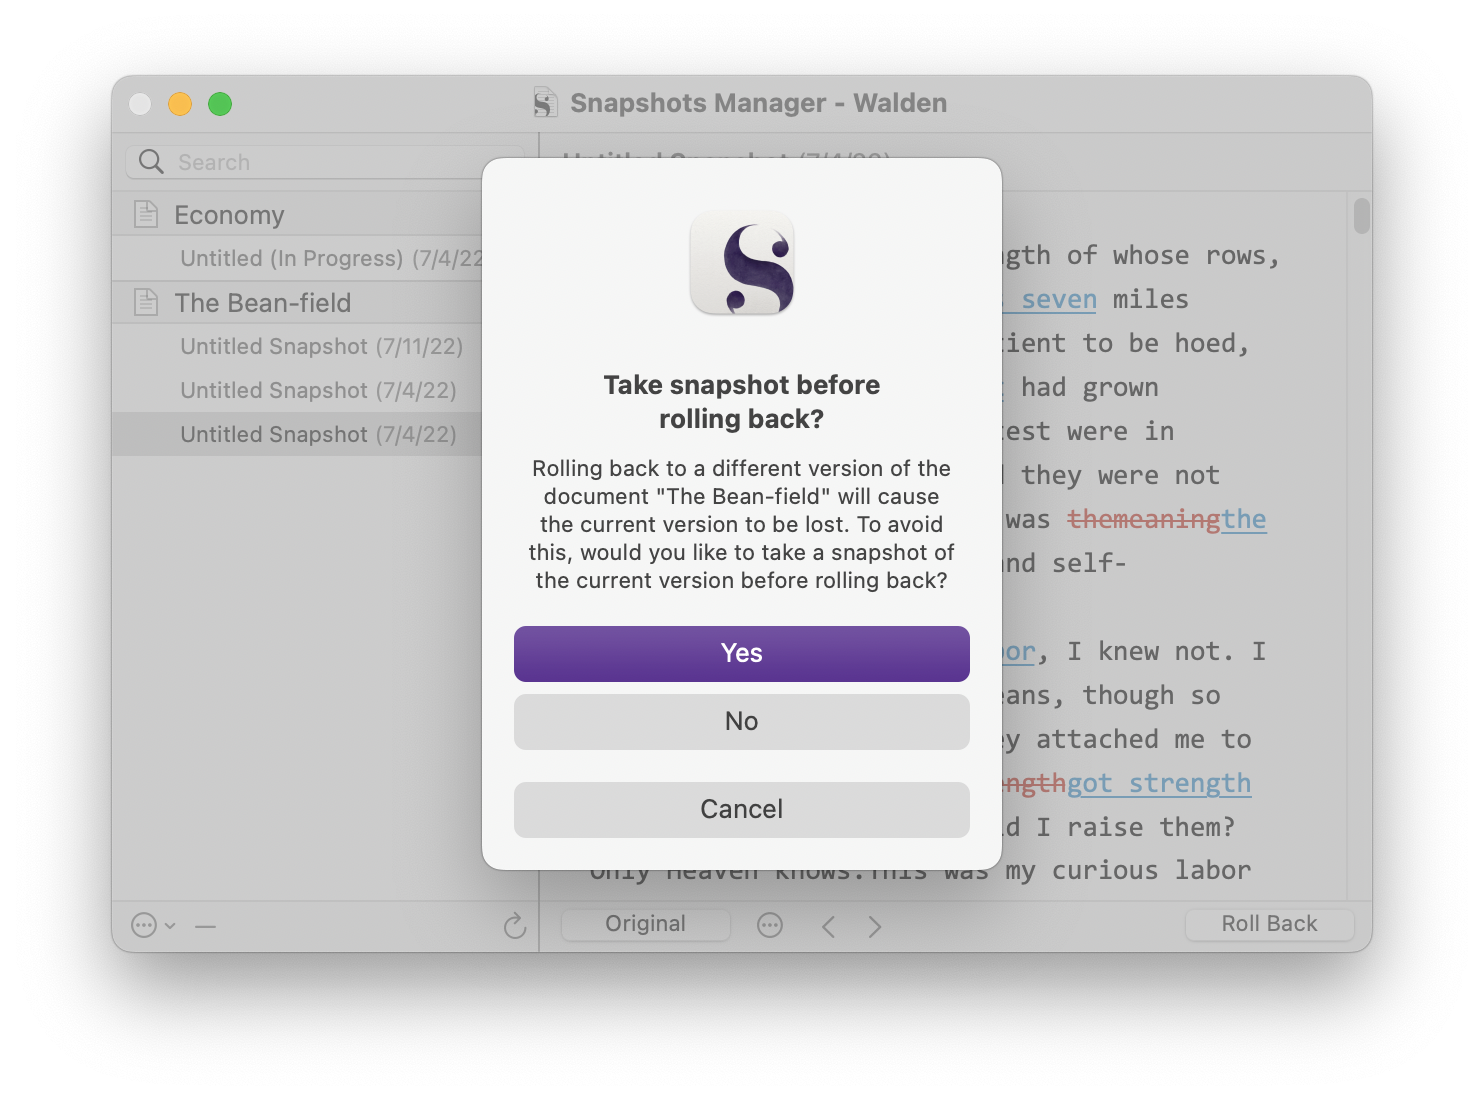
The other option is to click the Roll Back button. If you do this, Scrivener asks you if you are sure you want to roll back the text, but also offers to make a snapshot before doing so. This is recommended, because if you change your mind later, then you can do so by rolling back to the snapshot you make.
Snapshots are one of the most useful features in Scrivener when you get to the editing stage of your writing. They allow you to make changes to any part of your project and know that you can always go back to what you had before.
For more on comparing and restoring snapshots, see chapter 13.6 of the Scrivener manual.
Kirk McElhearn is a writer, podcaster, and photographer. He is the author of Take Control of Scrivener, and host of the podcast Write Now with Scrivener.