If you write longhand, you can use analog notes and texts to build your digital Scrivener projects.
Many writers find that using analog tools can spur creativity. They may make preparatory notes by hand, or write scenes, chapters, or even entire novels on paper. It is said that writing longhand uses different parts of the brain than tapping keys on a keyboard and that it may boost creativity. Since writers eventually spend so much time editing and revising their texts on a computer that creating a first draft by hand can be a way of getting a different perspective on their work. And when writing longhand, you won’t be distracted by your computer or tempted to browse social media, shop, or play games.
Scrivener is, of course, designed for electronic input, either via a keyboard or by even using dictation. But because of the way Scrivener projects allow you to include many types of documents, you can also store handwritten notes in them. Here’s how.
Taking notes
If you are an analog note-taker, you have your preferences. You may write in a pocket notebook, or you may take notes on pads. You may write with a pencil or a pen: maybe a fountain pen, if you prefer that sort of feeling of the pen on the paper. (And are willing to put up with the potential mess.) Some people can write with any type of writing implement on any type of paper, and others are more comfortable with a very specific combination. I like the relaxing pale, yellow color of legal pads and the smooth ivory-colored paper of Rhodia R pads, and I like the tactile feel of a good pencil or a smooth ballpoint pen on paper. I especially like the smell of a cedar pencil just after it has been sharpened; something about this smell puts me in the mood to write.
My handwriting is terrible. While I enjoy writing in notebooks, such as Moleskine notebooks, the pages are too small, and everything I write ends up messy. But those notebooks are great to carry around with you so you can write anywhere. If you have good, compact handwriting, you can write a novel in these notebooks.
You may want to use a hybrid, combining analog and digital. There are apps for Apple‘s iPad that allow you to write by hand using an Apple Pencil. This allows you to erase any mistakes you make, and change the color you’re writing in, or alter the thickness of the stroke. You can switch from something that looks like a pen to a pencil, a felt tip pen, or even a brush. And you can export files from these apps to PDF format, which you can later import into your Scrivener project. One such app is Goodnotes, but you’ll find many apps that work this way on Apple’s App Store.
Adding handwritten documents to Scrivener projects
There are two types of handwritten documents that you may wish to add to your Scrivener project. If you’ve made preparatory notes about a scene, character, or location, you can add these to your project, to refer to as you write. And if you’ve written entire scenes or chapters, you can add these to transcribe and edit.
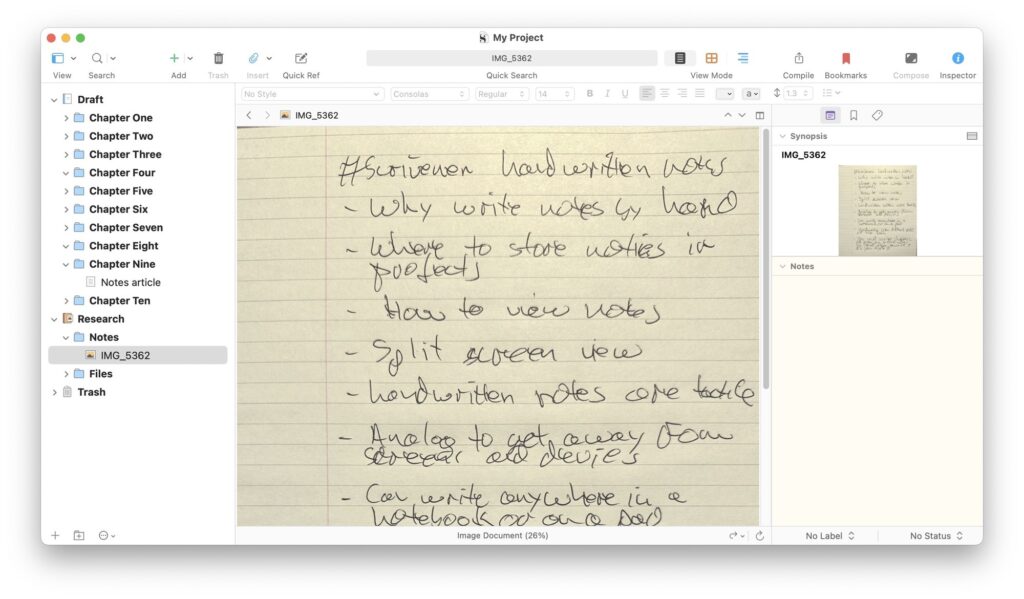
If you own a scanner, you could use that, but the easiest way to capture your handwritten notes is to take photos of them with your smartphone camera. Both iPhones and Android phones today have sufficient resolution for you to be able to read handwritten notes easily.
I took a photo of the notes that I made for this article (I told you that my handwriting is not very good), which I then imported to my Scrivener project. You cannot add photos to folders in the top section of the Binder, but you can add them to the Research folder. So I created a Notes folder and added the photo there.

You can do the same thing if you have a notebook full of scenes and chapters. Take photos of each page or each two-page spread with your phone. Transfer those photos to your Mac or PC, then add all the photos to a subfolder of the research folder.
If you’re using an iPad app, export notes from that app as JPEGs or PDFs and add them to your project.
Using handwritten notes in Scrivener projects
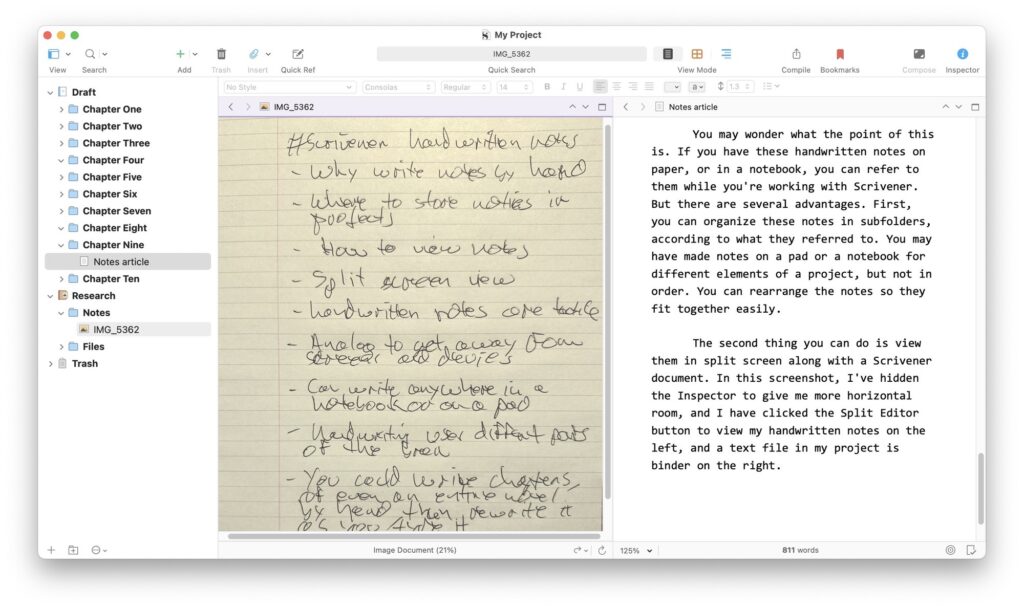
You may wonder what the point of this is. If you have these handwritten notes on paper, or in a notebook, you can refer to them while you’re working with Scrivener. But there are several advantages to storing them in your project. First, you can organize these notes in subfolders according to what they refer to. You may have made notes on a pad or in a notebook for different elements of a project, but not in order. You can rearrange the notes so they fit together easily.
The second way you can use them is to use Scrivener’s split-screen mode, viewing them alongside a Scrivener document. In the screenshot below, I’ve hidden the Inspector to give me more horizontal room, and I’ve clicked the Split Editor button to view my handwritten notes on the left and a text file in my project is in the Binder on the right. (Check out See More of Your Project: Splitting the Scrivener Editor for more on splitting the editor.) I can refer to my notes as I am writing my article.

If you are transcribing longer sections of text, such as entire chapters from a notebook, you can display the photos of your notebook pages on one side, and type in a document on the other side.
Many writers use handwritten notes or write sections of their books by hand, in part to free themselves from their computers. The ability to incorporate these notes into your Scrivener project makes it much easier to go from analog to digital and prepare your final draft.
Kirk McElhearn is a writer, podcaster, and photographer. He is the author of Take Control of Scrivener, and host of the podcast Write Now with Scrivener.

