

The Synopsis section of Scrivener’s Inspector is a great place to write an overview of the file you’re working on. But you can use it for much more. Here are 10 things you can do with the Synopsis field.
The Synopsis field is at the top of the Scrivener Inspector when you are viewing the Editor. Below the Synopsis field in the Inspector is the Notes field. While you can enter text in both of these fields, the difference is that anything you enter in the synopsis field also displays in the Corkboard or Outline. Because of this, entering text in the Synopsis field allows you to fill it with notes that you might want to see in any view: Editor, Corkboard, or Outline.
(If you don’t see the Inspector, choose View > Show Inspector, or click the Inspector button in the toolbar. See Get to Know the Scrivener Inspector to learn how to use the Inspector.)
Here are ten ways to use the Synopsis field.
1. Write a synopsis. This may seem obvious, but writing a synopsis in this field also populates the synopsis section of index cards in the Corkboard, as well as notes in the Outliner. When you fill in the Synopsis section in any of these, you can switch views and still see the synopsis. This is extremely practical if you’re outlining or planning a project. See Integrating Scrivener’s Binder, Corkboard, and Outliner to learn how the three views work.
2. Create mini-outlines. As you work on your project and create new files, the Synopsis section is a great place to put a mini-outline of each file. If each file is a chapter, you can jot down the main points of what happens in that chapter; if each file is a scene or part of a chapter, you can make a quick description of what you plan to write in that scene.
3. Leave the synopsis field blank. This may seem counterintuitive, but if you don’t put anything in the synopsis field, then view your project in the Corkboard, each index card shows text from the beginning of the file. You may find it useful to have these opening sentences visible quickly, especially if you use the Corkboard to rearrange scenes and chapters, to remember what happens in each one.

4. Revise the auto-generated synopses. If, as above, you haven’t entered anything in the synopses of your project, you can review the texts that Scrivener has automatically entered. When you have completed your first draft, you can switch to the Corkboard, look at the beginning of each file, and write synopses. This is a good way to prepare for the revision process as you work on your next draft.
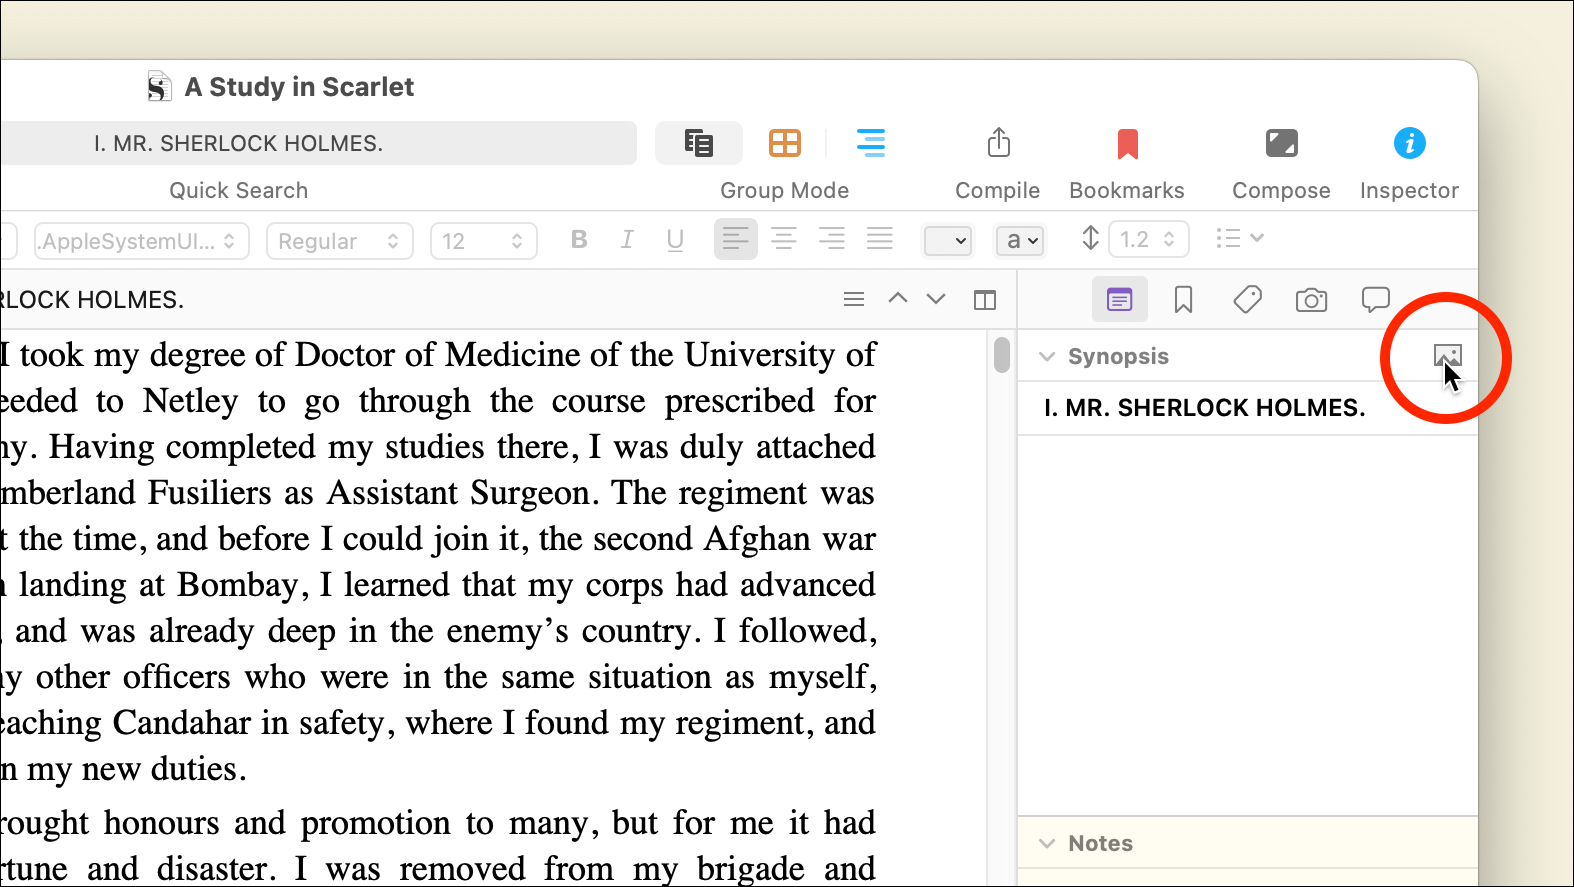
5. Add an image to the synopsis. If you click the small image icon above the synopsis, its text field changes and tells you, “Drop an image here.” Drag an image onto the synopsis section, and this image remains attached to this file, displaying on the index card for its file in the Corkboard. To hide the image, click the text icon that replaces the image icon; the image remains with the file but isn’t visible. To remove the image, right-click and choose Clear Image.
6. List key moments of a scene or chapter. You can use the synopsis field to note the key moments or beats of a scene or chapter after you’ve written it. This can be helpful when writing, as in the second idea above, or when revising, but also to keep a running tab of what happens in your novel. You may want to enter the names of characters who appear in each scene or chapter, specific settings if your novel moves around a lot, dates if timelines shift, or any other information that will help you as you write and revise.
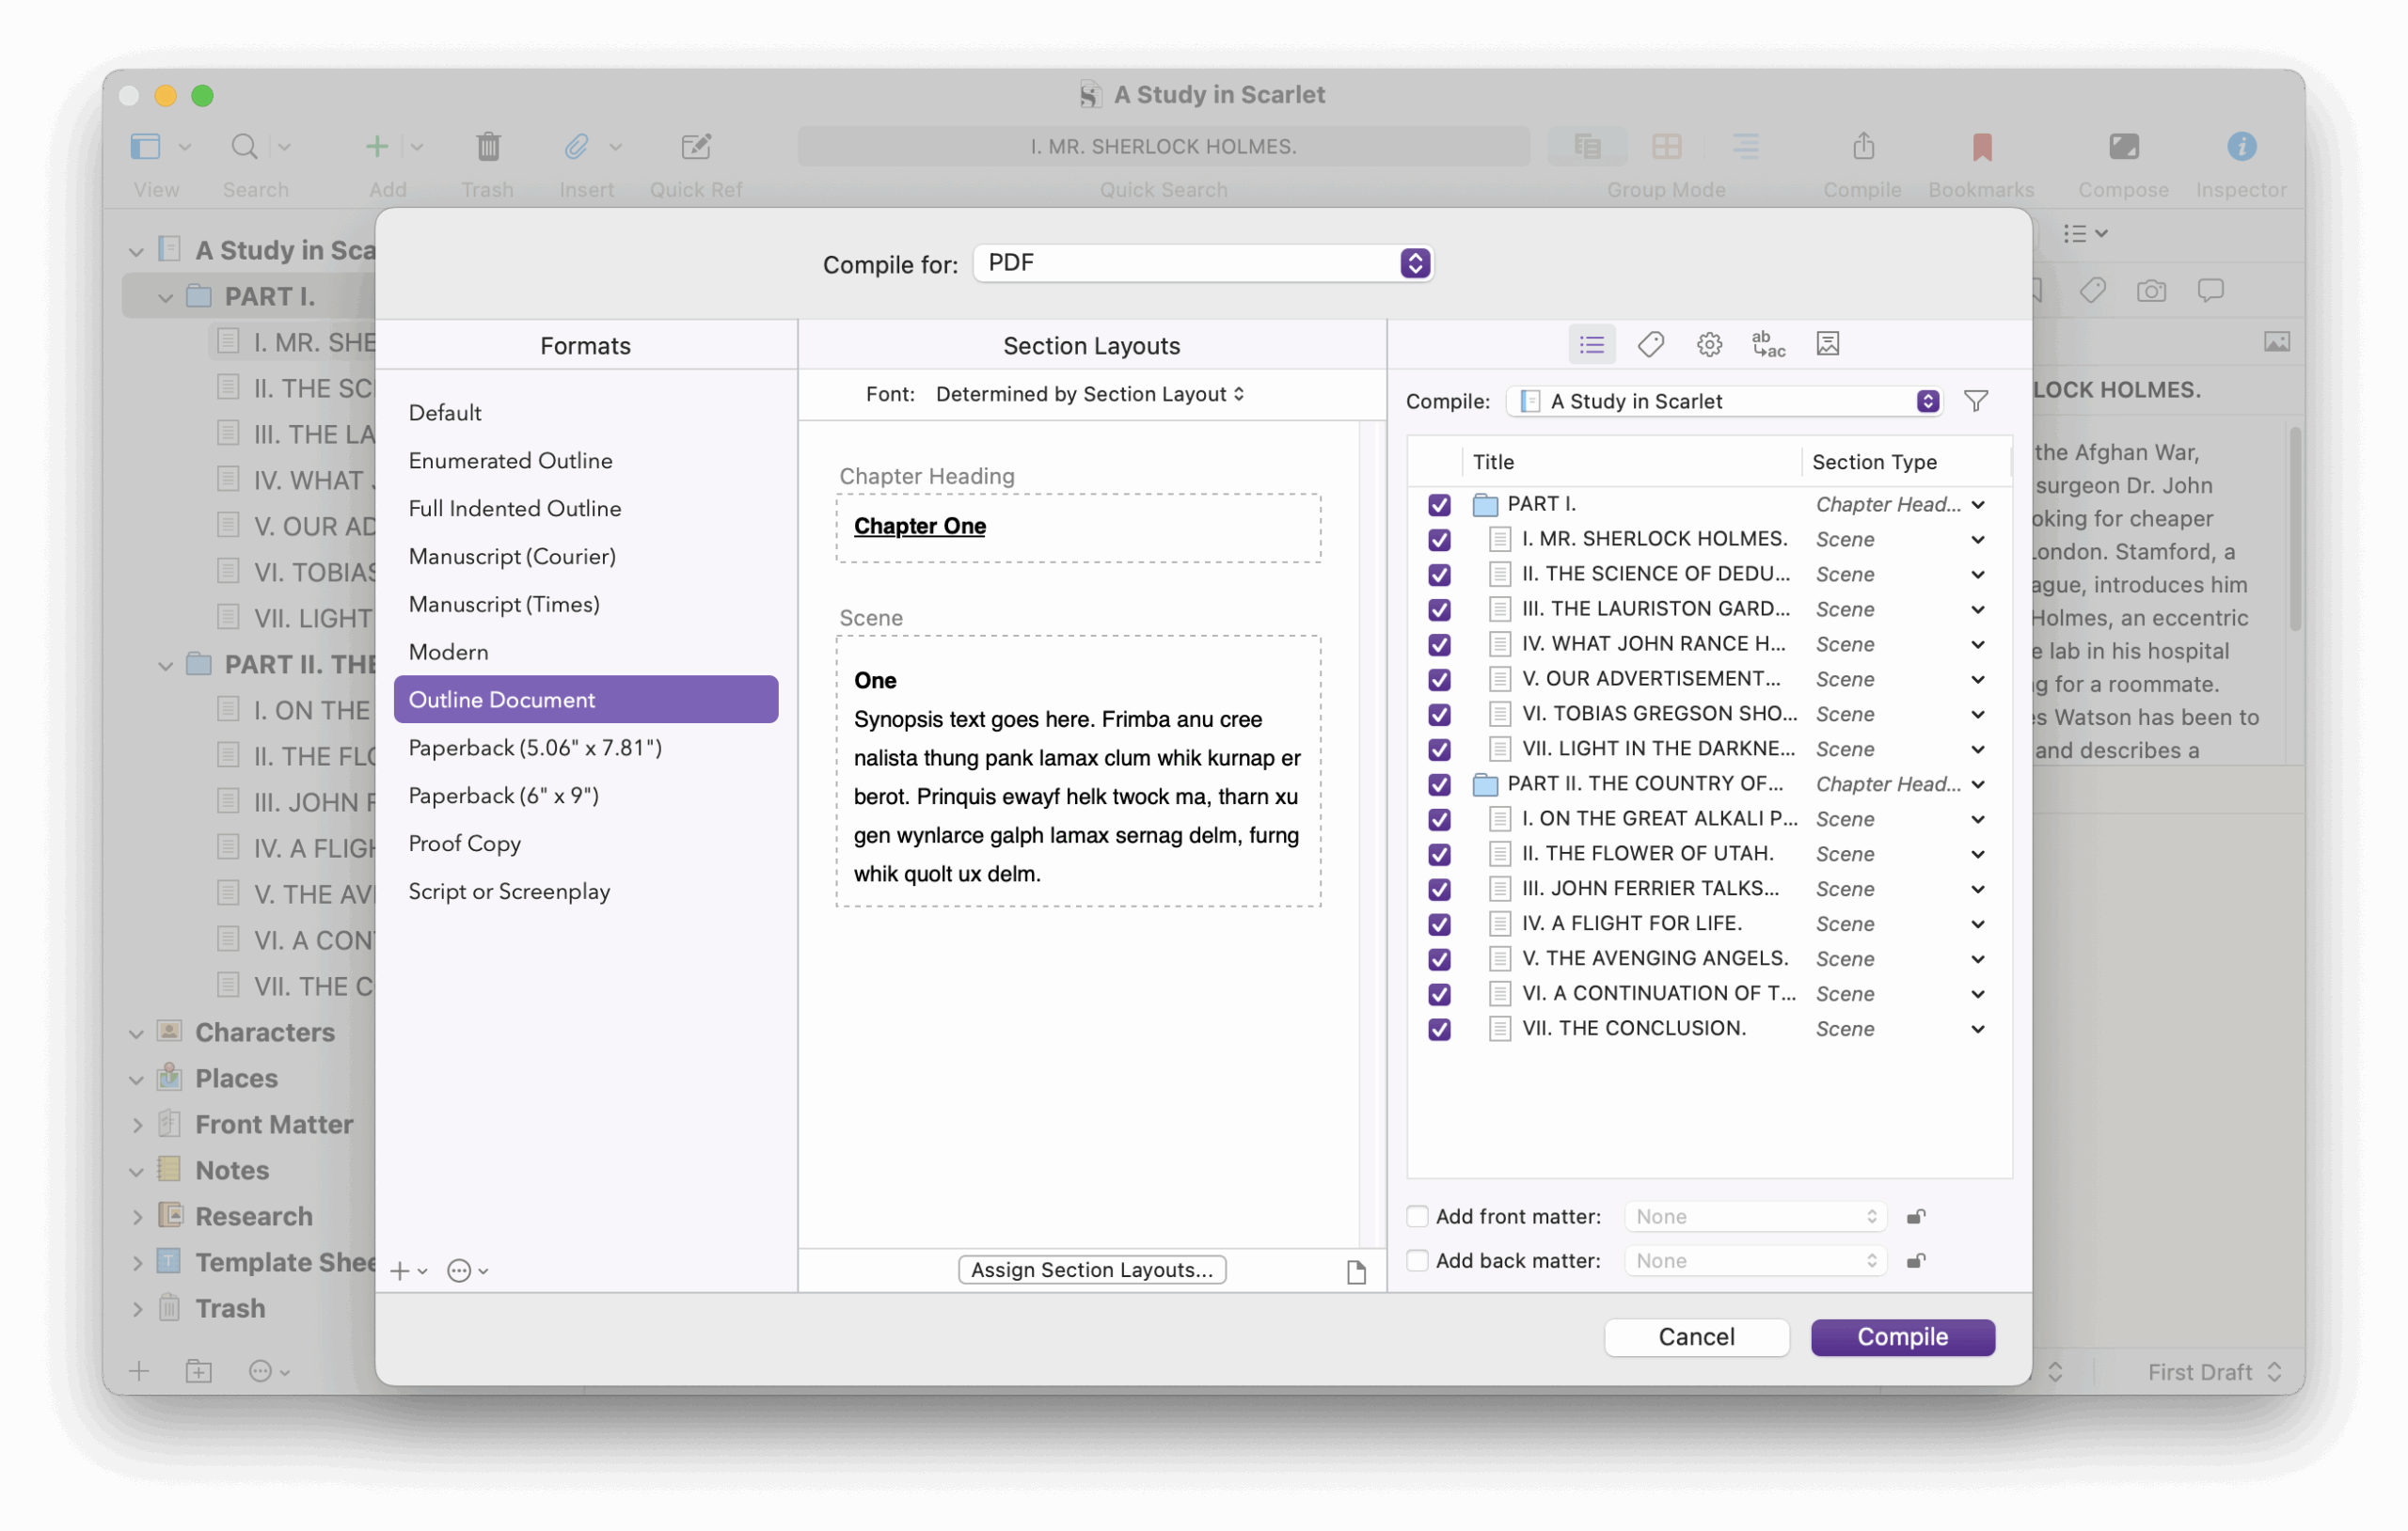
7.Compile and export a synopsis outline. Scrivener’s Compile feature puts all the elements of your project together to create a PDF or ebook, but you can also export an outline of your project. If you fill in the Synopsis fields for your files, Scrivener exports these in Outline Document format. Choose File > Compile, click Outline Document in the Formats list, and choose PDF in the Compile For menu. This saves a PDF with the titles of all your files and their synopses. You can use this to share an overview of your project with a friend, agent, or editor. For more on compiling Scrivener projects, see Compiling Your Scrivener Project: The Basics.
8. Use synopses for non-fiction projects. You can use the synopsis field for more than just fiction. For a non-fiction project, you may want to use it to write an overview of each chapter or list key points that you cover; enter dates if you’re writing a biography or history book; or enter the names of key people who are mentioned in each chapter.
9. Update your synopses as you write. If you have used synopses to outline your book, it’s very possible that the information they contain has changed during writing. It’s a good idea to update synopses as you write, so if you wish to use them to get an overview of your project after you’ve finished your first draft, or even before that, they will always be up-to-date.
10. Navigate using synopses. If you have a lot of files in your Scrivener project, it can be hard to remember what happens in each one. If you write synopses for all your files, you can quickly switch to the Corkboard or Outliner and scan your synopses when you’re searching for a scene or chapter. Also, rereading all your synopses in one of these views gives you an overview of your entire project.
Scrivener’s synopses are a powerful tool that can help you organize and manage your projects, from the planning stage through final revisions. Get to know this feature and how it can help you manage your projects.
Kirk McElhearn is a writer, podcaster, and photographer. He is the author of Take Control of Scrivener, and host of the podcast Write Now with Scrivener.