Two features built into Scrivener let you create and view timelines in different ways.
Two Ways of Creating a Timeline for Your Scrivener Project
In some novels, events happen according to a detailed timeline. This is often the case with mysteries and thrillers, where events may occur at specific times, and you, as author, need to keep track of what is happening and when. (Think of the TV series 24.) This is even more complex if you have multiple point of view characters and overlapping timelines; it can be difficult, when you're writing, to keep track of events.
In this article, I'm going to show you two ways you can create a timeline for your Scrivener project.
Create a timeline using Scrivener's Outliner
Scrivener's Outliner is a great way to get a top-level view of your project. It reproduces what you see in the Binder - the sidebar at the left of the Scrivener window - but can display much more information. By default, the Outliner displays the names of files in the Binder followed by synopses, if you have added them to the Inspector.
But the Outliner is very flexible; you can choose from about two dozen metadata elements to display in this pane, such as labels, status, created or modified date, word count, and more. In addition, you can create custom metadata which you can choose to display in the Outliner. In How to Add Custom Metadata to the Scrivener Inspector we explain how you can create any of four types of metadata: Text, Checkboxes, Lists, and Dates. If you add dates to your project files as custom metadata, you can sort the outline by date, allowing you to view a timeline.
Follow the instructions in the article linked above to create custom metadata. If your story takes place over a short period of time, you may want to have metadata that allows you to display both the date and the time; if it's a longer period, the date will be enough. When you've done this, add dates and/or times to your project files in the Inspector. Switch to the Outliner (View > Outline), then right-click on the header just above the outline and choose Date & Time in the menu.
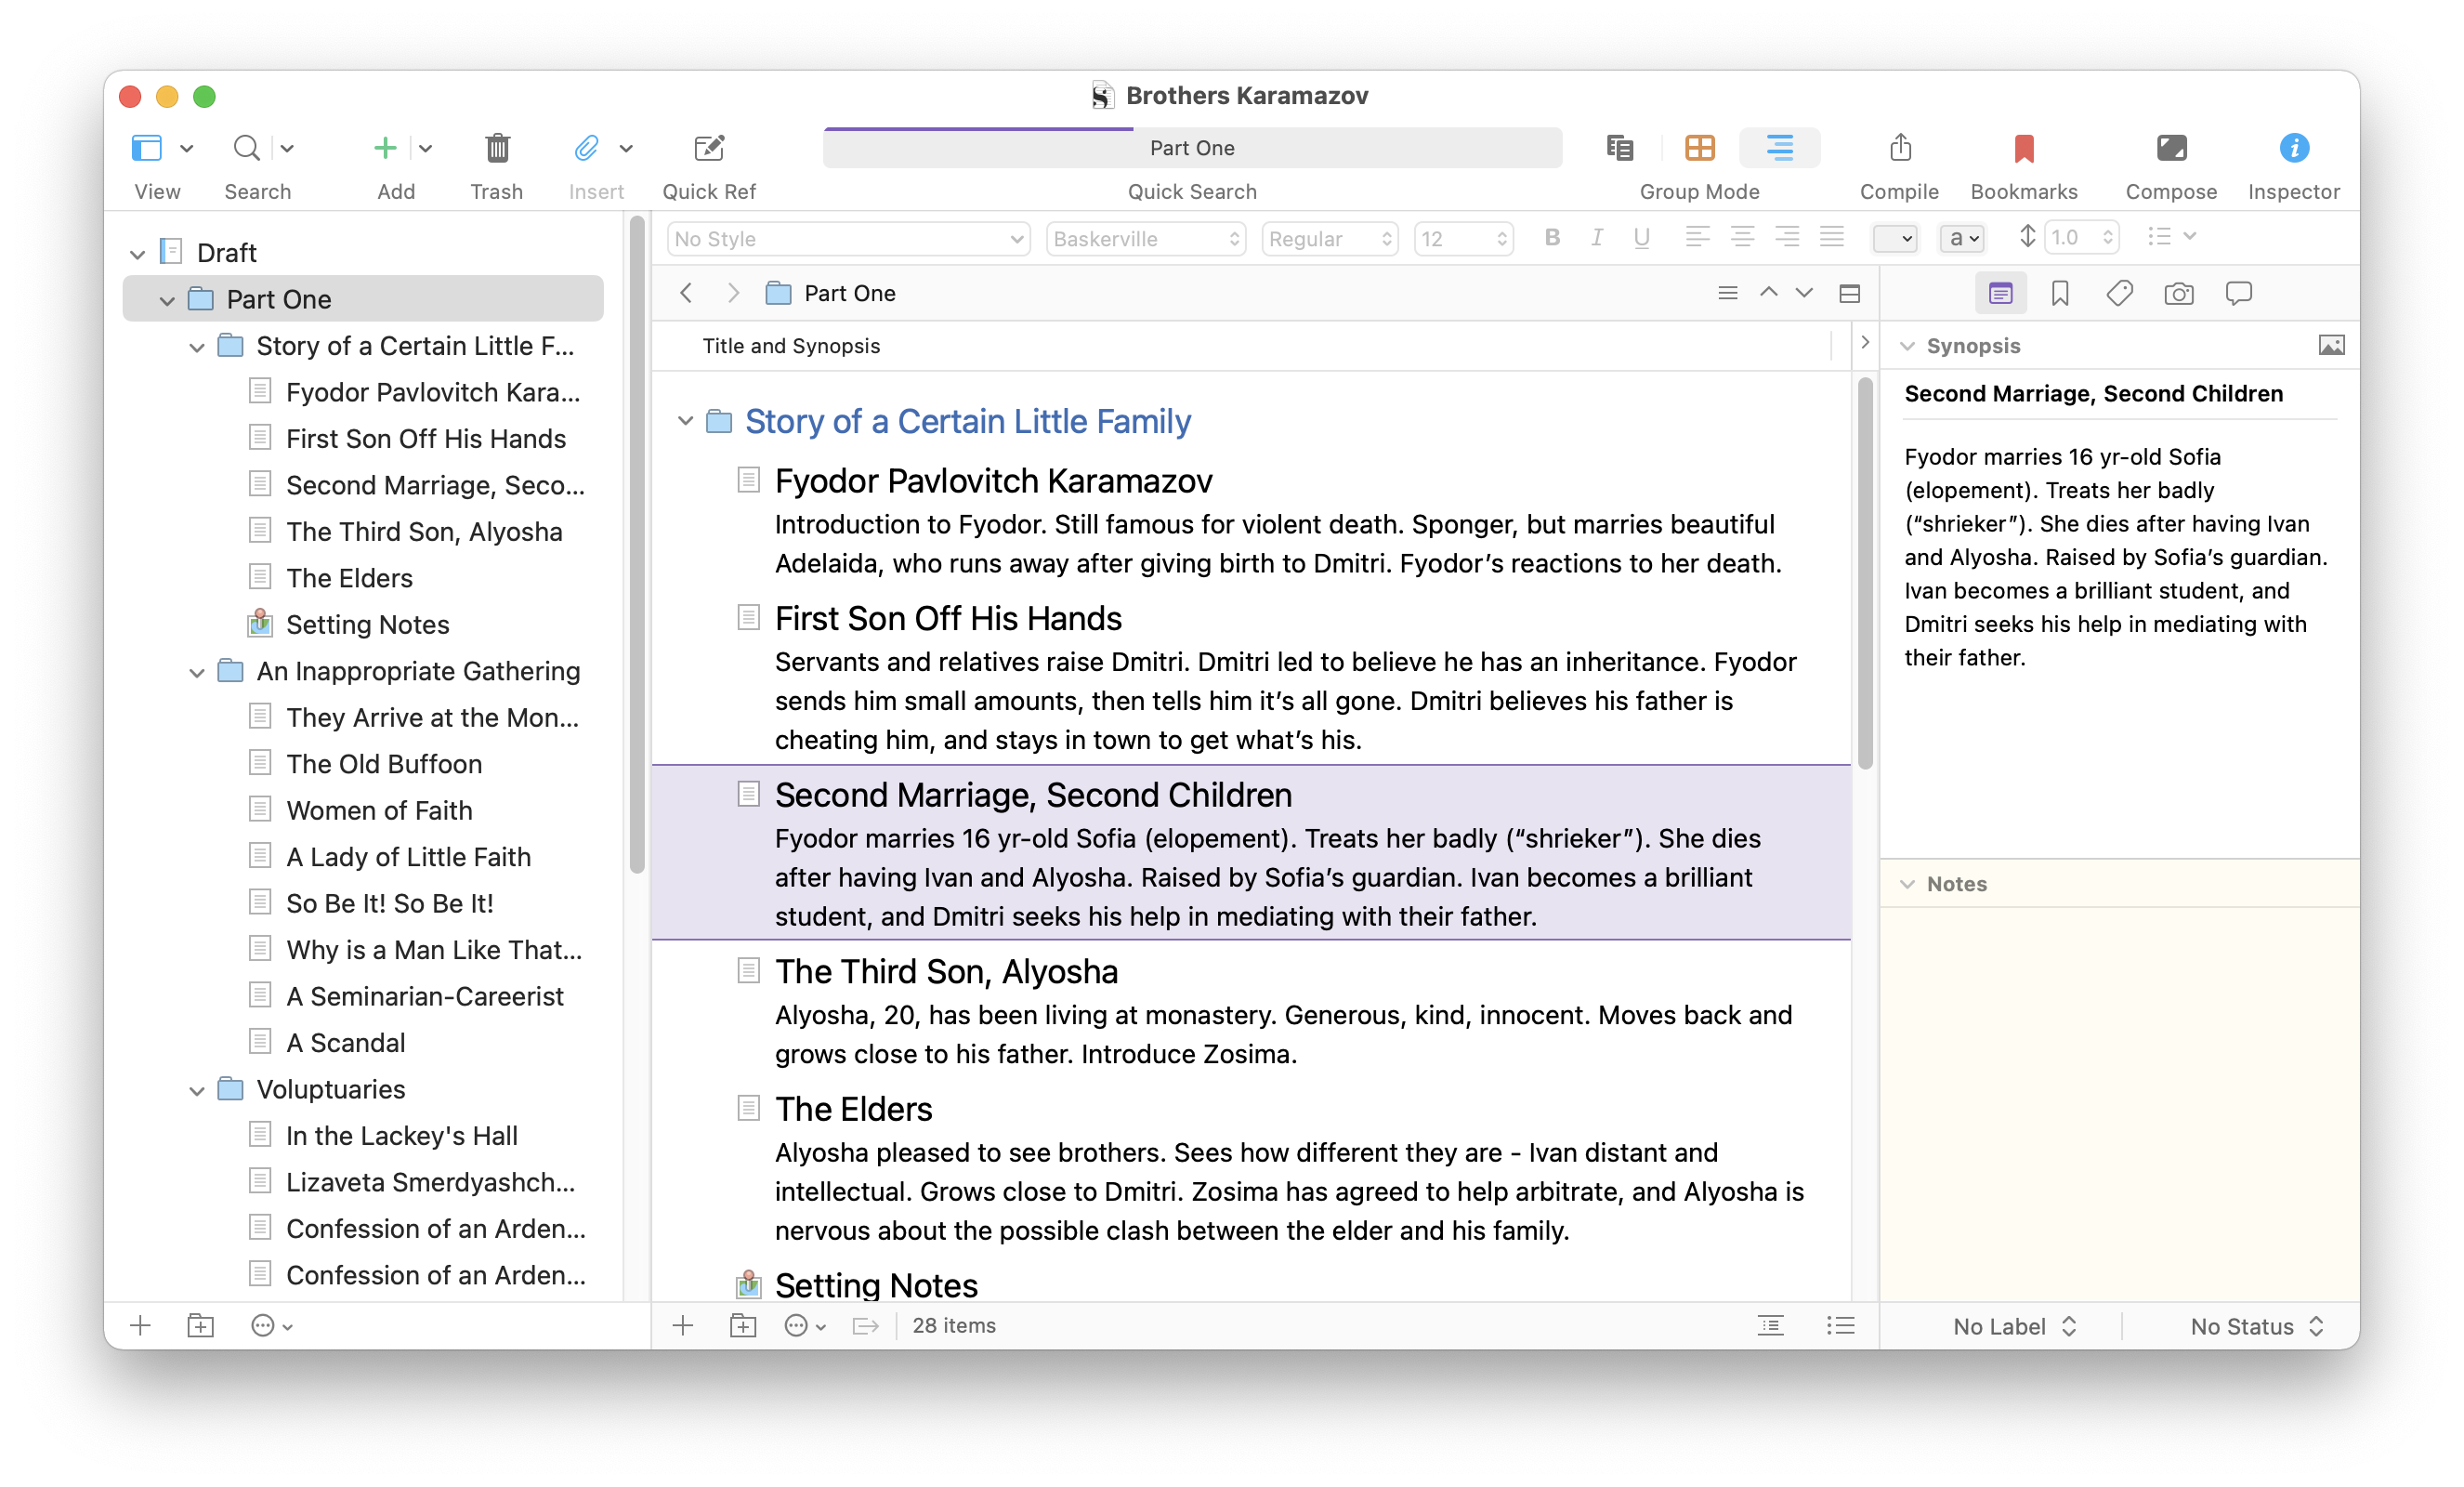
In the example below, I'm showing a simple outline with titles, synopses, and the Date & Time column displayed. In my example, events take place in a short time period, so both the date and time display.

You can display other columns in the Outliner, choosing from the menu that displays when you right-click on the Outliner header. But if you just want to view a timeline, a simple outline like the one above will let you quickly see when events occur in your story.
If your scenes are not in the timeline order, you can click the Outliner header labeled Date & Time to sort by that metadata. This can be useful if part of your novel is flashbacks, and you want to be able to view them all sequentially, even if they appear scattered among other chapters in your manuscript. Click the Title and Synopsis header again to sort by that order.
Use Scrivener's Corkboard and labels to create a timeline
The Outliner timeline is simple. It allows you to view when chapters or scenes occur, but it doesn't allow you to split these elements up and see individual threads in their own timelines. It's a good way to keep track of time in a linear story, or a story with just a single point-of-view character, but if you have multiple characters, you may want to view a different type of timeline.
You can do this using labels and the Corkboard. Labels are a good way to tag items in the Binder. You can apply labels by right-clicking any item in the Binder, choosing Label, and then selecting a label. Or you can select an item in the Binder and click Labels at the bottom of the Inspector. (See this article for more on using labels.)
By default, the labels are named according to their colors, but you can change this. Either right-click a Binder item and choose Label > Edit, or choose Edit from the Label menu below the Inspector. This dialogue displays:
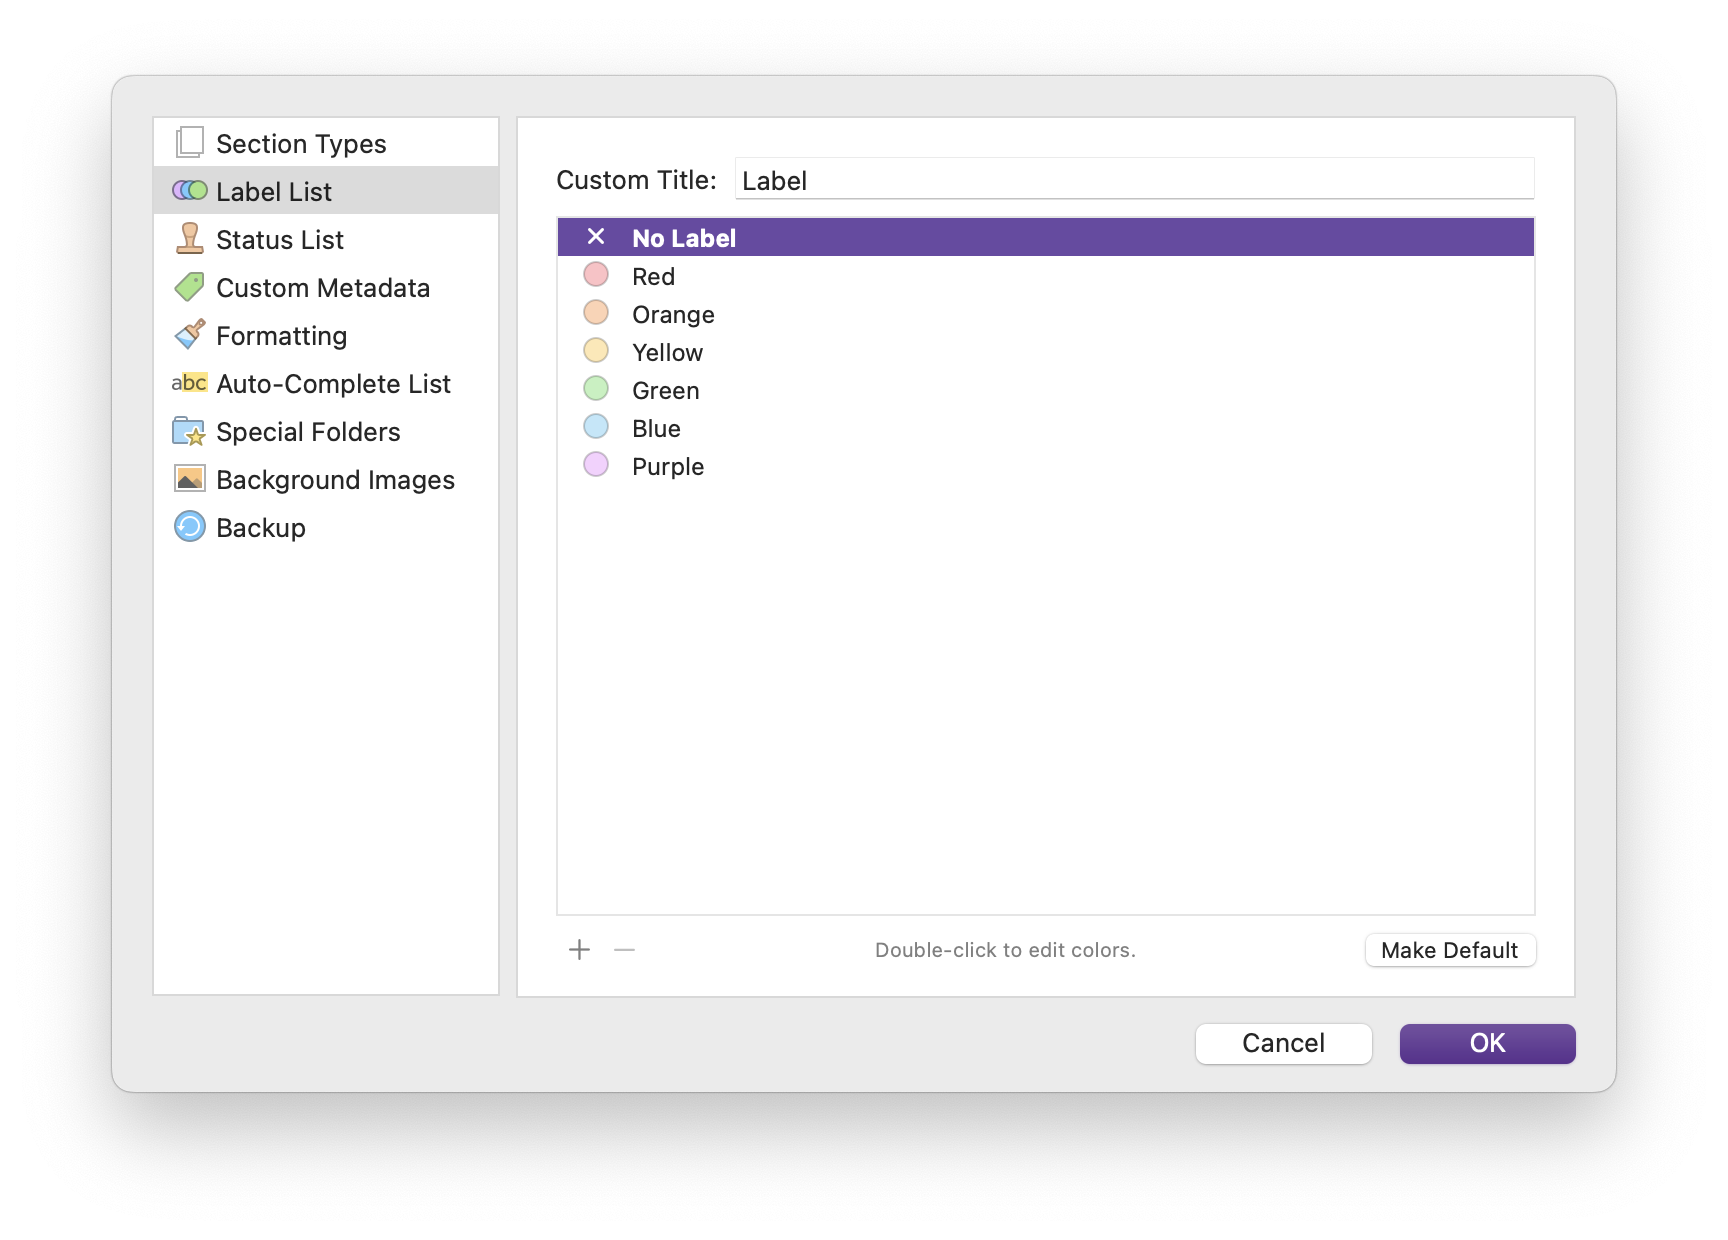
Double-click any label name to change it, and if you need more labels, click + at the bottom of this dialogue and type a name for the new label. To change any colors, double-click the color circle to bring up a color picker and choose a new color.
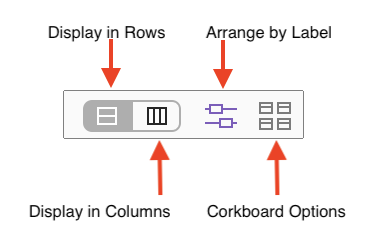
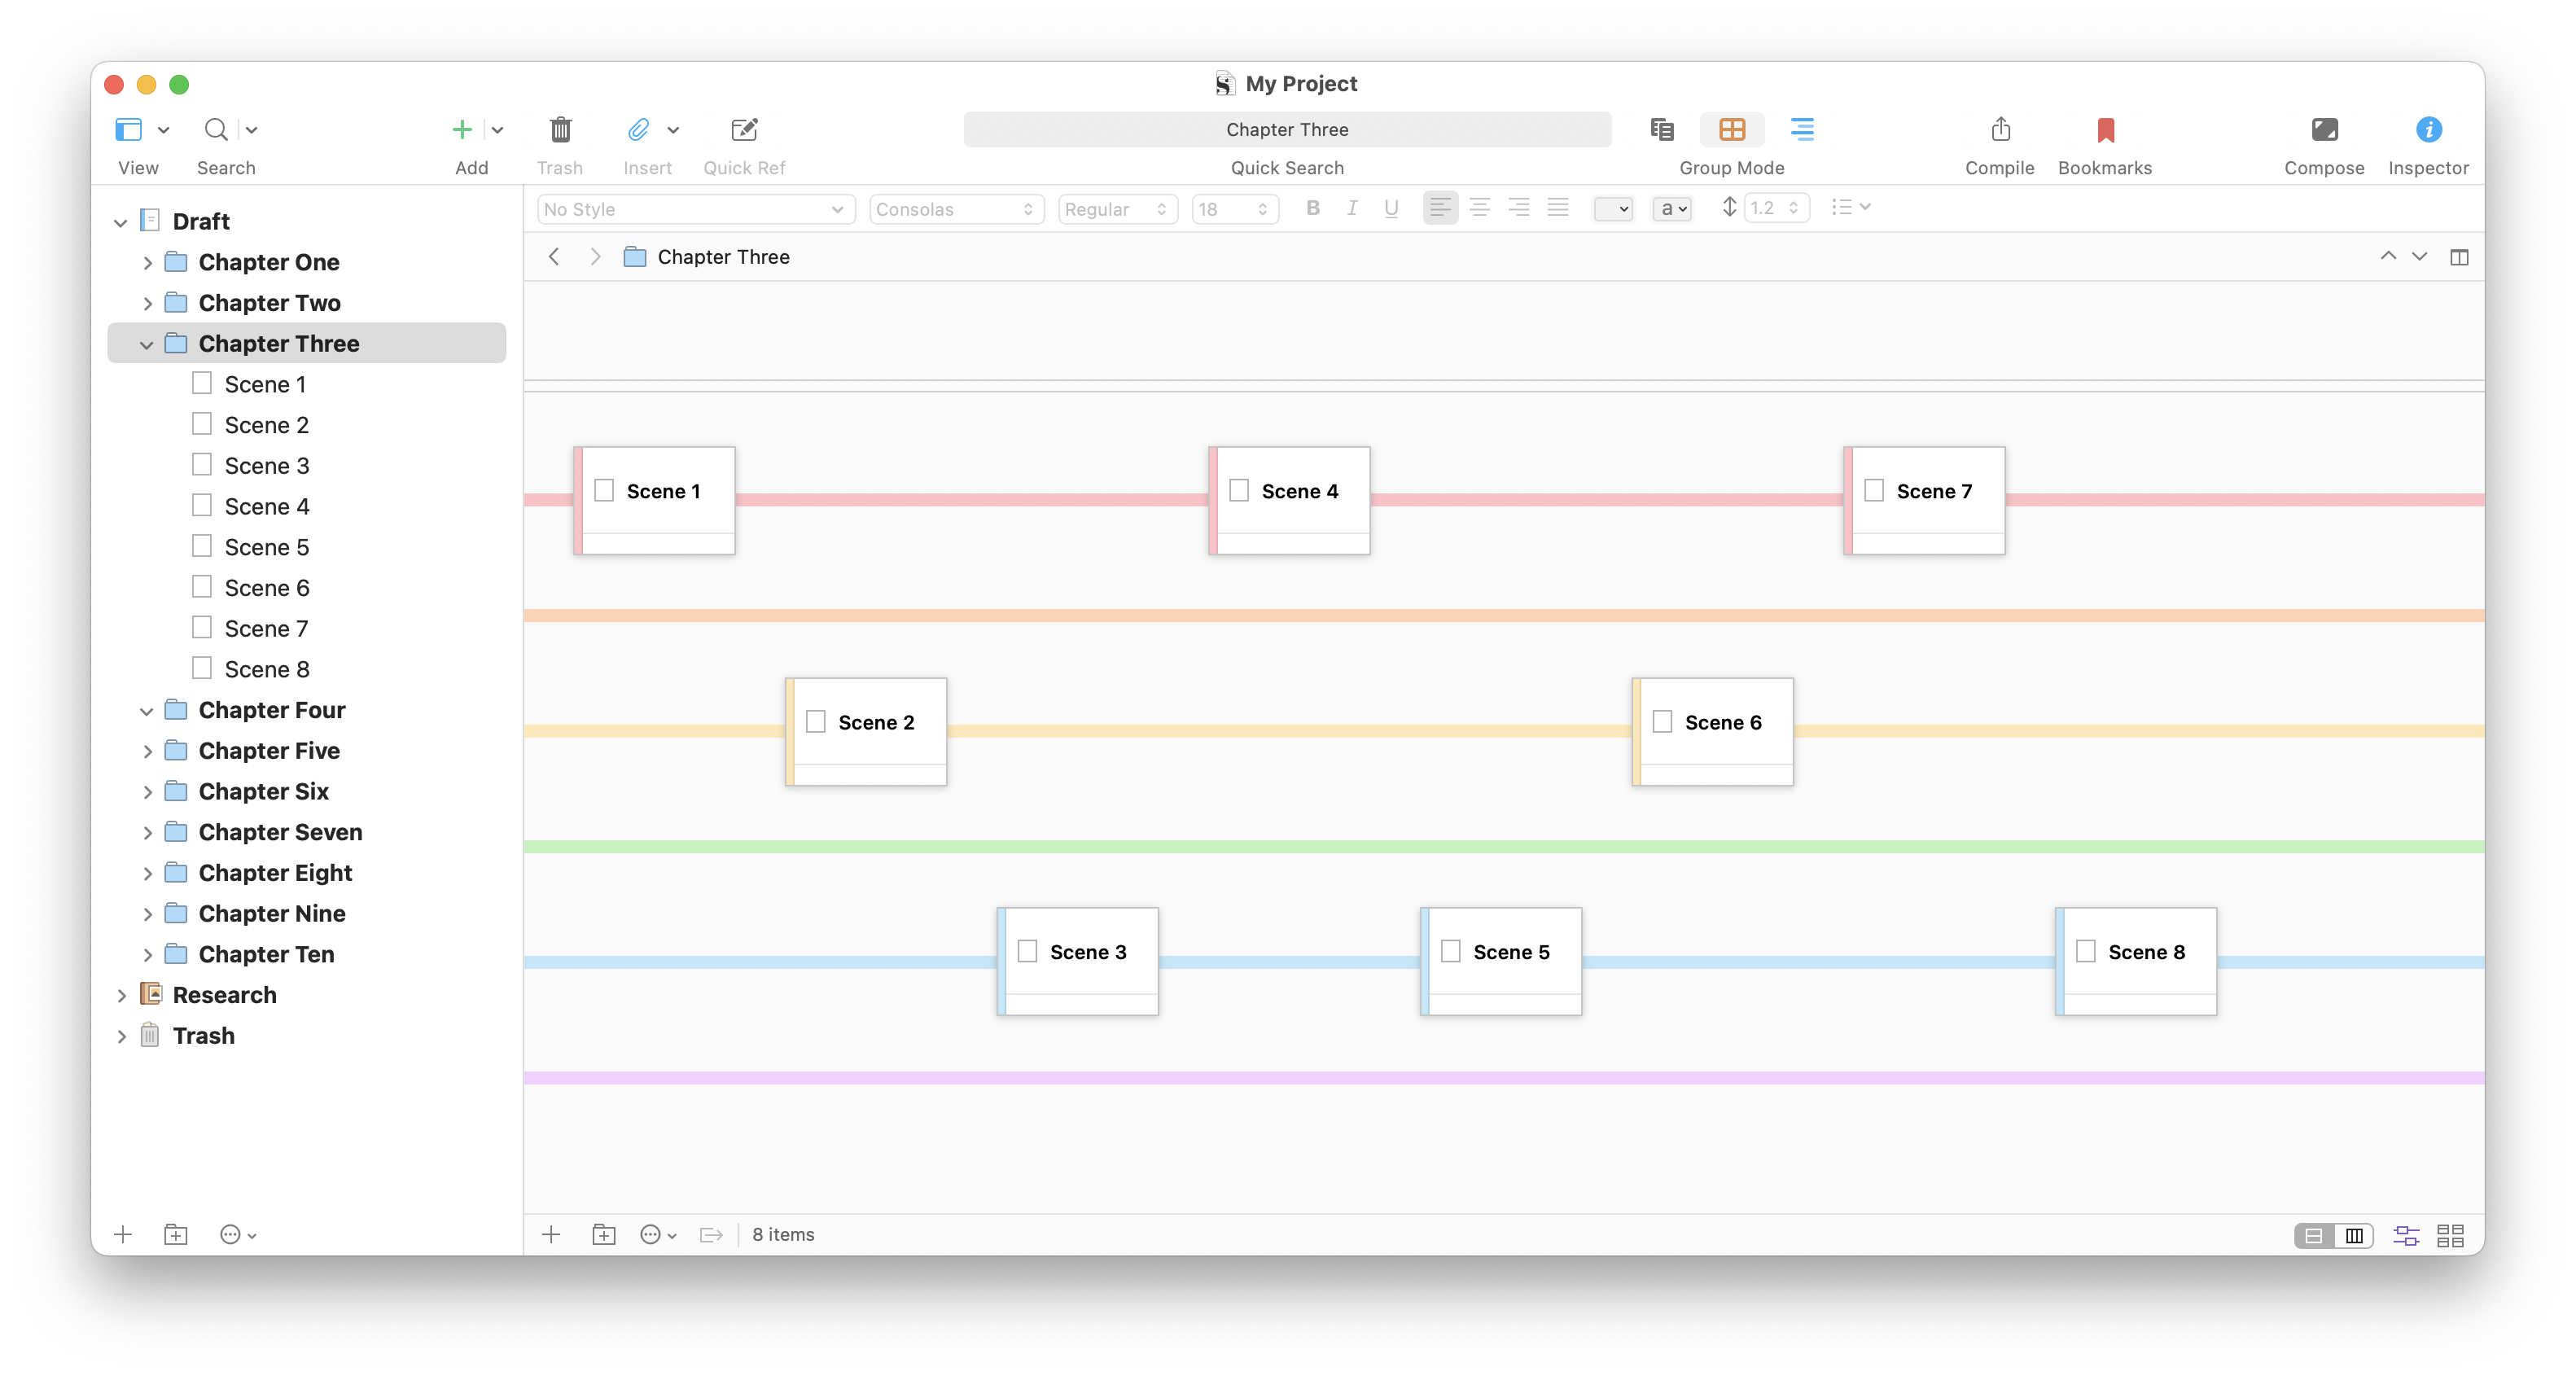
If you have multiple characters, each with their own timelines, you can set up labels for your POV characters. In the Label List, enter the names of these characters in different labels. Click the Arrange by Label button at the bottom of the window.
The Corkboard displays its cards in threads by label. By default, the cards display in rows, from left to right. Note that I haven't added synopses to the files in my sample project for better display in this view, but if you have synopses, they display as well, if the cards are large enough.
To switch to a vertical view, click the Display in Columns button. This is useful if you want to use split view to keep an eye on the Corkboard while you're writing.

You can change the size and spacing of the cards by clicking the Corkboard Options button, and if you click the Arrange by Label button again, the Corkboard stops displaying your cards by threads, and returns to the standard Corkboard view.
Working with timelines
With both types of timeline - Outliner and Corkboard - you can re-arrange items by dragging them, and you can view the text of any file by double-clicking the page icon to the left of any outline item, or on the top left of any index card. These timelines can help you when you're writing, allowing you, for example, to write all scenes or chapters in one timeline rather than switching back and forth. They can also help when you're editing, giving you a better view of each timeline and how they interrelate. If you've got a complex project where you need to pay attention to timelines, try out one of these methods.
Kirk McElhearn is a writer, podcaster, and photographer. He is the author of Take Control of Scrivener, and host of the podcast Write Now with Scrivener.