Scrivener's Corkboard is a powerful way to organize your projects, from brainstorming to editing.
Organize Your Scrivener Project with the Corkboard
Scrivener offers three ways to organize your projects: the Binder, the Outliner, and the Corkboard. We've looked at how you can Use Folders and Texts to Power Up the Scrivener Binder, and how you can Plan Your Project with Scrivener’s Outliner. We have also examined how you can outline with just the Binder.
Now it's time to look at Scrivener's third organizational tool, the Corkboard. Modeled after a real "analog" corkboard, Scrivener's tool lets you arrange and rearrange virtual index cards in order to plan and organize your projects. Here's how to work with the Corkboard.
Using the Corkboard
The Scrivener corkboard is designed to replicate an old-school method of "growing a book, rather than writing one," to quote Hilary Mantel. You start with a stack of index cards and just write down ideas: these could be scenes, characters, bits of dialog, locations, or impressions that you want to include in your project. You then pin them to a corkboard and rearrange them as your ideas develop. Some writers still do this, working with index cards before starting to write on their computers.
The advantage to using the Corkboard in Scrivener is that when you create index cards, they automatically create equivalents in the Binder and the Outliner. Each index card is a file or folder in the Binder, and is also an item in the Outliner.
Starting to work with the Corkboard
You can use the corkboard in any project template, but the best way to understand how it works is to create a new, empty template. To do this, choose File > New Project, then click Empty in the sidebar. Choose a name for the project, then save it.
In the Draft folder in the Binder, Control-click or right-click the Untitled Document, then choose Move to Trash. You now have a project with just three folders: Draft, Research, and Trash, and nothing else.
Click the Draft folder in the Binder, then click the Corkboard button in the Group Mode section of the toolbar. (See the screenshot just below.) You are now in Corkboard mode, and you see a cream colored background.
To create an index card, choose Project > New Text, or click the + icon at the left of the footer below the Corkboard; you can also press Command-N (Mac) or Ctrl+N (Win). Write something like First scene for the title of the card, then create another card and write Second scene. In each of these cards, you can write a synopsis or notes, if you wish; to do this, click in the card below the thin line, or, if the Inspector is visible, type on the Synopsis pane. After you've added a few cards, your corkboard will look something like this:
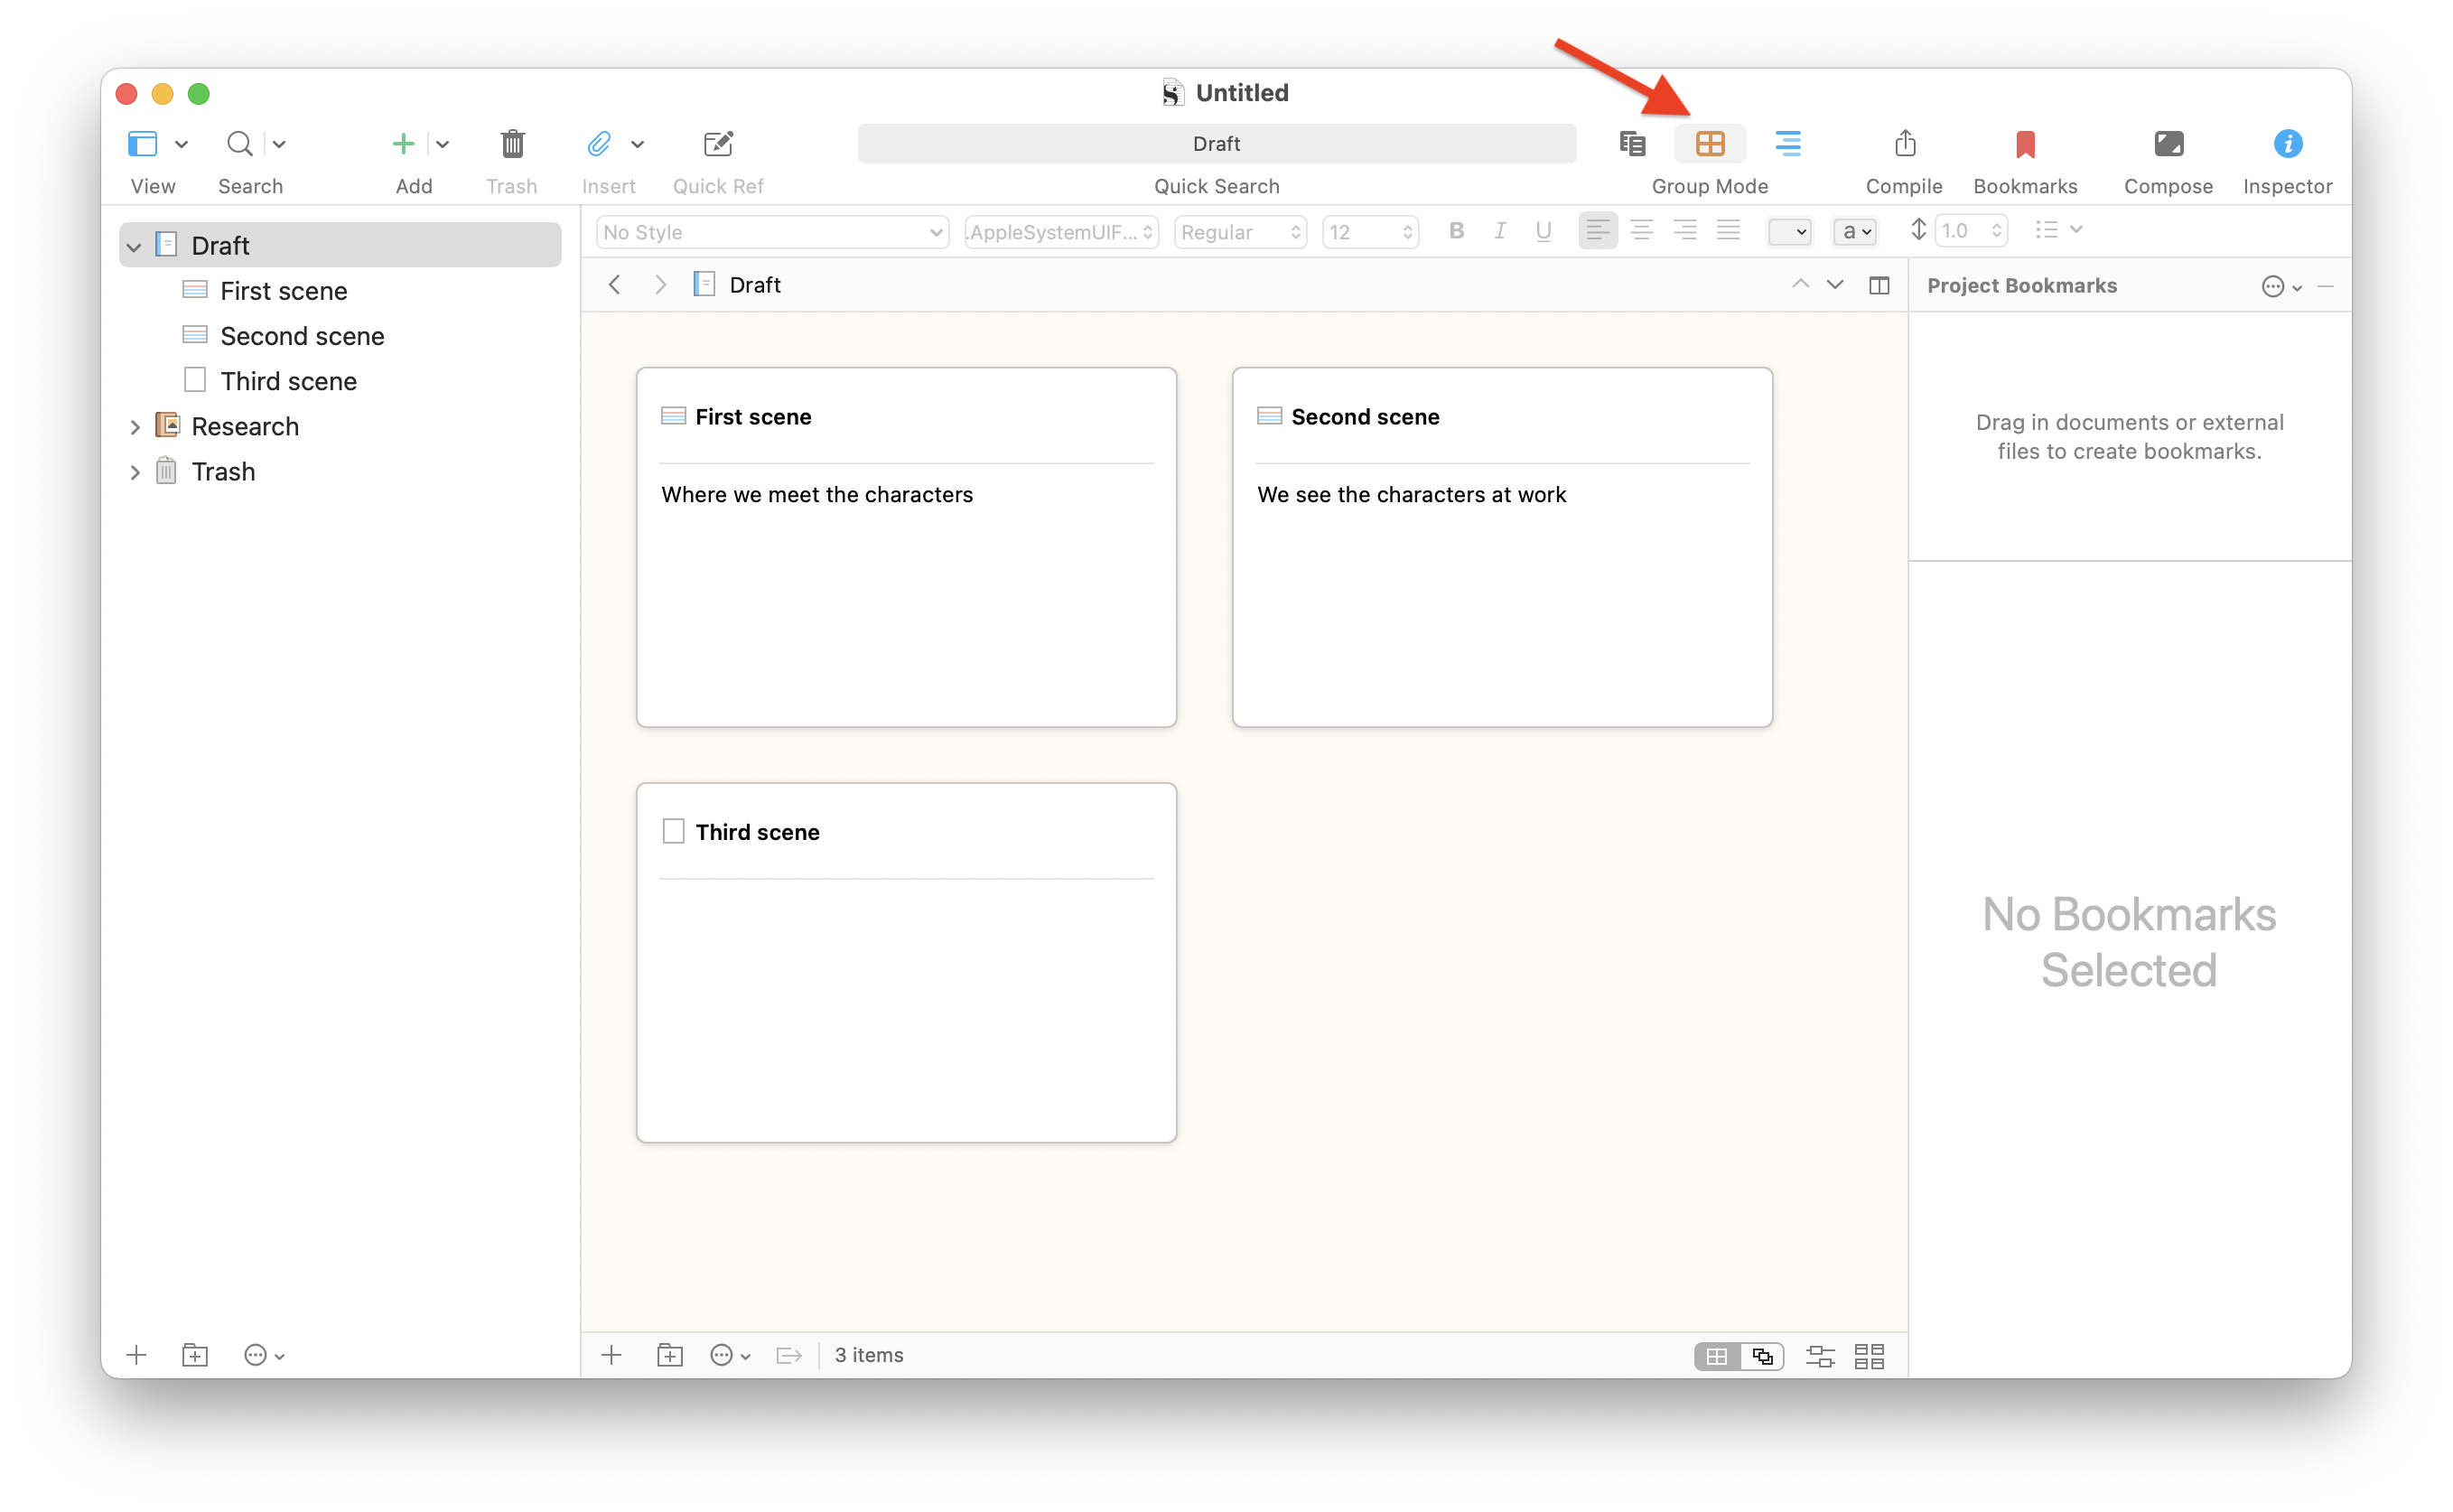
In the screenshot above, note the arrow pointing to the Corkboard button in the toolbar. You'll also note that the Binder displays text files for the three cards I've created; and that the first two look different from the third. The third is blank because it contains no synopsis.
Developing a project with the Corkboard
You can continue creating cards on the Corkboard, adding synopses or not, until you're satisfied that you have some structure for your project. But perhaps you want to move them around a bit, and rearrange their order. Just click and drag, and you'll see that the cards snap into place as you rearranged them. You'll also see the documents in the Binder take on new positions. Cards from left to right, then in rows from top to bottom, correspond to the Binder's vertical hierarchy.
The above Corkboard arrangement is the linear Corkboard; you can also use Scrivener's freeform Corkboard to work on your project. To do this, click the Freeform Corkboard button in the Corkboard footer. (Indicated with a red arrow below.)
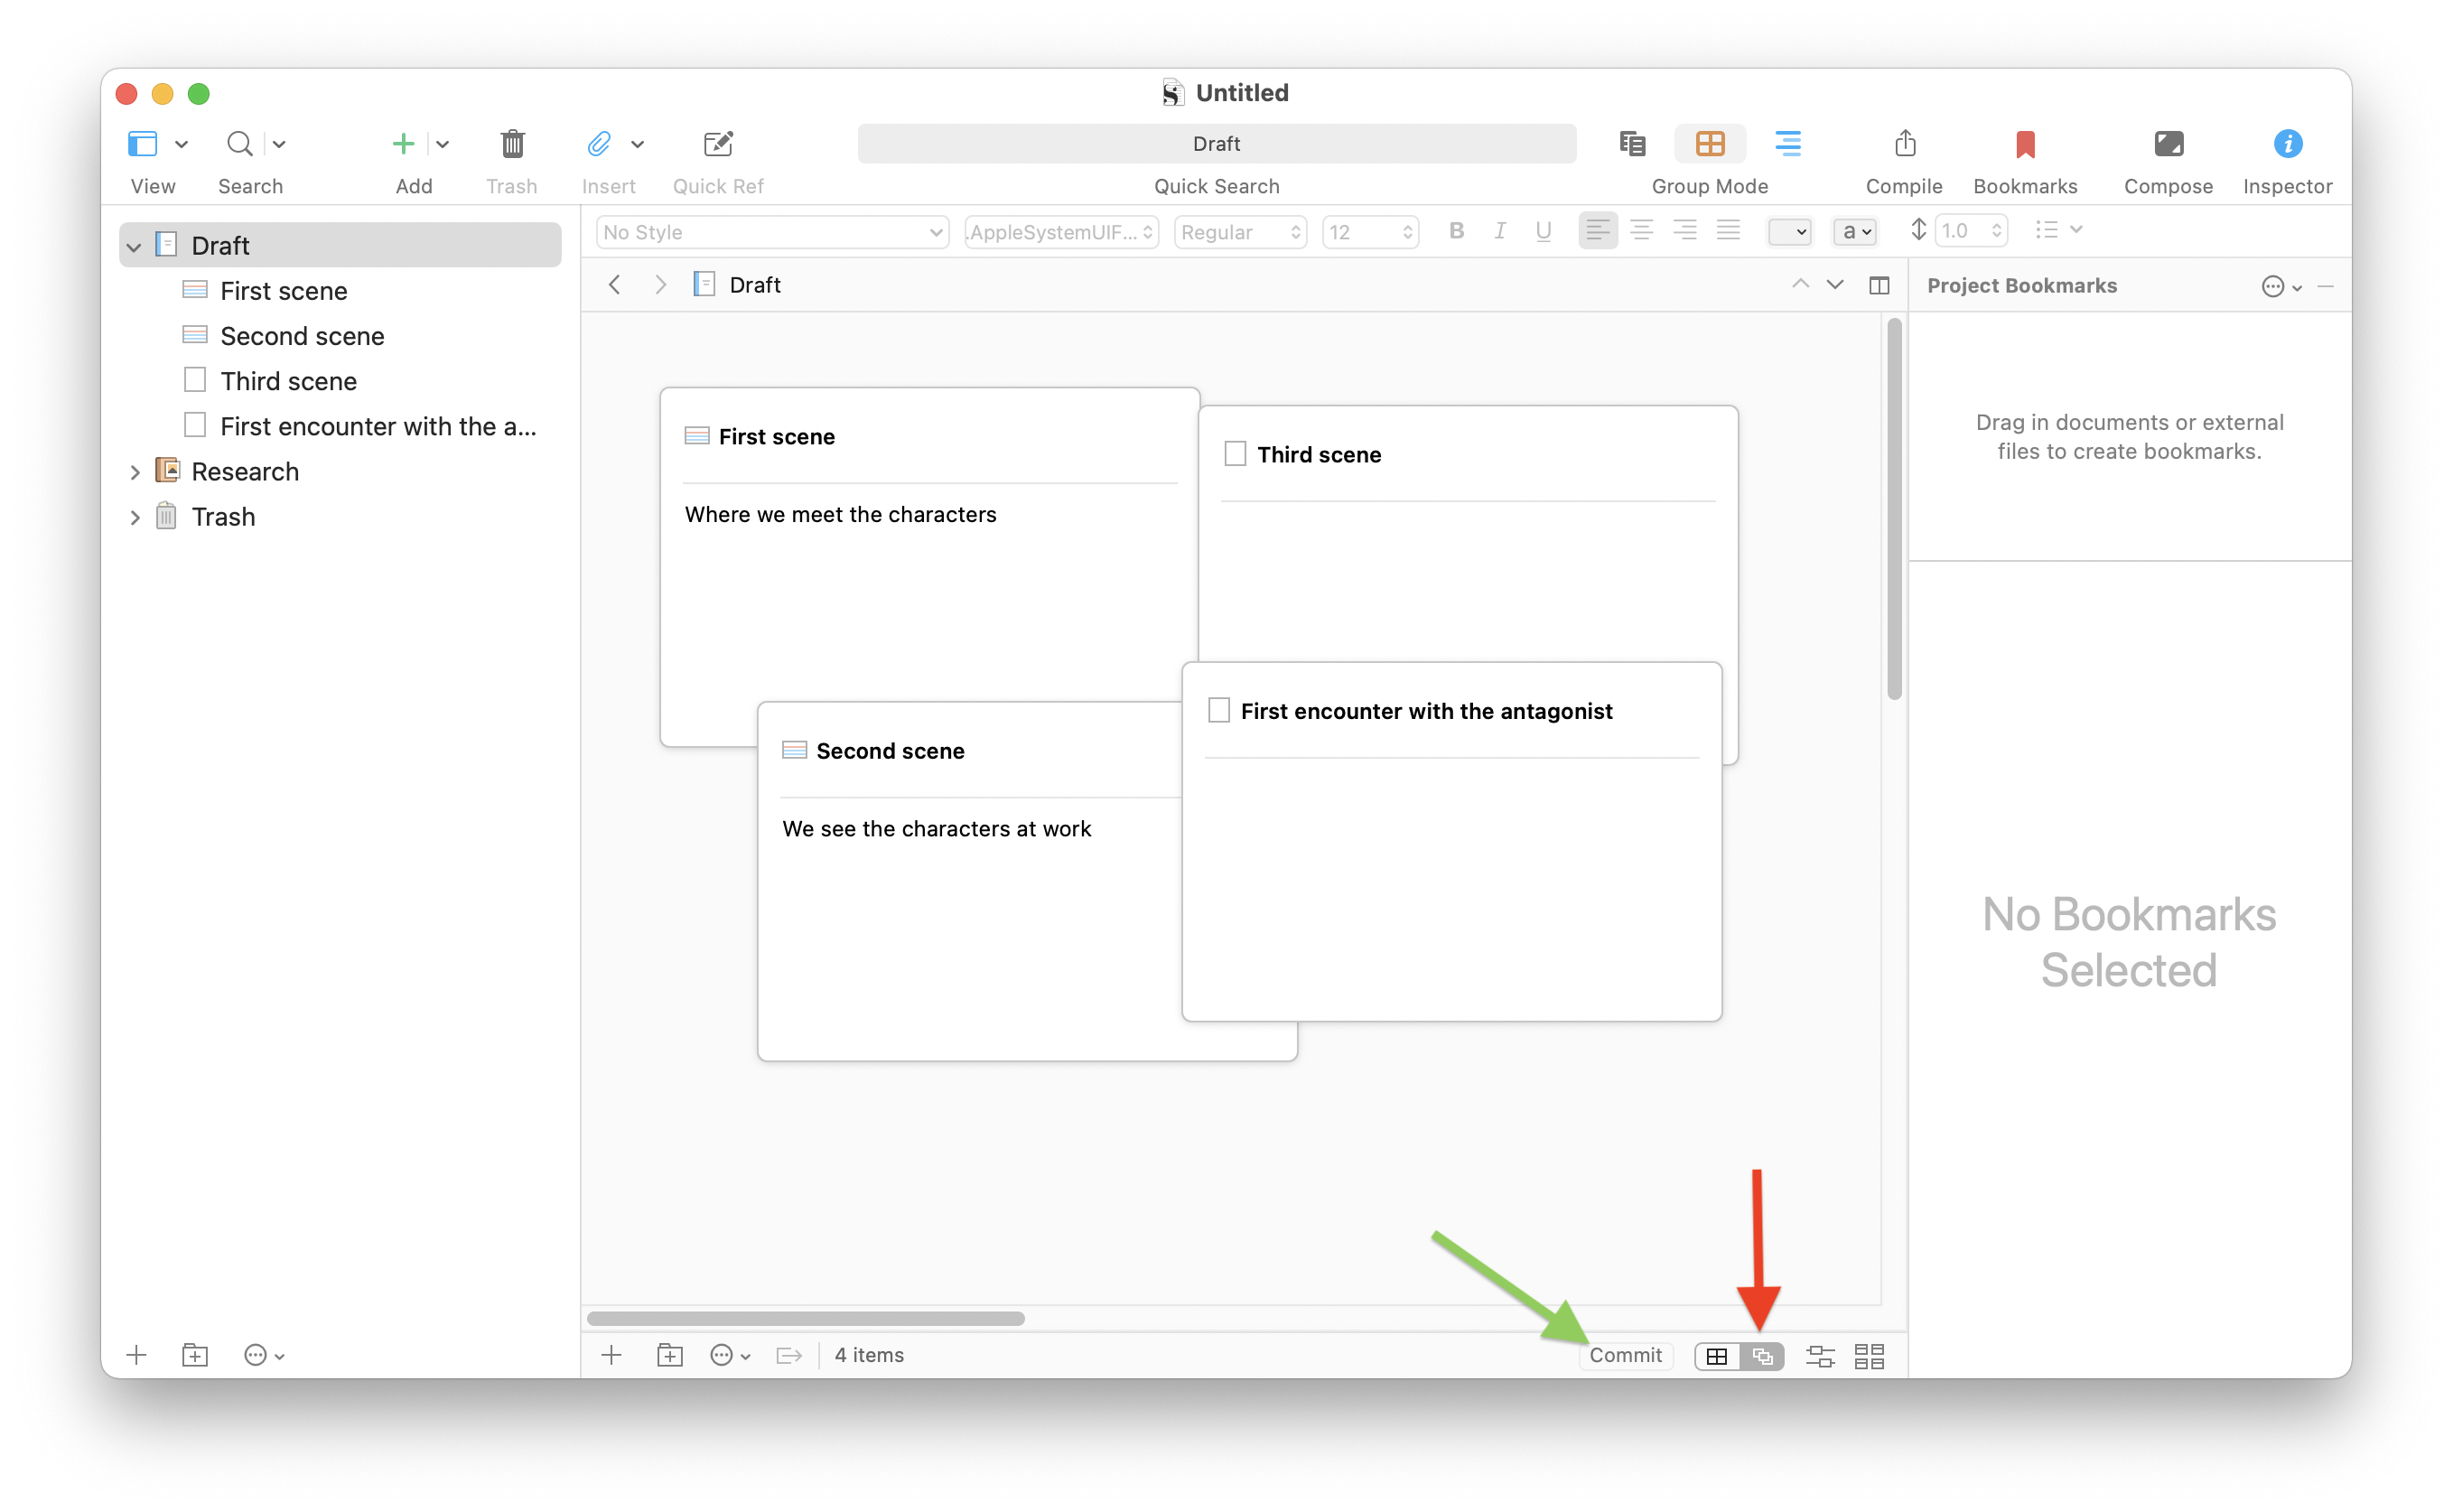
You can drag your cards around as you want, and, when you've decided that you like the order, click the Commit button (the green arrow above) to tell Scrivener to save your layout on the Corkboard and in the Binder and Outliner.
Corkboard options
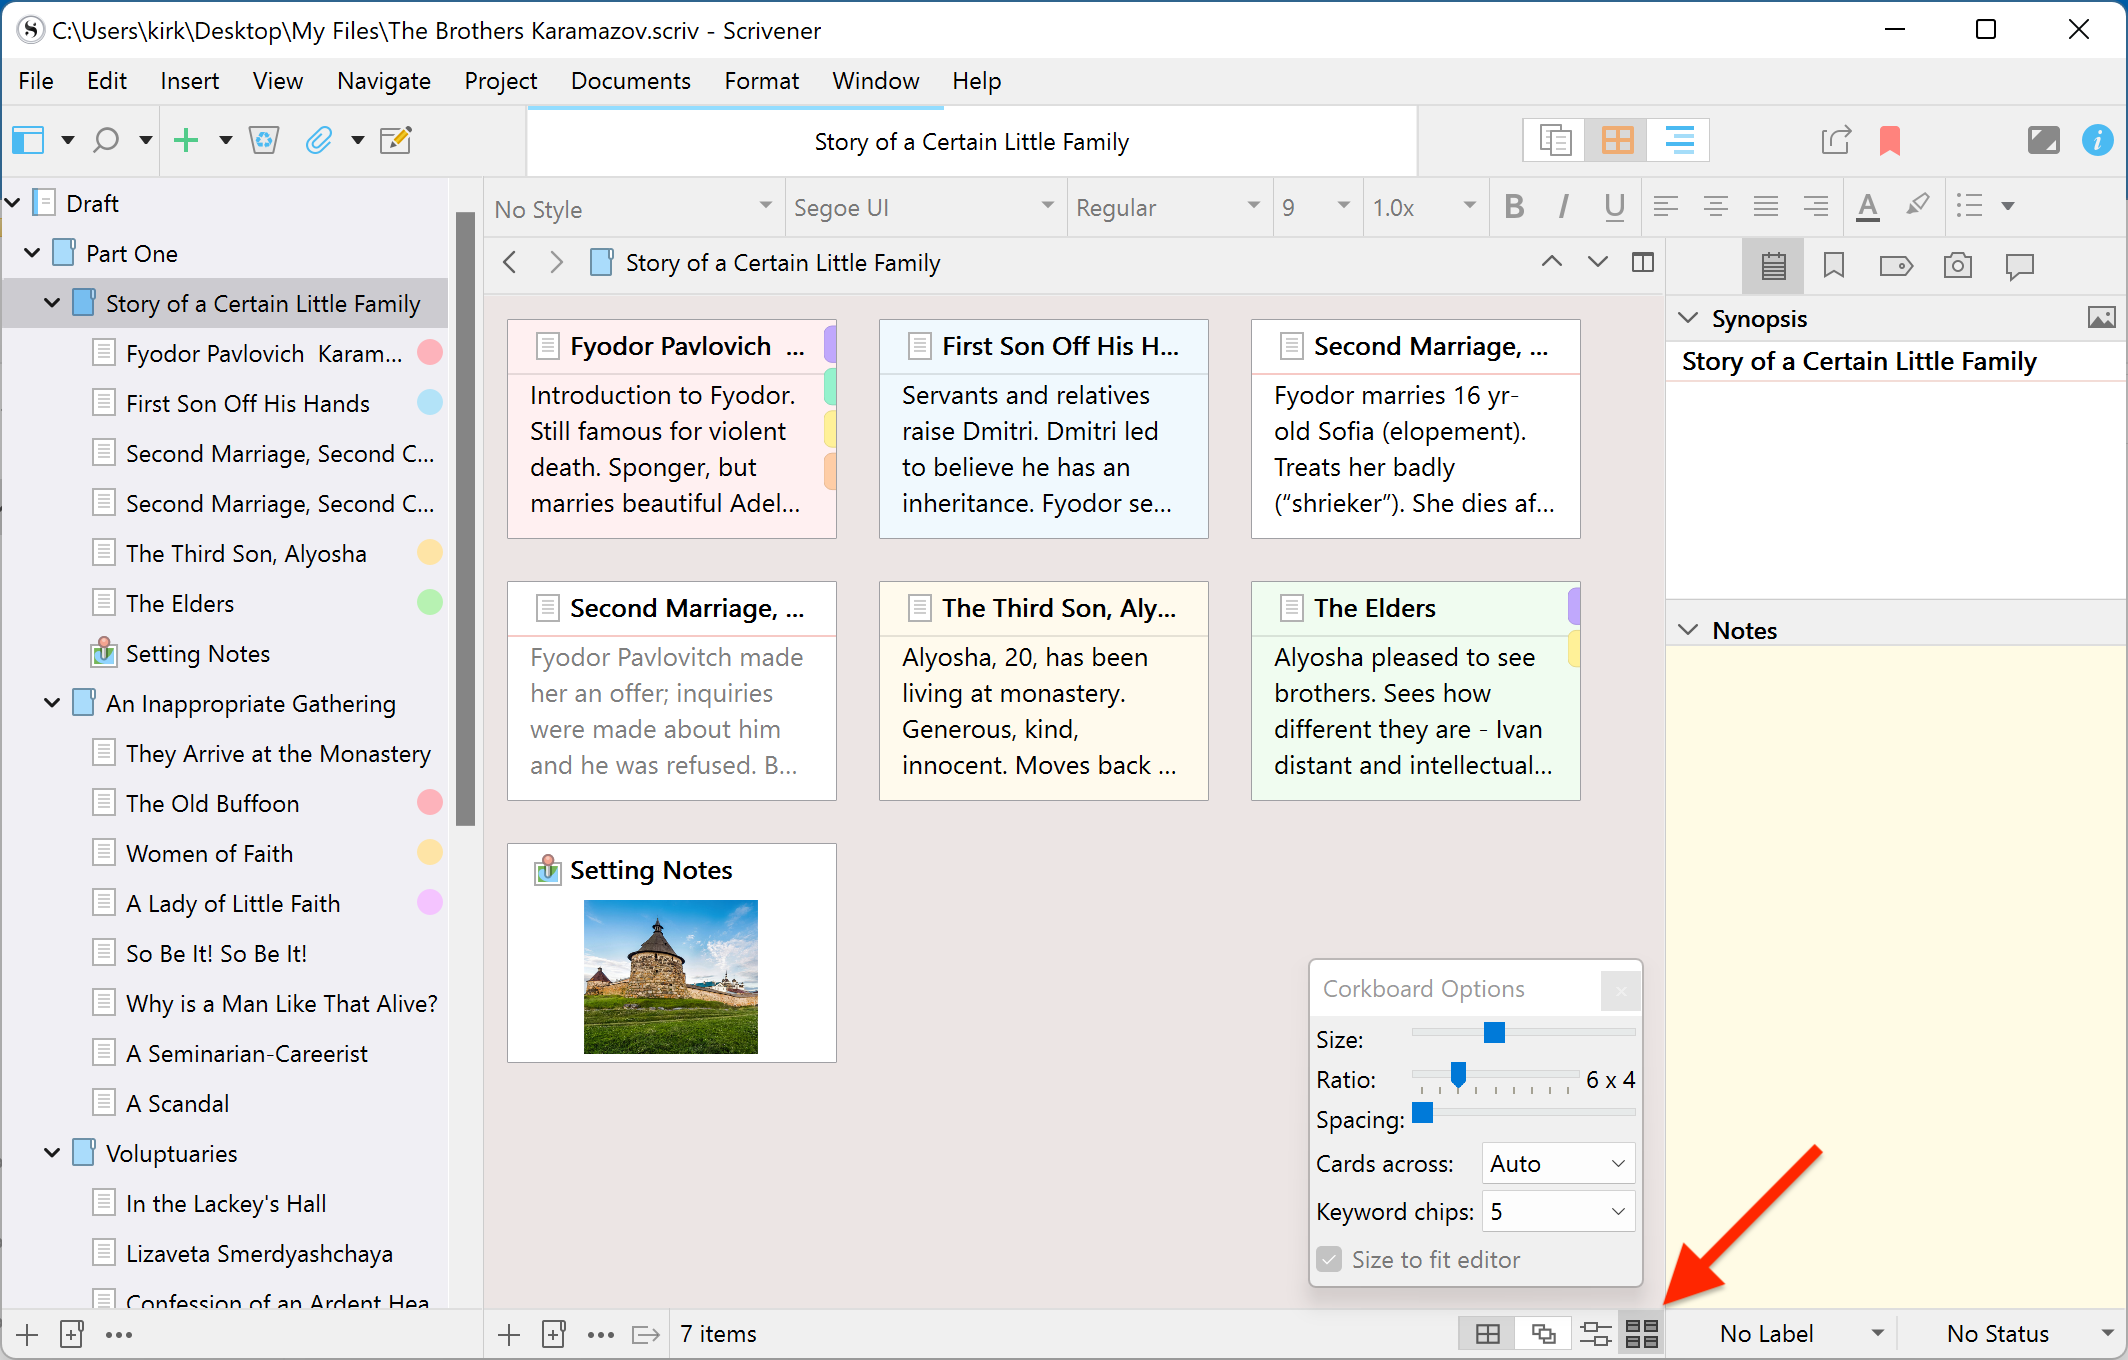
The Corkboard offers many display options; click the Corkboard Options button in the Corkboard footer. You can change the size of the cards, to fit more on your screen; in the screenshot below, I've made index cards very small to show how you can fit a lot of them on the Corkboard. You can change their ratio: below, they are set to 6x4, but you can change that, according to how much information you want to see on your cards. You can also adjust the spacing between cards.
The background to Scrivener's corkboard used to be virtual cork, but is now a pale color, one that offers a slight contrast with the index cards. You can, however, revert to the virtual cork background in Scrivener's Appearance preferences. (Scrivener > Preferences > Appearance, on Mac; File > Options > Appearance on Windows.) Click Corkboard in the sidebar, then click the Colors tab and choose Corkboard Texture from the Corkboard Background menu. If you want to use a color that motivates you more, feel free to choose it here.
There are many other options that you can set in Scrivener's Preferences or Options, on the Appearance tab. In the Corkboard options, you can adjust the display of cards on the Corkboard, and in the Index Cards options, you can tweak the types of cards (standard, lined, rounded, etc.) and their fonts and colors. The Mac and Windows versions of Scrivener offer some different display options, so check your preferences or options to see what's available.
I've only scratched the surface of using the Corkboard here to give you an overview, and, perhaps, to tempt you to try out the Corkboard if you've not yet used it. Chapter 8.2 of the Scrivener manual goes into a lot more detail, and future articles on this blog will look at advanced features using the Corkboard.
Kirk McElhearn is a writer, podcaster, and photographer. He is the author of Take Control of Scrivener, and host of the podcast Write Now with Scrivener.