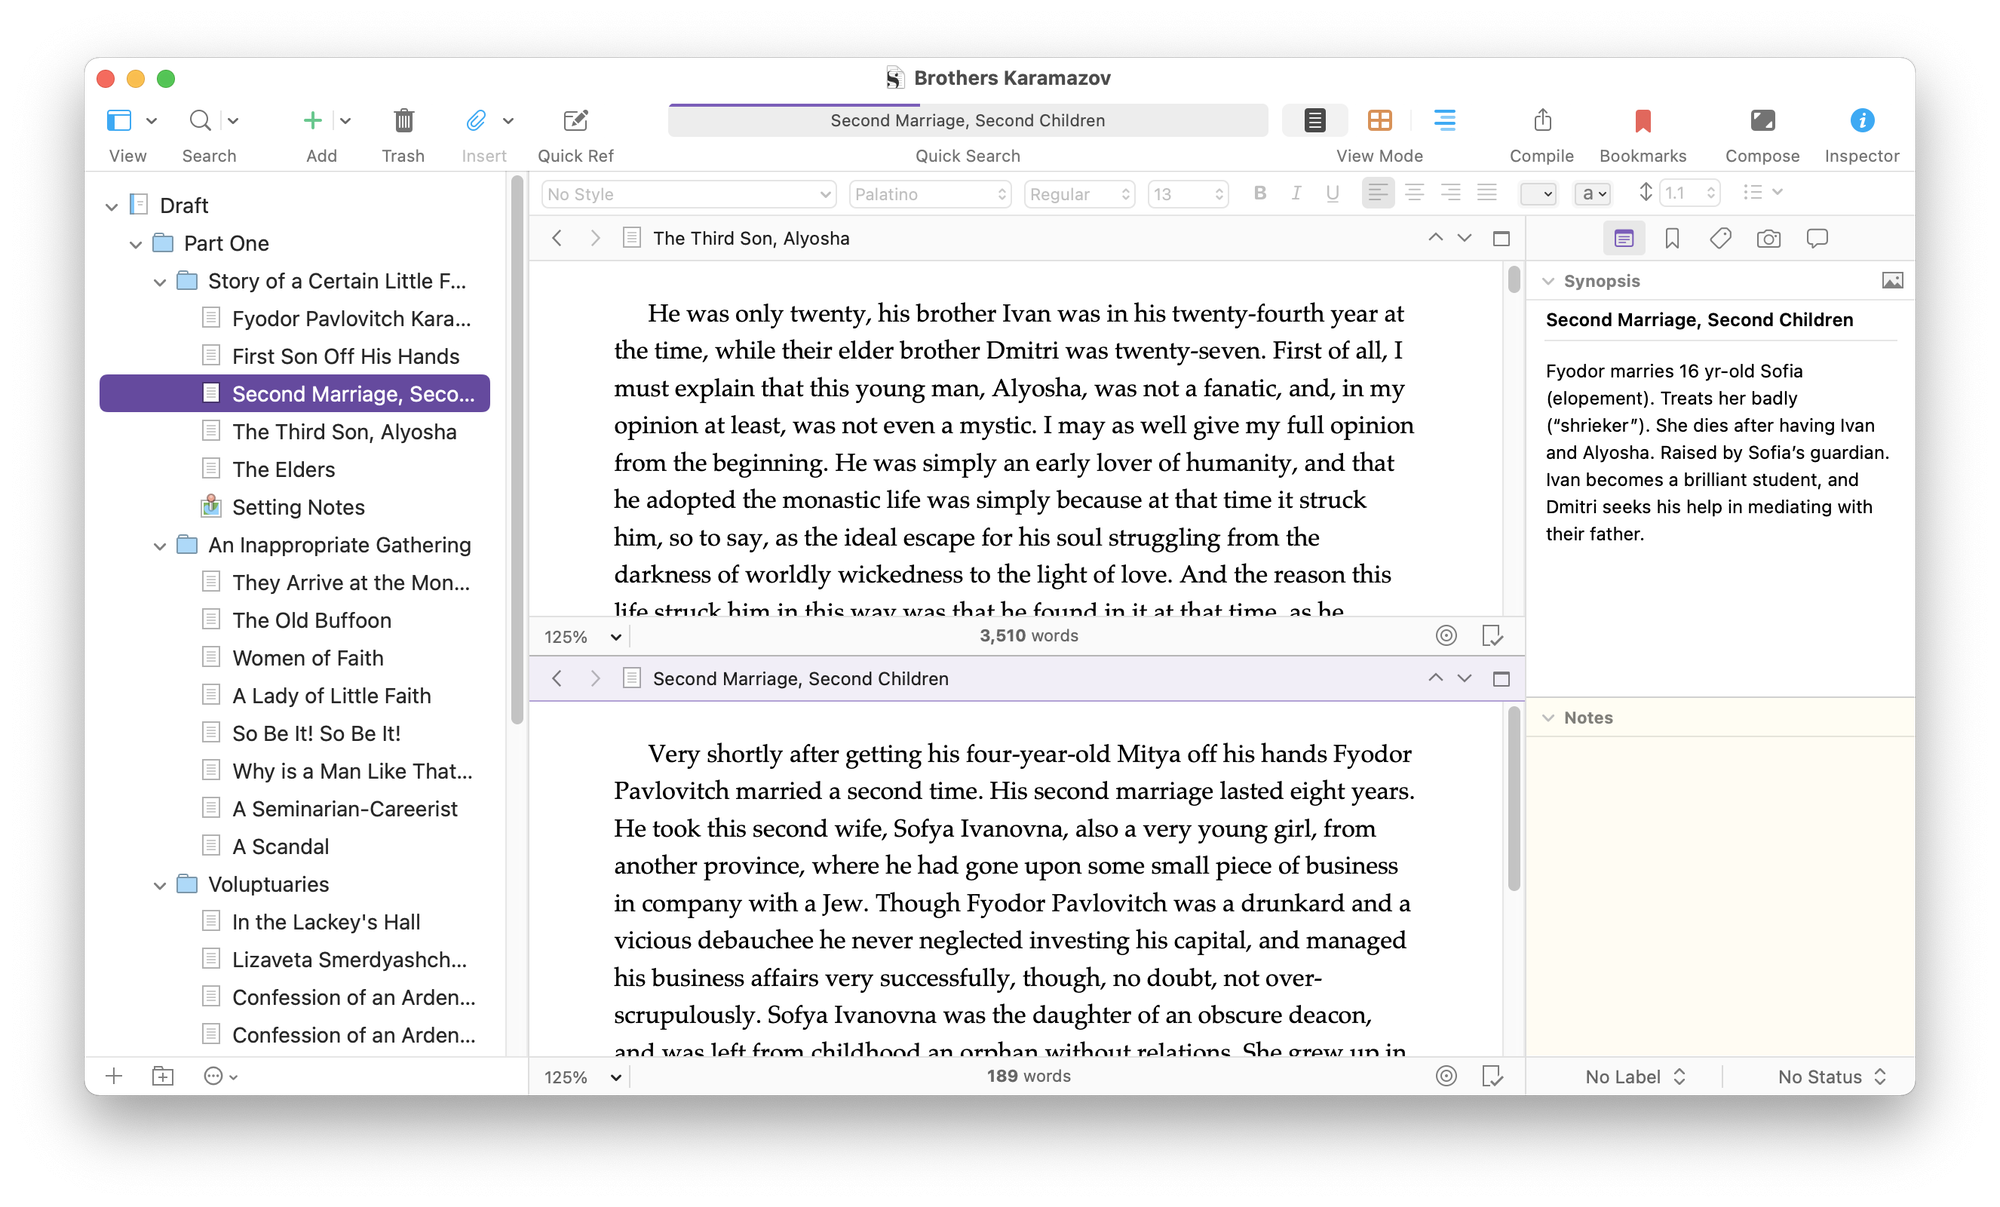
Split the Scrivener Editor to view two parts of your project at the same time.
See More of Your Project: Splitting the Scrivener Editor
Scrivener's Editor is the part of the app where you do your writing. We've looked at how you can customize the Editor to make it fit your style, and we've explained how to use Scrivenings mode to view multiple texts consecutively in the Editor.
Scrivener's Binder lets you build your writing project in sections, chapters, scenes, or fragments. But sometimes you need to see more than one part of your project. Unlike most writing apps, whose files are monolithic, leading you to scroll, scroll, scroll, when you want to go back to what you've written before, you can just click on another document in the Binder to do this.
But Scrivener's Editor goes even further, allowing you to split the editor into two parts. You can write chapter 17 while looking back at what happened in chapter 3, to make sure that you get everything right.
In this article, I'll tell how to split the Scrivener Editor.
Split the Editor
Many word processors let you split their windows. But when you do so, you need to scroll, scroll, scroll to find what you're looking for to display it above or below the split. With Scrivener, you can split the Editor, then click a document in the Binder to display it in a second pane.
To split the Editor, choose View > Editor Layout, then choose Split Horizontally or Split Vertically. Here's a project split horizontally:
And here's the same project split vertically:

When you split the Editor, each Editor pane has all the features of the full editor. You can set the view mode, zoom, and other settings, and each Editor pane also stores its own history. To switch to another document in an Editor pane, just click a different document in the Binder.
To unspilt the Editor, click in the pane you want to retain, then choose View > Editor Layout > No Split.
You'll notice keyboard shortcuts in the Editor Layout menu that can make splitting and unsplitting a bit quicker. But you can also click the Toggle Split button just above the Editor; in the screenshot below, the horizontal line in the button, in this screenshot, means that if you click it, the Editor will split horizontally.

If you press the Option key (Mac) or the Alt key (Windows), this button switches; in the above screenshot, clicking while holding this key makes the Editor split vertically.
To unsplit the Editor, you can click the same button in either pane. If you want to split the Editor again, the button will show either a horizontal or vertical split, depending on your last layout.
And if you've split the window one way and want to switch - from, say, horizontal to vertical - press the Option or Alt key and click the split button.
Other splits
Just as the Editor can display your project's Outline or Corkboard, you can also split the Editor to have one or both of these display. Click in one of the Editor panes, then click the Corkboard or Outline button in the toolbar. Here's how it looks with one Editor showing a text document, and the other showing the Outline:

You may find that viewing the Outline is better with a vertical split, and viewing the Corkboard benefits from a horizontal split.
Another way to use the split Editor is to view research files in one part of the Editor; just split the Editor, then go to your Research folder and click on an item. Anything in the Binder can display in an Editor split.
Navigating splits
Sometimes, you'll use splits to write in one pane while checking another. But sometimes you may want to make changes in two panes, so you'll want to switch back and forth. There are keyboard shortcuts you can use to do this quickly. To switch to the left or top pane, in the Mac version of Scrivener, press Command-Option-Control-E, and press Command-Option-Control-R to go to the right or bottom pane. On Windows, these shortcuts are Win+[ and Win+].
You can also cycle through the splits and the Binder. On Windows, press Win+Alt+E; on Mac, you can cycle through the three elements by pressing Control-Tab, If you just want to cycle back and forth between two splits, you might want to hide the Binder; to do this, choose View > Binder (Windows) or View > Hide Binder (Mac).
While these shortcuts are a bit complicated, you'll find that you remember them quickly when you're working with splits.
Swap and control splits
What if you want to move the left-hand pane to the right, or the top to the bottom? This is easy: choose View > Editor Layout > Swap Editors.
And if you want to control the split that is not active, the one you're not currently editing, the Navigate > Editor > Other Editor sub-menu gives you options for scrolling, moving around, and controlling media. Chapter 8.1.4 of the Scrivener manual goes into more detail about this.
Splitting the editor is a great way to view two parts of your project at the same time, and especially to avoid having to scroll, scroll, scroll.
Kirk McElhearn is a writer, podcaster, and photographer. He is the author of Take Control of Scrivener, and host of the podcast Write Now with Scrivener.