Custom metadata displays additional information about the elements of your Scrivener project in the Inspector.
How to Add Custom Metadata to the Scrivener Inspector
The Scrivener Inspector shows you information about the files and folders in your Scrivener projects and lets you add information about them as well. The Inspector has five sections: Synopsis & Notes, Bookmarks, Metadata, Snapshots, and Comments & Footnotes. See Get to Know the Scrivener Inspector to learn more about these.
The Metadata pane of the Scrivener Inspector is especially useful: it includes information such as the date a file was created and modified, whether it's included in Compile, and its section type for compiling. But you can also add custom metadata to this section of the Inspector, which can be helpful as you write and edit your projects. Here's how.
What is custom metadata?
Custom metadata is additional fields of information that you can add to items in your Scrivener project. Custom metadata applies to the project where you set it up, not to all your projects.
To see the custom metadata that you can use, display the Inspector if it's not visible (View > Show Inspector, or click the blue Inspector icon in the toolbar), then click the tag icon above the Inspector.
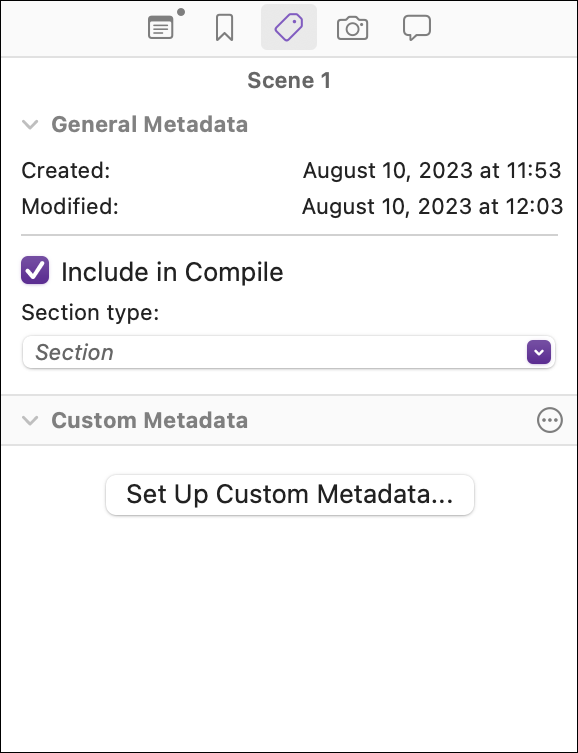
Click the disclosure triangle to the left of Custom Metadata to see any metadata that has already been created, or to create new metadata.
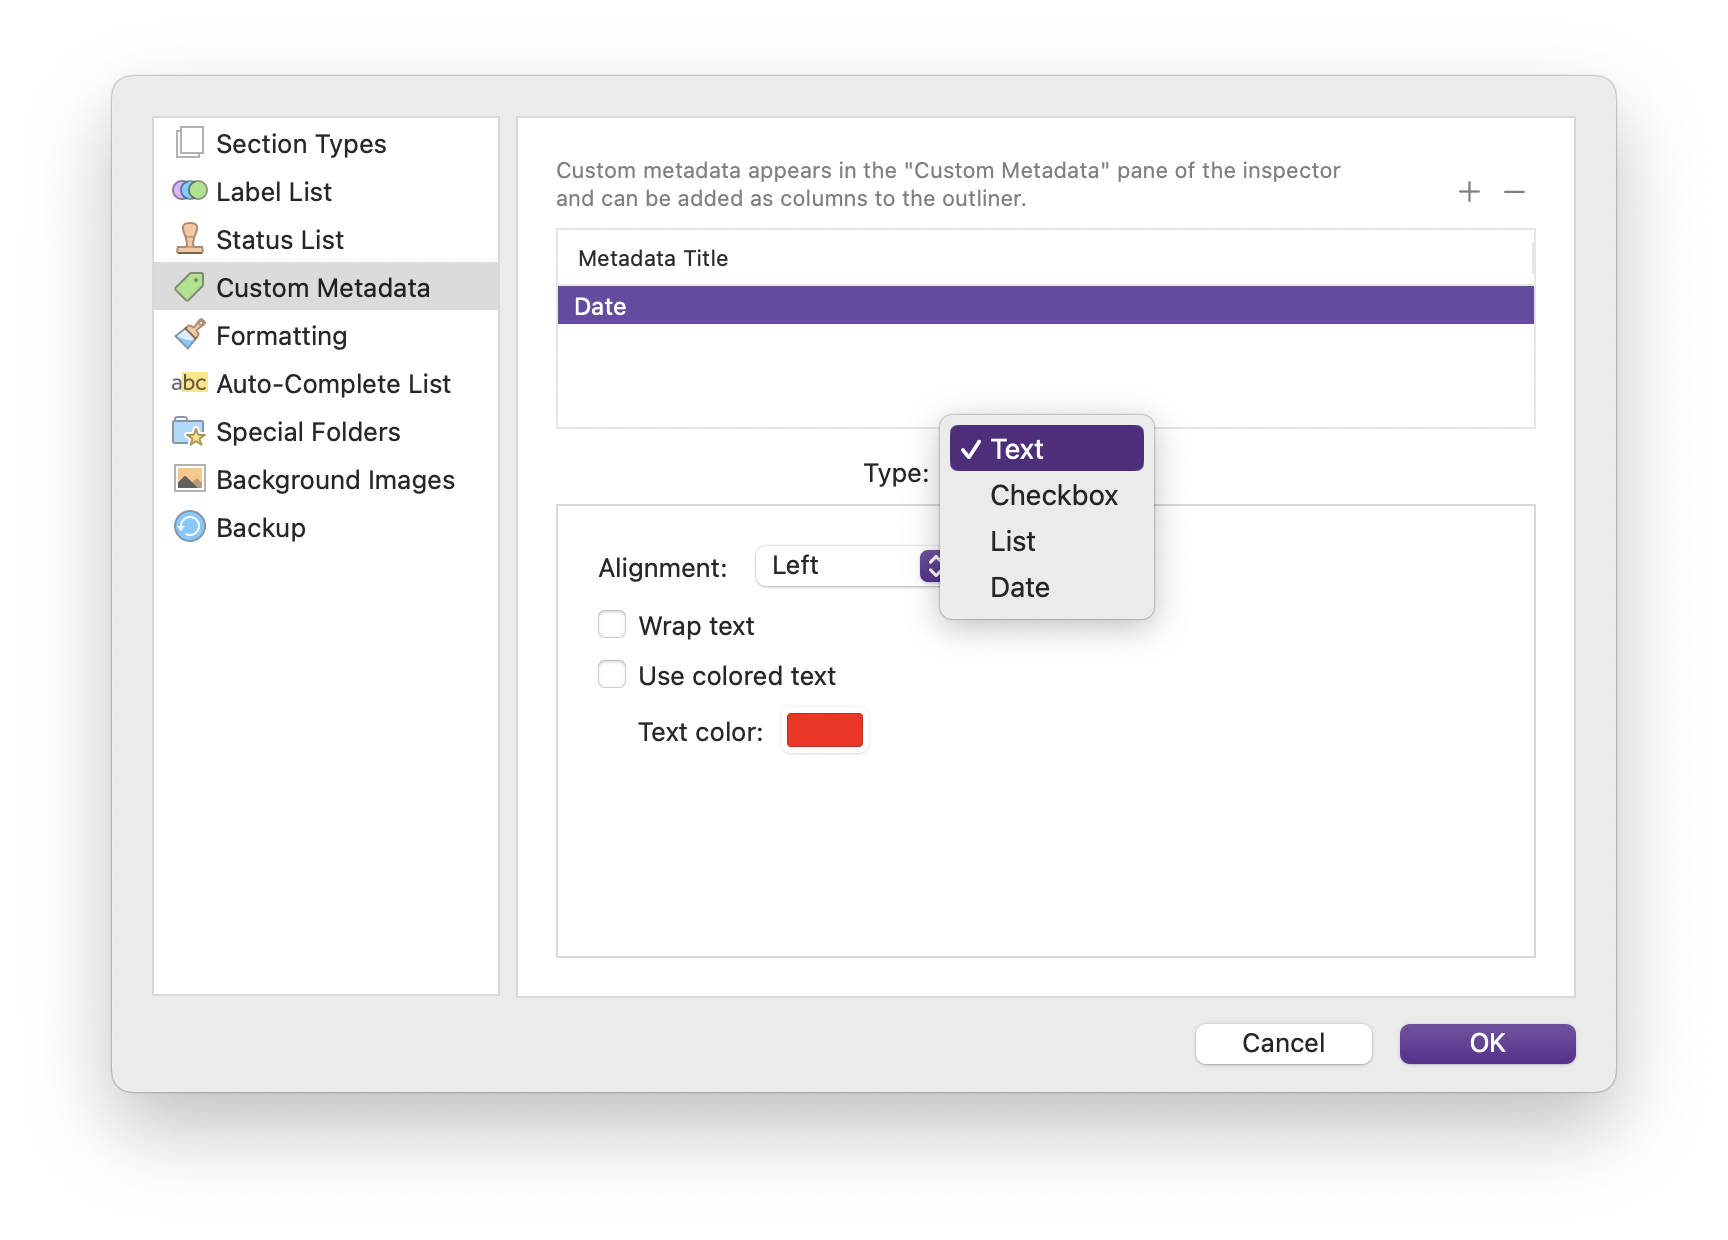
Click the ... icon to edit custom metadata. Click + at the top right of the dialogue to create a new metadata item. Type a title for your metadata, then click the Type menu. There are four options: Text, Checkbox, List, and Date.
The four types of custom metadata in Scrivener
There are four types of custom metadata that you can use in Scrivener. Here are your options.
Text
Text metadata could contain anything you want. If you set up text metadata, then double-click below that section in the Inspector, you can enter any text you want. For example, if you want to enter the name of a reviewer, you can do so by double-clicking the text field in its section of the Inspector.

Checkbox
Checkboxes are what you expect. You can use checkboxes to mark when you've finished writing or revising individual chapters, or for any other time you wish to mark something as completed.
List
You can create a list, and then choose an item from that list in the Inspector. For example, you could choose point of view characters, locations, or any other repeating element that you wish to mark as you progress in your project. You could use a list for revision status, such as Draft 1, Draft 2, etc., for edit status, or to mark files in your project as reviewed by an external reviewer. You can also use labels for these purposes, but some people prefer using custom metadata because you can display it in different ways, such as in the Outliner (see below).
To set up list metadata options, use the bottom section of the Custom Metadata dialogue. Click + to add items to the list. You can also enter an item name when to use when nothing is chosen in the list if you want.

When you want to apply an item from this list to one or more items selected in the Binder, just click the list and select it.
Date
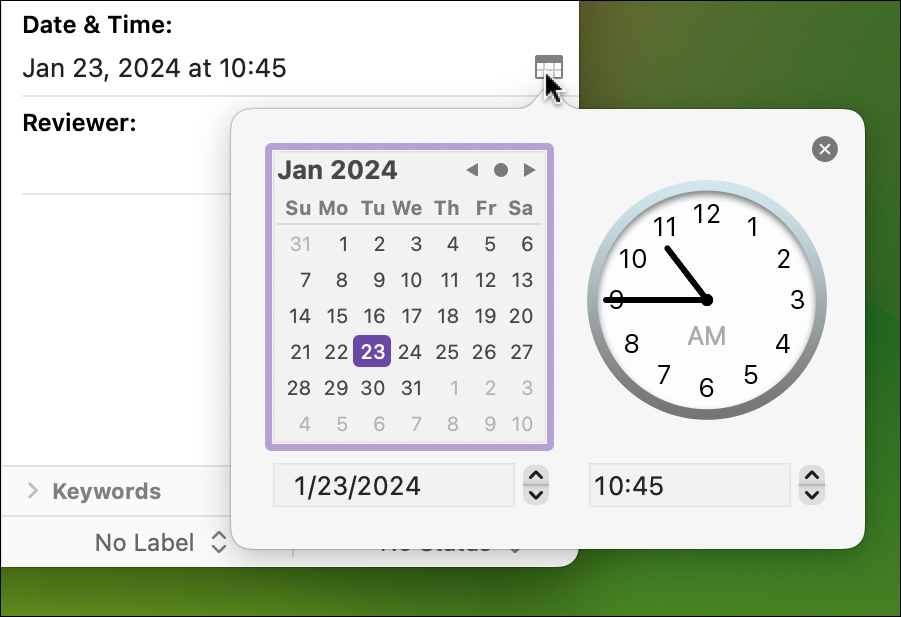
You can use custom metadata to indicate dates, which could be the date that you begin a file or complete it or when you send it to someone for review. You can also use this metadata to indicate dates in the timeline of your project; see Two Ways of Creating a Timeline for Your Scrivener Project to learn how to create a timeline with custom metadata. Note that the Date custom metadata gives you many formatting options for dates, including with times, and you can customize date and time formats that comply with Unicode standards.
To apply date metadata, click the calendar icon in the metadata section and choose a date, a time, or a date and time, depending on what you chose when setting up the metadata.
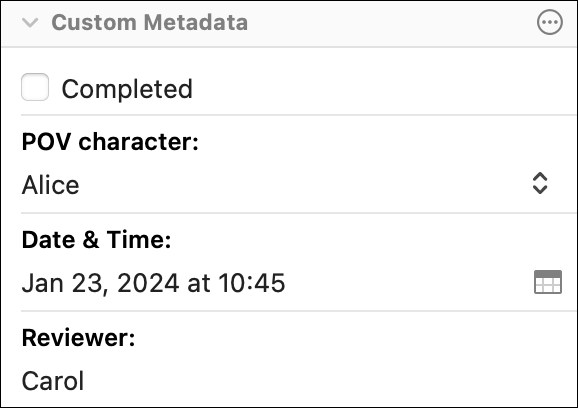
Here's how the Inspector looks with all four types of custom metadata:
Custom metadata displays in the order you create it, but you can change this order by dragging items in the custom metadata dialogue. If you want to re-order or edit your custom metadata, click the ... icon at the right of the Custom Metadata header to return to that dialogue.
How to use custom metadata in the Outliner
While custom metadata always displays in the Inspector, you can also choose to display it in the Outliner. If you select the top-level folder in the Binder or any folder containing files, then choose View > Outline, you'll see these files in Outliner view. (See Plan Your Project with Scrivener’s Outliner for more on using the Outliner.) If you right-click in the Outliner header, a menu lets you choose which items get displayed in this view. Along with the standard items, such as Title, Label, Status, Keywords, etc., all your custom metadata displays at the bottom of this menu. For example, if you set up a list with your POV characters, and want to see that metadata in the Outliner, choose it when you right-click.

Custom metadata is a great way to get additional information about the elements of your Scrivener project, and tag items so you can see the metadata in the Outliner. Check this feature out; you may find that it's especially useful as you progress in a project and start looking at the bigger picture.
Kirk McElhearn is a writer, podcaster, and photographer. He is the author of Take Control of Scrivener, and host of the podcast Write Now with Scrivener.