Scrivener allows you to save snapshots of documents in your projects, that you can go back to if you want to roll back changes.
Use Snapshots in Scrivener to Save Versions of Your Projects
As you certainly know, it's essential to back up your Scrivener projects so you don't lose any of your hard work. Scrivener makes automatic backups to your computer, but it is important to also back up your files to an external drive or cloud service, in case you have problems with your computer. See How to Back Up Your Scrivener Projects for more on backing up projects.
Another useful Scrivener feature to protect your data is snapshots, which back up versions of your documents. You can use snapshots to look back at a previous version, before you edited it or cut text, and restore all or part of it if you've changed your mind.
In this article, I'll explain how snapshots work, and why you should use them frequently when working in Scrivener. In a future article, I'll look at how you can manage, compare, and restore snapshots in your Scrivener projects.
What are snapshots?
When you make a snapshot in Scrivener, the app saves a document at the moment you make the snapshot. You continue working on the document, and add to it or edit it, but that snapshot is available if you ever want to go back. You may have cut text from your current document and want to look back to see if you want to restore some of your excisions. You may have edited a chapter of a project and feel that the original version might have been better. Or you may have accidentally deleted some text in a document and need to recover it.
When you make snapshots, Scrivener makes a copy of an individual document, not of your entire project; like a photo, it freezes a moment in time. Don't think that snapshots are a replacement for full backups; they are backups of individual documents only.
When to make snapshots
The ideal time to make a snapshot of a document is when you plan to start editing it. When editing, you may spend a lot of time on a chapter, changing dialogue, building new plot points, and even adding or removing characters. But when you've finished, or some time in the future, you may think that your original version was better. Snapshots allow you to go back to that state before editing. You can compare your edited version with the original, seeing all your changes, and you may decide to roll back some of them and keep others.
How to make snapshots
To make a snapshot, display the Inspector to the right of the Editor, if it's not already visible. You can choose View > Show Inspector, or click the i button in the toolbar. Click the small camera icon at the top of the Inspector to display the Snapshots pane.

Next, select a document in the Binder. Choose Documents > Snapshot > Take Snapshots of Selected Documents. (If the Editor has focus - which means that you've clicked in the Editor pane - then the menu item will be Documents > Snapshot > Take Snapshot.) A snapshot is added to the snapshot pane of the Inspector, showing the date and time of the snapshot (or just the date if it's before the current day), and a title for the snapshot. By default, this is Untitled, but you can click this to enter a title that will help you remember the state of the document when you took the snapshot.
You may have noticed the plural in the first menu item above; you’re not limited to taking a snapshot of just one document, you can take snapshots of multiple documents in the Binder, if they are selected.
Another way to take a snapshot is to click the + icon on the Snapshots tab of the Inspector.
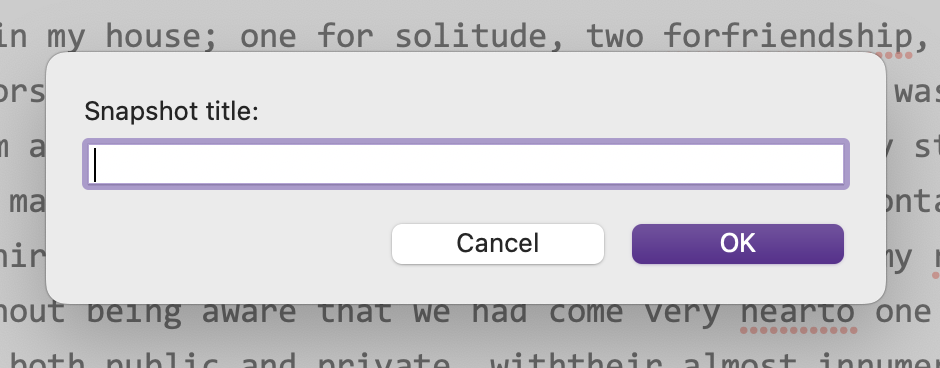
If you want to take a snapshot and title it, choose Documents > Snapshot > Take Titled Snapshots of Selected Documents. A dialog asks you to enter a title, which might be something like First draft, or Second revision, to help you sort out the many snapshots you may have.
To speed up the above operations, you can use the keyboard. To take a snapshot, just press Command-5 (Mac) or Ctrl+5 (Windows). To take titled snapshots, press Command-Control-5 (Mac) or Shift+Ctrl+5 (Windows). In this way, you can quickly take snapshots whenever you want.
If you use a lot of snapshots, it is very useful to title them. The dates you see in the Inspector may not be enough for you to tell them apart.
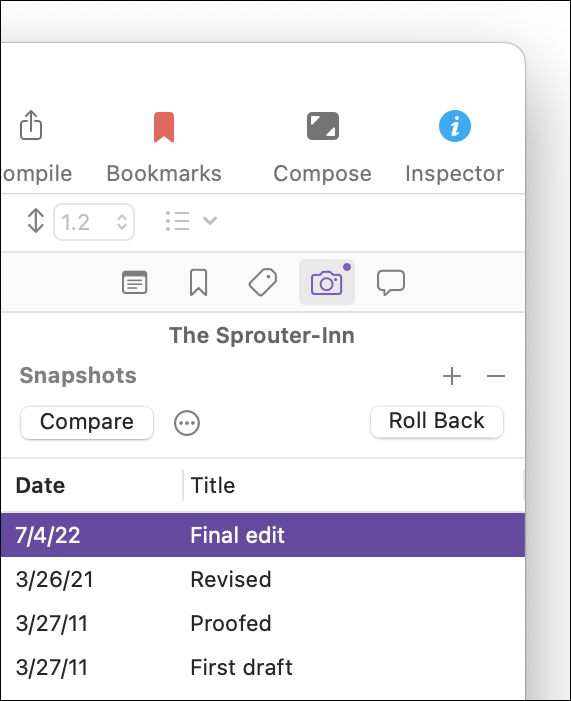
When you have taken snapshots of any documents in your project, Scrivener will change the icons slightly, by folding back the top right corner of the icon page. In addition, the camera icon in the Inspector will display a dot at its top right when you've selected a document with snapshots.

How to annotate snapshots
Snapshots are only useful if you know what they contain, and how they are different from your current documents. While you can title a snapshot, that doesn't give you a lot of room for adding comments that could be helpful weeks or months later when you start revising and editing your draft.
A good idea is to use inline annotations to make some notes about the state of the snapshot, and, in particular, what you planned to do in the newer version. To do this, put your cursor at the beginning of the document's text and choose Insert > Inline Annotation. You can add any notes you like, and they will always be visible as soon as the snapshot displays.

In the next article, we'll look at what you can do with your snapshots: how to manage snapshots, how to compare snapshots to see changes highlighted, and how to restore snapshots if you want to revert back to a previous version of a document.
Kirk McElhearn is a writer, podcaster, and photographer. He is the author of Take Control of Scrivener, and host of the podcast Write Now with Scrivener.