If you use Scrivener's Corkboard, these tips will help you get the most out of your virtual index cards.
5 Tips for Getting the Most Out of Scrivener's Corkboard
Back in the analog days, many writers would use index cards to brainstorm and outline books. You would write some text about each chapter or scene on a card, then you could move them around and rearrange them on a corkboard or whiteboard, using pins or magnets. The free and flexible nature of index cards allowed you to arrange them any way you wanted, to rearrange them at will, and you could stack related cards to group them.
Scrivener’s Corkboard is an innovative feature that lets you outline a project using the visual metaphor of index cards but on a computer screen. In Organize Your Scrivener Project with the Corkboard, we looked at the basics of using the Corkboard; in this article, I show you 5 tips that will help you get the most out of this feature.
1. Number your cards
Corkboard index cards offer a number of options that can help you work with them, and also give you information at a glance. The first option you can use is telling Scrivener to display card numbers. To enable this, choose View > Corkboard Options > Show Card Numbers.
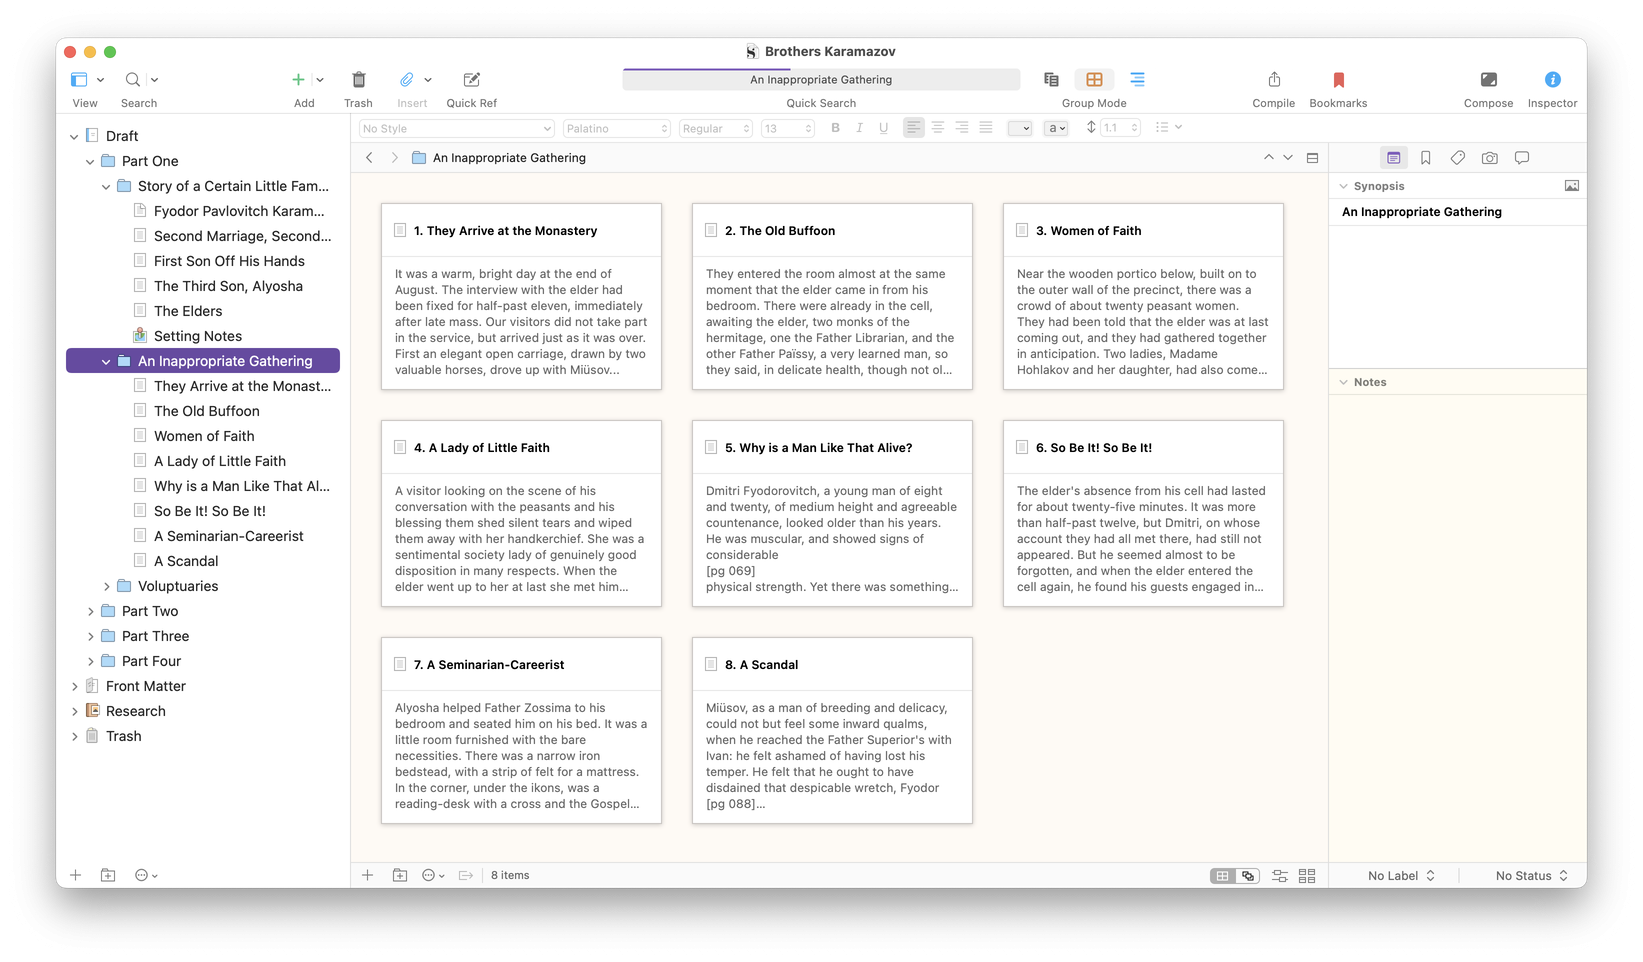
Scrivener numbers each card in relation to the other cards on the Corkboard. These numbers don’t reflect chapter numbers, or anything else, and don’t display when you compile your project. They also only apply to cards in a given folder. If you select a different folder in the Binder, the numbering begins again at 1. (Though see the 5th tip below to find out how stackable Corkboards work.) These numbers are a way of seeing, at a glance, where a card fits in the broader outline.
Numbers are particularly useful when you are rearranging the contents of a folder in Freeform mode (View > Corkboard Options > Freeform), before committing changes in order (View > Corkboard Options > Commit Freeform). Once you commit, Scrivener renumbers the cards in the new order.
2. Use labels
Labels are a great way to mark items in your Scrivener project. You can use labels to indicate different point of view characters in scenes, flashbacks or present actions, different settings, and more.
If you choose View > Corkboard Options > Show Label Colors Along Edges, label colors display on the left edges of cards. Hover your cursor over a label and a tooltip shows you the text of that label. You can also have Scrivener color cards according to labels.

Learn more about labels, and how to create custom labels, in 5 Tips for Using Labels in Scrivener.
3. Use status tags
Status tags are useful to indicate the status of each item in your Binder. You can mark items as first draft, edited, final, or anything you want, to help you know how much work is needed for each file. To set the status for any item, select it, then click the Status menu at the bottom right of the Inspector. If no status is applied, that menu will show No Status; if a status has been selected, it will display that status. To edit the list in the Status menu, click it and choose Edit, then change the names of the existing status tags, and add as many new ones as you want.
You can view status stamps on cards in the Corkboard; choose View > Corkboard Options > Show Status Stamps. This puts the status tag on each card in the Corkboard in large, diagonal text.

You can change the color of status stamps in Scrivener’s settings. Go to Scrivener > Settings (Mac) or File > Options (Windows); click Appearance, then Corkboard, then click the Colors tab. Click the color next to Status Stamps and choose the color you want to use.
4. Use keywords
Keywords are a great way to keep track of elements in your project. You can assign keywords to any item in the Binder, and you can use them to mark files for their point of view characters, settings, and more.
If you choose View > Corkboard Options > Show Keyword Colors, Scrivener displays the colors of keywords on the right edge of cards. As with labels, hovering your cursor over a keyword color displays a tooltip showing its text.

For more on using keywords, see Use Keywords to Manage your Scrivener Projects.
5. Use the Corkboard with multiple items selected
By default, the Corkboard shows the contents of the selected folder in the Binder. If a folder has subfolders, the Corkboard displays the contents of each folder like a small stack of cards. You can see, at the bottom of cards, that there are more than one, and the icon at the top of a card shows a folder, not a file.

If you double-click the folder icon, Scrivener opens the contents of that folder in its own Corkboard. You can work with its cards, then click the < icon in the header to go back to the overview.
And if an index card displays a file icon, you can double-click that icon to view the file in the Editor.
You can use a stacked Corkboard to view the contents of multiple folders. Click one folder in the Binder to select it, then press the Command key (Mac) or Alt key (Windows), and click another folder; you’ll see all the cards in the selected folders, with a divider between the contents of each folder. If you have numbering enabled, you’ll see the cards with sequential numbering.

When using a stacked Corkboard, you have three display options; you can click one of the Stacking Layout buttons, found in the Scrivener footer.

From left to right:
- Grid: the normal Corkboard view.
- Horizontal: all of the cards within each container (folder) display on a single row, so you can view them sequentially and scroll left or right to view subsections.
- Vertical: all the cards within each container display in a single column, so you can scroll left and right to view containers and up and down to view cards.
When using a stacked Corkboard, you can drag items from one folder on the Corkboard to another. This is a great way to rearrange your project, viewing multiple folders, or even all of a project’s contents.
There are many more features available with the Corkboard. See chapter 8.2 of the Scrivener manual for more.
Kirk McElhearn is a writer, podcaster, and photographer. He is the author of Take Control of Scrivener, and host of the podcast Write Now with Scrivener.